 December
31st, 2-2025 New Year's Eve. Shop update. It is time for rest.
Shop construction was is completed and clean up is almost finished. Photos
coming this weekend when there is time to do a photoshoot during daylight hours.
December
31st, 2-2025 New Year's Eve. Shop update. It is time for rest.
Shop construction was is completed and clean up is almost finished. Photos
coming this weekend when there is time to do a photoshoot during daylight hours. Latest News Updates
Shop Renovation & Stone Forge Construction
[ Home ]
December
31st, 2-2025 New Year's Eve. Shop update. It is time for rest.
Shop construction was is completed and clean up is almost finished. Photos
coming this weekend when there is time to do a photoshoot during daylight hours.
Latest price update December
31, 2025 - I have no idea what has become of the ridiculous tariffs but
I can say that prices did NOT go back down. And now the idiot in White House is
saying that he is going to give the sheeple a "tariff dividend". Where is the
money really coming from? The money is going to come from central banks; they will "print" new money into existence in the form of new debt - this is called
inflation and will result in much higher prices for all goods and taxes. If the
actor in the White House really does this then we can expect prices of
everything to rise again dramatically during mid to late 2026 thru 2027 exactly
as we witnessed during the covidiot scamdemic from 2020-2022
October 11th, 2025. Price shock coming soon. This is an update to a previous post I wrote May 3rd of this year. In the May 3rd post I warned that anyone considering construction projects or tool and machine purchases should get their tools and machines and supplies purchased quickly to avoid shortages and/or price increases. The shortages did not appear but the large price increases did and they were quite sharp and nasty. One week ago I purchased a grinder motor for a sanding machine assembly and the motor price had increased 50% due to the current tariff rate. The price was $1229 - $800 for the motor plus an additional $429 due to tariff price increases. One year ago today, that same motor was around $600 and the sanding attachement was around $285. All together this outfit was around $950 including sales tax. Today the total price exceeds $1729. That was with a 50% tariff rate against tools and machines coming from China.
Worse is coming. Yesterday (October 10th, 2025) news outlets reported that here in the U.S. a 100% tariff will be placed on goods coming from China beginning November 1st, 2025. You have less than 3 weeks before the new tariffs take effect and drives up tool and machine prices much higher than they already are. Some vendors may be forced to raise prices even sooner. I have no idea about the timeline for price increases. Get your tools and machines bought now or you will pay much higher prices very soon. The risk of shortages will also return again if these trade issues persist.
Let me put this in perspective for anyone that doesn't get it. Exactly one year ago today, the grinder motor and sanding attachment that I was considering together as a complete outfit were priced at $950 plus tax. One week ago I paid a total of $1729 for that same outfit. That was roughly an 80% price increase year over year due to tariffs and government inflationary spending. Beginning November 1st this price will likely increase an additional 50% higher due to a much higher tariff rate. If you are planning to purchase tools and equipment, then get those items bought soon. This situation may also lead into shortages of some tools and machines if vendors cut back on inventory purchases.


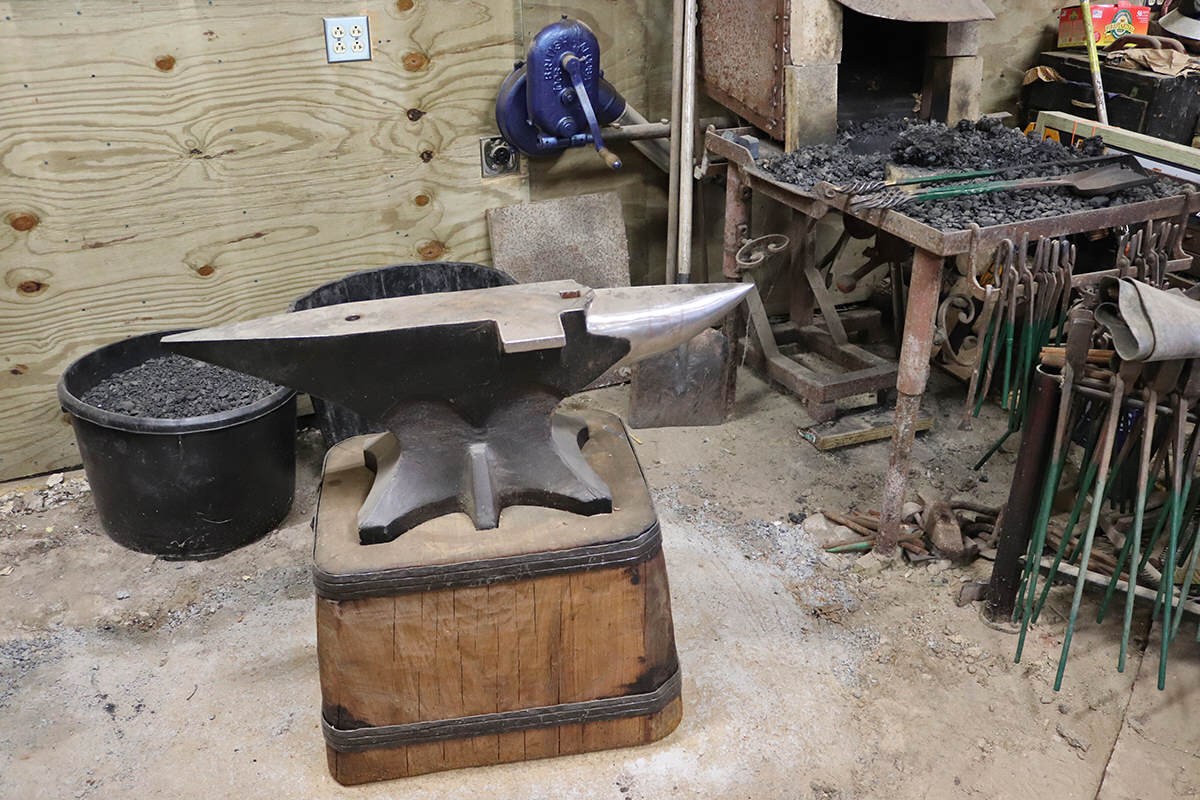
 September
15th, 2025. Shop Update. The new brick floor is spectacularly
beautiful. All shop construction projects for the 2024-2025 season have been
completed. I will be taking time off construction work for a while and then
resuming construction of the stone forge in late October this year. Photos of the finished floor
are shown at right. Bricks were orientated in two different
patterns to add contrast and to frame the work area around the new stone forge
and its anvil. The straight brick pattern in front of shop draws the viewer's
eyes into the shop. A 45-degree herringbone brick pattern frames the work area
of the new stone forge. This contrast of brick styles is intended to create a
visually pleasing contrast of floor styles and to create a visual impression of
workspace borders where forging is done within one area, and all other work is
done outside that area.
September
15th, 2025. Shop Update. The new brick floor is spectacularly
beautiful. All shop construction projects for the 2024-2025 season have been
completed. I will be taking time off construction work for a while and then
resuming construction of the stone forge in late October this year. Photos of the finished floor
are shown at right. Bricks were orientated in two different
patterns to add contrast and to frame the work area around the new stone forge
and its anvil. The straight brick pattern in front of shop draws the viewer's
eyes into the shop. A 45-degree herringbone brick pattern frames the work area
of the new stone forge. This contrast of brick styles is intended to create a
visually pleasing contrast of floor styles and to create a visual impression of
workspace borders where forging is done within one area, and all other work is
done outside that area.
The next round of floor work can begin next year and will not require a shut down of the shop because equipment on the old floor areas are redundant and can be removed from the shop to make way for floor replacement work.


 The herringbone brick style brick pattern is the same no
matter whether orientated 90 degrees from one edge of the floor or 45 degrees.
If a herringbone brick pattern starts at 90 degrees from
one edge of floor, it creates a visual queue that drags a viewer's eyes
diagonally off to one side of the floor. Cutting the starting bricks at an angle
such as 45 degrees from the edge breaks up this visual queue and creates a
pattern that is much more
pleasant to look at without dragging the viewer's eyes to one side of the floor.
However, the price to be paid for starting a herringbone pattern at 45 degrees
is that all edge bricks must be cut at an angle and thus involves a large amount
of brick cutting work to create the starter bricks and finish brickwork all
around edges of the new floor.
The herringbone brick style brick pattern is the same no
matter whether orientated 90 degrees from one edge of the floor or 45 degrees.
If a herringbone brick pattern starts at 90 degrees from
one edge of floor, it creates a visual queue that drags a viewer's eyes
diagonally off to one side of the floor. Cutting the starting bricks at an angle
such as 45 degrees from the edge breaks up this visual queue and creates a
pattern that is much more
pleasant to look at without dragging the viewer's eyes to one side of the floor.
However, the price to be paid for starting a herringbone pattern at 45 degrees
is that all edge bricks must be cut at an angle and thus involves a large amount
of brick cutting work to create the starter bricks and finish brickwork all
around edges of the new floor.
Cutting large numbers of bricks can be very
time-consuming, especially if one does not have equipment designed properly for
that task. I used a metal cutting chop saw with a diamond brick blade and a
garden hose with a spigot (with a piece of string tied around the trigger) to
shoot a small stream of water on the saw blade while cutting.
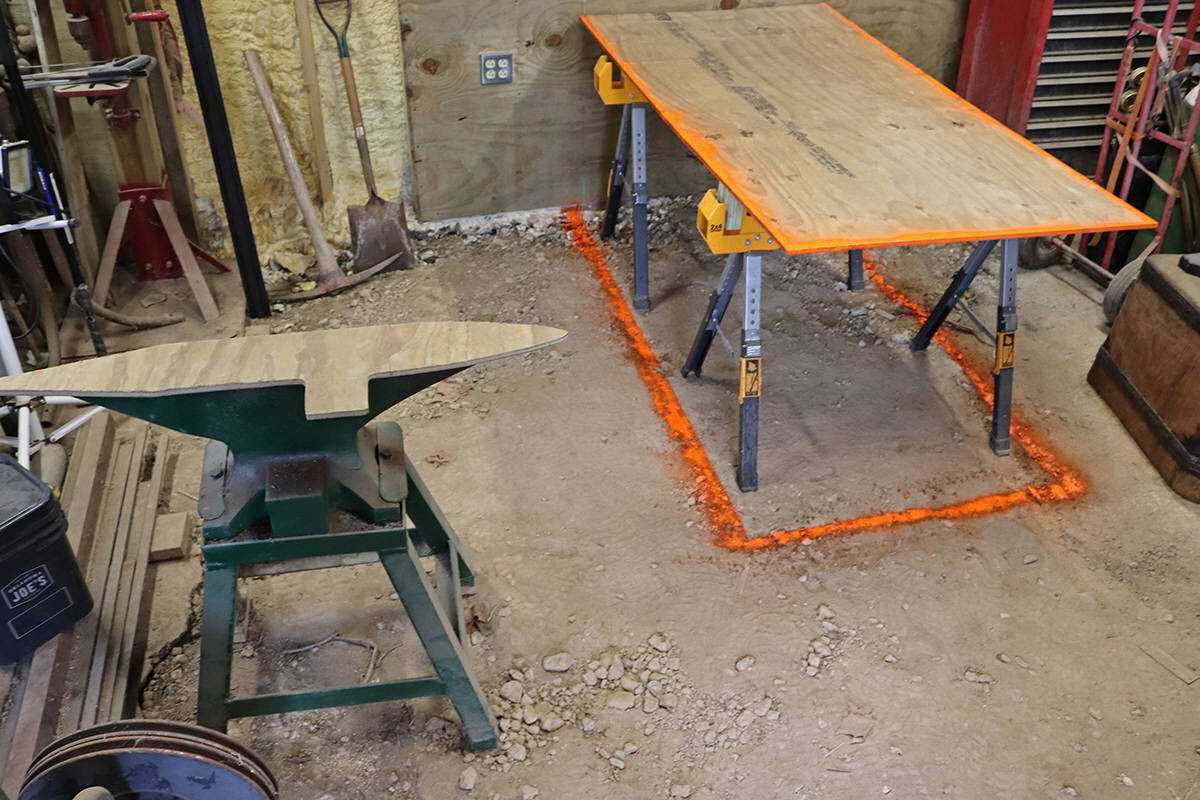
First fire has been lit and iron test piece forged to make sure everything works. Only work left to do now is adjust power hammer dies and clean work benches and put tools away.


 September 9th, 2025.
Shop Update. Moving Day has finally arrived. Finished brick floor work middle of
last week (September 4th, 2025). Immediately began moving and re-positioning equipment,
tools, work benches, and
cleaned floor areas to make room for installing the Kerrihard power hammer. Early the
following day (Friday 5th of September), loader arrived to lift the power hammer into the shop. Photos
(at right) show the hammer setting on the floor inside the front entrance.
Officially moving back into the shop and getting ready for real work and to soon
resume construction of the stone forge. New brick floor is beautiful. Now that
floor construction work is completed for the year, there is more open floor
space for working inside the shop. Some final tasks such as cutting the plywood
base for the power hammer can now be performed inside the shop - and none too
soon as we may have rain coming soon. Photos of new floor will be in next update.
The photos lower down (at right) are more for showing off part of the new floor than they
are for showing the installation of the power hammer.
September 9th, 2025.
Shop Update. Moving Day has finally arrived. Finished brick floor work middle of
last week (September 4th, 2025). Immediately began moving and re-positioning equipment,
tools, work benches, and
cleaned floor areas to make room for installing the Kerrihard power hammer. Early the
following day (Friday 5th of September), loader arrived to lift the power hammer into the shop. Photos
(at right) show the hammer setting on the floor inside the front entrance.
Officially moving back into the shop and getting ready for real work and to soon
resume construction of the stone forge. New brick floor is beautiful. Now that
floor construction work is completed for the year, there is more open floor
space for working inside the shop. Some final tasks such as cutting the plywood
base for the power hammer can now be performed inside the shop - and none too
soon as we may have rain coming soon. Photos of new floor will be in next update.
The photos lower down (at right) are more for showing off part of the new floor than they
are for showing the installation of the power hammer.
The whole place is overgrown. Yard work was halted temporarily so that more time could be spent on finishing shop floor and house repair projects. Now the shop looks like an old abandoned homestead discovered in a forgotten forest. While we were stuffing the power hammer through the front entrance we expected the steel shoeing stock to slide out of the way as we shoved the hammer past it. But the shoeing stock snagged on the loader boom and dragged itself further into the entrance area, now listing sideways and down low in front. Going to be a large effort to clear out the weed growth and junk that got dragged with it and then move the shoeing stock back out of the entrance. However it does seem to add more character to that abandoned forgotten homestead look.
Seen in the photos (at right), the power hammer has already been moved into the shop and is ready to be shoved into its new permanent location next to the wood stove. Motor voltage was set up as 220vac and new electrical cable installed to connect to the machine circuit in the shop. This separates the electrical feed for the hammer so that it runs at lower amperage and does not trip outlet circuit breakers.

 Some new changes have occurred since floor
reconstruction began. While preparing to begin floor construction last year, the
new drill press was stacked along the wall next to
the original drill presses and this gained more floor space for floor
construction, but that drill now reduces space for machinery along the drill
wall. The work bench was rotated (which is something that was planned from the
beginning) and this gained back that same space that was taken up by the new
third drill. But along comes the power hammer and this machine also needs to be
installed along the wall where the third drill press was sitting previously So all the
drills move farther down along the wall, and space along that wall is smaller
cramped again. This small cramped space will be remedied hopefully when the last bit of
floor on the opposite side of the shop can be replaced in the next year or so, and then one of the drills can be
moved across the shop. Until then things are going to be very tight on this
wall.
Some new changes have occurred since floor
reconstruction began. While preparing to begin floor construction last year, the
new drill press was stacked along the wall next to
the original drill presses and this gained more floor space for floor
construction, but that drill now reduces space for machinery along the drill
wall. The work bench was rotated (which is something that was planned from the
beginning) and this gained back that same space that was taken up by the new
third drill. But along comes the power hammer and this machine also needs to be
installed along the wall where the third drill press was sitting previously So all the
drills move farther down along the wall, and space along that wall is smaller
cramped again. This small cramped space will be remedied hopefully when the last bit of
floor on the opposite side of the shop can be replaced in the next year or so, and then one of the drills can be
moved across the shop. Until then things are going to be very tight on this
wall.
There are still some small tasks to finish to get the shop fully functional again, and these will be completed over the next few days.
 August 24th, 2025.
Shop Update. Brick floor currently under construction.
At the time of this writing approximately 1/2 of new brick floor has been intalled and looks very nice. Will
be completed and shop will be re-opened in the next 3 ro 4 days. Photo at right
shows brick floor progress at the time of this writing.
August 24th, 2025.
Shop Update. Brick floor currently under construction.
At the time of this writing approximately 1/2 of new brick floor has been intalled and looks very nice. Will
be completed and shop will be re-opened in the next 3 ro 4 days. Photo at right
shows brick floor progress at the time of this writing.
A lot has happened since previous update. The last part of the floor edging that needed to be finished before starting brick work was the stone pedestal area of the forge. This turned out to be a disaster. Twice the stonework was completed and twice the mortar was discovered to be bad. New stonework had to be torn out and thoroughly cleaned off the existing stonework so that it could be rebuilt. This took place over a two week period. The bags of defective mortar were discarded and new mortar purchased. Work started over again and a new stone forge front pedestal was built. Three weeks later everything was ready to go but I was called away for a large job and didn't have time to work in the shop for another 2 and a half weeks. Finally back to work on the floor and suddenly it is nearly finished.
Every part of this new floor looks nice. Huge amount of problem solving involved and that slows the work quite a lot. Lost one full day due to main electrical panel failure, bad circuit breaker took out the main with it. Spent hours going from store to store to find a main breaker. Beautiful weather this week so work is much faster and easier. Not going to say any more until the floor is finished and equipment moved in and set back up again. Just a few more days.
July 4th, 2025.
Shop Update. Finished the last bit of concrete perimeter edge
and started the edging around the forge foundation.
Bottom of the forge
hearth support pedestal is the last bit of floor work before brick laying can
begin.
Brick floor laying begins in a few days after new concrete floor edging has partially cured.
Floor work should be completed in about two weeks around the same time as the final bit of concrete has finished curing.
Looking forward to finally completing this part of the shop renovation, clearing out construction supplies, and finish building the stone forge.
This last section of concrete floor edge is semi-permanent and it stabilizes the nearby rotten floor area until that last rotten section of floor can be torn out and replaced in the next year or two.

 June
13th, 2025.
Shop Update. The permanent section of concrete sub-floor edge
(left side of photo) has finished curing and this weekend a large section of the semi-permanent
floor edge (right side of photo surrounding power hammer) was poured and floated. The
semi-permanent section on the right (underneath the air hammer) will allow me to
begin laying the brick floor surface soon and it can be left in place for an indefinite
length of time and is easily torn out later when permanent floor replacement begins
next year.
June
13th, 2025.
Shop Update. The permanent section of concrete sub-floor edge
(left side of photo) has finished curing and this weekend a large section of the semi-permanent
floor edge (right side of photo surrounding power hammer) was poured and floated. The
semi-permanent section on the right (underneath the air hammer) will allow me to
begin laying the brick floor surface soon and it can be left in place for an indefinite
length of time and is easily torn out later when permanent floor replacement begins
next year.
 May 29th, 2025.
Shop Update. Poured first half of the permanent concrete edging for brick floor.
All floor dimensions and angles are measured from these floor boundary edge
lines. Photo shows sandbags holding the large wooden form in place for pouring
the concrete floor edges.
It takes two
weeks for sack concrete to fully cure so it was important to get this work done
as soon as possible to avoid delays later when there is time to work on the
floor again.
May 29th, 2025.
Shop Update. Poured first half of the permanent concrete edging for brick floor.
All floor dimensions and angles are measured from these floor boundary edge
lines. Photo shows sandbags holding the large wooden form in place for pouring
the concrete floor edges.
It takes two
weeks for sack concrete to fully cure so it was important to get this work done
as soon as possible to avoid delays later when there is time to work on the
floor again.
The most difficult aspect of this work is dealing with the lack of space. This work turns the shop into a mess and is a good reason to do work elsewhere while waiting for concrete to cure. So much of the floor is being modified at one time, and there is very little space for working and storing materials, tools, and equipment until after the work is finished. We have had rain intermittently for over a week now so all materials must be stored indoors even while working. It was raining while I was pouring concrete. I had to store bags of concrete inside the shop and carry them outside in the rain to throw in the mixer.
Temporary floor edging must still be completed on the opposite side of the shop. The photo shows new permanent edging for half of the shop. But the opposite side of the shop will not get floor replacement until at least next year at the earliest. So the remaining concrete floor work will be semi-permanent to allow the brick floor to be installed, and this concrete must be easily broken out and removed when the rest of the old floor can finally be removed and replaced.


 May 19th, 2025.
Shop Update. At right are photos of the new concrete subfloor in
the front of the shop. Concrete floor on a well-drained base now extends
from front doors to the rear of the shop. There is still a 6' x 7' section of
floor underneath the air hammer that needs to be finished in the front of the
shop but this will wait until next year. The wet muddy
nasty floor and humidity problem is finally eliminated in full. Concrete sealer
was rolled onto the central sections of concrete for the purpose of making it
easier to keep clean. Concrete edging for the
brick floor will proceed when I have time. Shortages of construction supplies
will become a probem soon so I must
immediately finish some of the planned electrical renovation in other buildings over the
next month or so. This other work is urgent and must be done ASAP, so brick
floor work in the shop will be slow for a couple months.
May 19th, 2025.
Shop Update. At right are photos of the new concrete subfloor in
the front of the shop. Concrete floor on a well-drained base now extends
from front doors to the rear of the shop. There is still a 6' x 7' section of
floor underneath the air hammer that needs to be finished in the front of the
shop but this will wait until next year. The wet muddy
nasty floor and humidity problem is finally eliminated in full. Concrete sealer
was rolled onto the central sections of concrete for the purpose of making it
easier to keep clean. Concrete edging for the
brick floor will proceed when I have time. Shortages of construction supplies
will become a probem soon so I must
immediately finish some of the planned electrical renovation in other buildings over the
next month or so. This other work is urgent and must be done ASAP, so brick
floor work in the shop will be slow for a couple months.
Kitty footprints are all over the rear secti0n of the new concrete. They waited until I was busy cleaning tools and equipment and then they all ran into the shop to put fresh foot prints all over the wet concrete. The front section closest to the doors was the wettest and softest concrete and the only way to protect it was to put a couple small pieces of plywood over the most vulnerable contoured front area. The odd discoloration of the concrete in the lower section of the photo is from the plywood that was laying on top of that section of concrete while it cured. The cats walked all over the protective plywood pieces causing them to roll imprints of the plywood into the contoured front area. The discoloration will disappear in a week or so and the deformation is very small and inconsequential. Concrete crack sealant fills a couple deep footprints in the front, and is meant only to prevent rain and ice from filling the holes and causing damage.
What's next. With the first phase of concrete sub-floor work
completed for the year, the next step is
to install a large section of the brick surface, then move equipment out of the
way and finish building the stone forge.
 What's causing delays. Since all of my buildings need renovation work, there is
nowhere to store equipment during construction work. Thus everything must be
shoved over to one side of the shop as work progresses. This also limits the
size of the area that can be repaired. And there is no space
left over to bring in heavy machinery to help tear out old floor. All of the old
floor must be torn out and replaced by hand. I also have large tasks such as
renovations of other buildings that
prevent me from working in the shop for weeks at a time. This is what is causing the work to
take so long.
What's causing delays. Since all of my buildings need renovation work, there is
nowhere to store equipment during construction work. Thus everything must be
shoved over to one side of the shop as work progresses. This also limits the
size of the area that can be repaired. And there is no space
left over to bring in heavy machinery to help tear out old floor. All of the old
floor must be torn out and replaced by hand. I also have large tasks such as
renovations of other buildings that
prevent me from working in the shop for weeks at a time. This is what is causing the work to
take so long.
Construction notes. My biggest concern during floor renovation was elimination of the wet floor problem. The simplest and cheapest method for installing a brick floor would have been to dig a shallow trench, pound/vibrate a layer of rock and sand into the bottom of the trench to level and flatten it and then place the brick layer over the aggragate. Normally this style of brick floor construction drains well. Unfortunately high ground water at this location causes water to continuously infiltrate up to the surface and this causes the dirt surface to be continuously wet all year long and would result in a wet brick floor. And a wet brick floor would quickly develop dips and pot holes in heavily used areas of the shop and it would still cause high humidity problems and severe rusting and corrosion of all metal tools and machinery and mildew all over everything. The solution that I chose was to install a layer of reinforced concrete sections over a layer of crushed rock for good underground drainage. The concrete sections are divided by wood forms to prevent broken concrete from leaking away sand that would be placed on top of the concrete as bedding for the brick floor. If I had made one solid slab of concrete, the shifting ground would have broken it and sand from the brick floor bed would leak out. Landscaping cloth seals all areas where bedding sand for the brick might leak out through cracks/gaps in the concrete sub-floor. In a blacksmith shop it is common for water to spill or leak related to using a quench tub. If this water had nowhere to go after soaking through the brick surface, then I would be back to the original wet floor problem again. So the gaps between concrete sub-floor sections also help to drain away any water that might leak or spill from the water/quench tub. This has already occurred during the recent winter after my water barrel broke and dumped 25 gallons of water on the new concrete floor - draining out through the wood-form gap between floor sections.
Yep. Just one more thing. So of course I had to add just one more item to the ‘to
do list. With the new brick floor installed in the middle of the shop, the
north side corn crib concrete slab is no longer level with the new brick floor
surface. I replaced the south side floor 20 years ago, but the north side is
still a rotten trip hazard mess. So guess what? Yup. The north corn crib floor
gets replaced next. But first I need to get the new stone forge done. Replacing
the last remaining section of corn crib floor and the front section underneath
the air hammer will wait until next year.
 May
3rd, 2025. URGENT
MESSAGE: Prices of everything are skyrocketing. Here is just one example: I
bought a sander/grinding attachment that mounts on a grinder. Just six weeks ago
this attachment cost under $300. Today it costs $500. It has almost doubled in price in six
weeks. The grinder motor was around $800, and today it cost over $1000. These
items are "made in America" and yet in some cases prices nearly doubled. Why?
I suspect that much of the materials that were used to make these items are
imported from China, and these items are becoming unavailable and/or much more
expensive due to foreign trade problems. This is the reason I am stalling floor
work in the shop and refocusing on electrical work in my other buildings - many
electrical construction supplies are imported from China and likely to be very
expensive or temporarily unavailable in the near future. If you are planning any
work that requires purchasing items made in China then get those projects
finished immediately. This problem is going to last for at least several months,
possibly longer. And refilling an empty supply chain can take 6 months or more.
We went through a similar event during the covidiot hoax. This current trade
stoppage is worse. Most construction/contractor's tools and machines are made in
China. Table saws, miter saws, circular saws, drills, most carpentry and
construction hand tools, portable cement mixers, shovels, rakes, nails, screws,
fasteners of all kinds - nearly all construction supplies are made in China -
get them bought now and finish your projects as soon as possible.
May
3rd, 2025. URGENT
MESSAGE: Prices of everything are skyrocketing. Here is just one example: I
bought a sander/grinding attachment that mounts on a grinder. Just six weeks ago
this attachment cost under $300. Today it costs $500. It has almost doubled in price in six
weeks. The grinder motor was around $800, and today it cost over $1000. These
items are "made in America" and yet in some cases prices nearly doubled. Why?
I suspect that much of the materials that were used to make these items are
imported from China, and these items are becoming unavailable and/or much more
expensive due to foreign trade problems. This is the reason I am stalling floor
work in the shop and refocusing on electrical work in my other buildings - many
electrical construction supplies are imported from China and likely to be very
expensive or temporarily unavailable in the near future. If you are planning any
work that requires purchasing items made in China then get those projects
finished immediately. This problem is going to last for at least several months,
possibly longer. And refilling an empty supply chain can take 6 months or more.
We went through a similar event during the covidiot hoax. This current trade
stoppage is worse. Most construction/contractor's tools and machines are made in
China. Table saws, miter saws, circular saws, drills, most carpentry and
construction hand tools, portable cement mixers, shovels, rakes, nails, screws,
fasteners of all kinds - nearly all construction supplies are made in China -
get them bought now and finish your projects as soon as possible.
As I write this, warehouses still have inventory and there are no shortages of anything in stores. A storm is brewing. Imports coming from China are shutting down until the trade problem is solved. One report says Seattle ports have little or no import container volume. Another recent report says Los Angeles ports total import volume are down 33% (running at 67% of normal volume) and are expected to drop to 20% of normal volume in approximately 10 days. At that point we have only what is in warehouses and that inventory will last only weeks. Even if trade were to restart immediately it would take weeks to refill the gap in inventories. This means short temporary shortages and increased prices by this summer, and that is an optimistic view. If the trade shutdown persists, the shortages will be severe and take at least until the end of the year to backfill. Prices will remain sky high even after trade restarts because there will be huge backlog of items waiting to be shipped and huge demand placed on shipping vessels and ports. This will keep prices high and severe shortages lasting until at least the end of the year.
If you are planning any construction projects or improvements for this year, make a list of needed supplies and get them bought now.


 April
21st, 2025. Shop Update. Front right side floor has been replaced
with new concrete. Photos show the
prep work to get ready for pouring concrete. New concrete sub-floor is now poured all the way
up to the front doors of the shop. The wet muddy floor problem has been
eliminated. Cats keep walking all over the new concrete so I immediately shut
the doors to keep the little vandals out. Photos of the finished concrete will
appear in next update for May.
April
21st, 2025. Shop Update. Front right side floor has been replaced
with new concrete. Photos show the
prep work to get ready for pouring concrete. New concrete sub-floor is now poured all the way
up to the front doors of the shop. The wet muddy floor problem has been
eliminated. Cats keep walking all over the new concrete so I immediately shut
the doors to keep the little vandals out. Photos of the finished concrete will
appear in next update for May.
The first photo at right shows the large deep holes that were left after digging out the large stones. Middle photo with wheel barrow shows the largest of the stones. Third photo at right shows the trench leveled and compacted. And the 4th photo shows the trench filled with a compacted layer of rock. Rebar and a wooden frame completes the prep work.
Repairing the floor has been every bit a disaster as was the repair of the walls. While excavating closer to the front entrance of the shop, large stones were found buried under the floor. These stones weighed roughly 200-400 lbs. each. The larger of these stones are seen in one of the photos at right. After getting the stones dug out of ground, they were simply too heavy to be levered and lifted out of the trench by hand and required some precarious tying and lifting with chains and a fence stretcher.
Some of the smaller stones were
thrown back into the holes along with a layer of dirt and compacted. Second and
third layers
of stones and dirt were added and compacted until holes were filled flat and level
to the proper trench depth. After the trench was escavated and scraped smooth to
the proper depth, crushed rock was thrown in and compacted. A laser level
was used to frequently inspect the height/level of the trench and the wooden
frame. The laser level was also used to frequently inspect the height/level of
the concrete as it was being poured and floated. There is no room to get a
screed into the shop so the concrete was floated by hand. This is a subfloor for
a planned brick surface floor. A layer of sand will cover the concrete and cover
imperfections in the concrete sub-floor and brick will be laid on top of the
sand layer.
One small piece of wood is missing from the wooden frame in the bottom right corner of the photo and this was added later during the concrete pour. That piece of w0od framing will show up in the finiseh concrete photos in the next update.
This will likely be the end of floor reconstruction for the year. I want to get the brick surface installed on the finished areas of concrete and then immediately get back to finishing the forge construction. Brick floor work will wait for a few weeks as I work on renovation projects on the house and other buildings. This summer I will finally have time to get the stone forge finished and then build two more forges on the side of the shop to replace the old temporary steel forge. The final section of floor under the air hammer will wait until spring of next year. I have already completed far more work than originally planned. This was supposed to be about replacing 3 windows and 6-8 electrical outlets - not renovating an entire building inside and out. Somehow more and more new improvements kept getting added to the list of shop improvements.

 January,
16th, 2025. Shop Update. Large floor upgrade in progress. During
the past fall and Christmas season, stone forge construction was temporarily
stopped while approximately 2/3rds of the shop floor was dug out and replaced
with a new concrete subfloor in preparation for building a permanent brick
floor. Space is very limited because there is nowhere to store the equipment and
tools during floor reconstruction and thus everything must be shoved into sides
and corners of the shop. This leaves only half of shop floor space free and open
for reconstruction. There was no space large enough to get a skid loader into the building due to
equipment and machinery being in the way. Thus, all tearing out of old rotten
concrete rubble and wire and metal and rock was done entirely by hand. And
finally, excavating the dirt fill by hand. First photo here (at right) shows the
subfloor completed and construction materials and shop equipment stored in the
back corner. This floor is a huge improvement in working conditions. The items
stored in the corner by the forge are only temporarily stored there for winter
and can be removed in 20 minutes when forge construction gets underway again in
the spring.
January,
16th, 2025. Shop Update. Large floor upgrade in progress. During
the past fall and Christmas season, stone forge construction was temporarily
stopped while approximately 2/3rds of the shop floor was dug out and replaced
with a new concrete subfloor in preparation for building a permanent brick
floor. Space is very limited because there is nowhere to store the equipment and
tools during floor reconstruction and thus everything must be shoved into sides
and corners of the shop. This leaves only half of shop floor space free and open
for reconstruction. There was no space large enough to get a skid loader into the building due to
equipment and machinery being in the way. Thus, all tearing out of old rotten
concrete rubble and wire and metal and rock was done entirely by hand. And
finally, excavating the dirt fill by hand. First photo here (at right) shows the
subfloor completed and construction materials and shop equipment stored in the
back corner. This floor is a huge improvement in working conditions. The items
stored in the corner by the forge are only temporarily stored there for winter
and can be removed in 20 minutes when forge construction gets underway again in
the spring.
This new floor was necessary to allow construction of the upper half of the forge chimney to continue. The old concrete floor had disintegrated and become a mess of broken rubble and sharp jagged wire and mud. High ground water levels soaked up through the old rotten concrete and infiltrated mud upward into the old floor surface. The wet muddy rubble floor attracted cats to defecate all over the floor - stinking up the shop and creating an awful nasty mess. Cat crap gets on shoes, then migrates up onto pants legs and carried into the house. I'm not going to go through that. So, the floor needed replaced immediately. And while floor work is only partially finished, the new subfloor has already been a tremendous improvement in work environment in the shop. No time was wasted by doing this work, it would have had to be done anyway even if the new forge was completed first.


 The
plan is to build an attractive and very photogenic new brick-surface floor in the middle of the shop, running
from front doors to the rear wall. The sides of the shop will still be concrete,
but the center 2/3rds of the floor will be brick from front to rear of the shop. New floor will be safer, cleaner, dryer, and
much more visually appealing than the old floor. The new floor will also make
the task of moving tools and machinery much faster and easier than it was on the
rotten old floor. All the concrete work done so far has ended the wet floor/humidity
problem that has plagued the shop with perpetually rusting tools and machine
surfaces. And after the last remaining rotten section of floor is removed and
replaced next spring, much of the dirt and dust problem should also be greatly
reduced.
The
plan is to build an attractive and very photogenic new brick-surface floor in the middle of the shop, running
from front doors to the rear wall. The sides of the shop will still be concrete,
but the center 2/3rds of the floor will be brick from front to rear of the shop. New floor will be safer, cleaner, dryer, and
much more visually appealing than the old floor. The new floor will also make
the task of moving tools and machinery much faster and easier than it was on the
rotten old floor. All the concrete work done so far has ended the wet floor/humidity
problem that has plagued the shop with perpetually rusting tools and machine
surfaces. And after the last remaining rotten section of floor is removed and
replaced next spring, much of the dirt and dust problem should also be greatly
reduced.
Photos here show the construction of the concrete subfloor that will support the brick surface floor. Starting with the first photo, excavated trench was dug deep enough to allow 4 inches of rock for good drainage, divided by treated lumber to separate sections so floor concrete does not break, and well reinforced with 1/2" rebar. Wooden blocks temporarily support rebar while pouring concrete - these blocks were removed when poured concrete was added nearby. Concrete can be destroyed from the inside out by rusting rebar, so nothing can be allowed to create a void under the concrete that would allow ground water to infiltrate from below. That was the whole reason that I am replacing my concrete floor - ground water destroyed the concrete from below. Thus, the wooden rebar support blocks were removed as concrete was poured nearby.

 Treated lumber was used to box in each concrete section. This treated lumber was
left in place as each concrete section was finished. By separating concrete into
smaller sections, shifting and breaking of concrete sections is controlled.
Concrete was pounded/vibrated into and under rebar to be sure no porosity exists
in the lower layer of concrete that could be damaged by ground water freezing and
thawing during winter. Subfloor surface is 3" below existing concrete floor
level so that the finished brick surface will be level with the concrete along
the sides of the shop. I was only able to obtain 2-1/4" brick pavers, so I set
the subfloor level at 3" below existing floor level for brick and sand layer.
That 3/4" gap should allow for any improper leveling that I might have done
during concrete work.
Treated lumber was used to box in each concrete section. This treated lumber was
left in place as each concrete section was finished. By separating concrete into
smaller sections, shifting and breaking of concrete sections is controlled.
Concrete was pounded/vibrated into and under rebar to be sure no porosity exists
in the lower layer of concrete that could be damaged by ground water freezing and
thawing during winter. Subfloor surface is 3" below existing concrete floor
level so that the finished brick surface will be level with the concrete along
the sides of the shop. I was only able to obtain 2-1/4" brick pavers, so I set
the subfloor level at 3" below existing floor level for brick and sand layer.
That 3/4" gap should allow for any improper leveling that I might have done
during concrete work.
It's quite pleasant to walk through the shop now. There is still a dirt problem caused by walking over the unfinished front alleyway into the shop. The unfinished/unreplaced section of floor is visible in the first vertical photo at right. This will be replaced next spring. I can hardly wait to get this finished. This is going to be a beautiful improvement to the shop. Already the shop is dry, and tools have stopped rusting. Plenty of new electrical outlets for both regular small tools as well as new outlets for 220vac machinery. New welding outlet so it is no longer necessary to plug and unplug welders when heavy tools are in use. New lights. Already planning to replace cabinets and workbenches with new stuff that uses space more efficiently and free up more workspace. An additional unplanned improvement is coming soon that will add tremendous work/productivity value in the shop and upcoming photos will show this one sometime next spring.
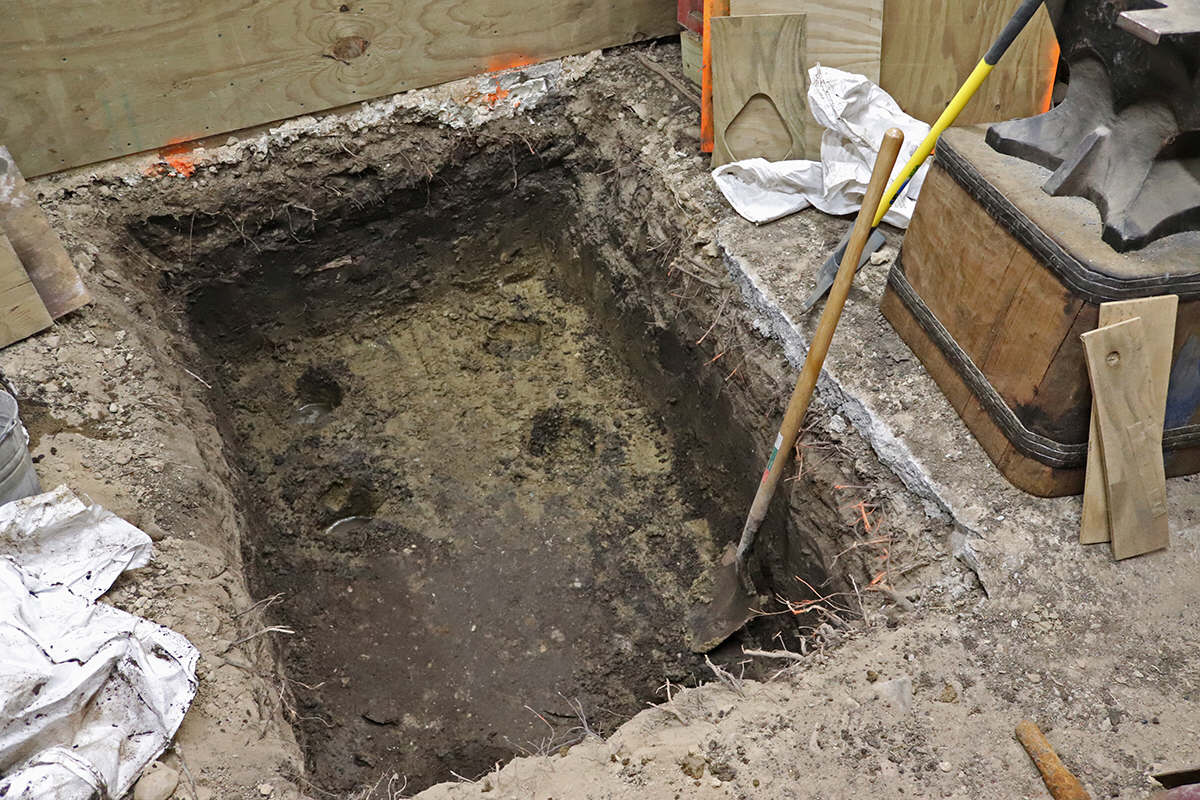
Another floor tear out begins next weekend to get ready for more concrete work as soon as weather allows. This will be the rotten floor section seen in the foreground of the photo (at near right). Forge construction will begin again shortly after.
 October
23rd, 2024. Shop Update. Changed priorities, now replacing
rotten old floor. Will finish chimney after floor problem is fixed. Huge amount of work this past month. Garden work, house
renovation, car repairs, shop cleanup (home shop - where wood working and
electrical tools are used for renovation work).
October
23rd, 2024. Shop Update. Changed priorities, now replacing
rotten old floor. Will finish chimney after floor problem is fixed. Huge amount of work this past month. Garden work, house
renovation, car repairs, shop cleanup (home shop - where wood working and
electrical tools are used for renovation work).
Another lame excuse. During the next stage of forge constuction, I must have a safe walking surface in the work area where I am building the new stone chimnney. This is a great excuse for beginning the new brick floor that I was planning to build next year. (See the photos further down this article.) The rotten remains of the old wrecked concrete floor has become a serious problem and must be replaced immediately. Hard work. No way around it. There is no space to bring a skid loader or small escavator into the building, so it must be done entirely by hand. New floor will be a beautiful brick floor. This means tearing out the old rotten concrete, digging the hard packed dirt fill out, and replacing with a well-drained concrete subfloor to support the brick floor surface. The first 1/3 of the sub floor has been poured. See photo at top right.
What happened to the old floor? The old concrete floor has become a pulverized mess of stones, powdered/crushed concrete mud dust, jagged bits of steel wire and scrap metal, and dirt/mud that infiltrated up from beneath the concrete floor. It was a concrete floor when I bought the place years ago. So how did it get this way? This mess was caused by pouring poorly mixed concrete directly onto a dirt base that had high ground water problems. The old concrete was simply dumped on the ground and the top surface smoothed with a piece of lumber. No packing or vibrating to remove porosity out of the freshly poured concrete. Ground water levels rose up into air pockets in the porous old concrete. During the freeze and thaw cycles every winter, the freezing water that infiltrated into the old concrete literally pulverized it from the inside out, reducing it into a mixture of stones and concrete dust. During rainy weather, ground water levels would rise and bring dirt and mud up into the porous old concrete. This turned the old concrete floor into a pulverized mess of mud and stones. Farm cats started using the (now) dirt floor as a litter box and defecate all over it, thus turning it into a stinking filthy mess. (See photos in next paragraph below.) An absolutely rotten mess, trip hazard, hazardous to feet, and constantly snagging tools and machinery while moving around the shop.


 Demolition.
Floor
replacement begins with tearing out the old concrete and digging a trench for
new rock bed and concrete subfloor. Very time-consuming, the concrete was full
of wire and metal scraps. Some areas of the old concrete are a stony packed
dirt, other areas are chunks of intact concrete. Wire and metal must be cut out and removed. Pick axe used to tear it up
enough to clean out with a shovel. This is dangerous work with stones flying up
during pickaxe work, and embedded wire in the concrete chunks can injure the
workman while throwing them into the rubble pile.
Demolition.
Floor
replacement begins with tearing out the old concrete and digging a trench for
new rock bed and concrete subfloor. Very time-consuming, the concrete was full
of wire and metal scraps. Some areas of the old concrete are a stony packed
dirt, other areas are chunks of intact concrete. Wire and metal must be cut out and removed. Pick axe used to tear it up
enough to clean out with a shovel. This is dangerous work with stones flying up
during pickaxe work, and embedded wire in the concrete chunks can injure the
workman while throwing them into the rubble pile.
Concrete work. The trench was dug deep enough to allow several inches of stone fill beneath the new concrete subfloor, and to allow the new concrete surface to be 2-1/2 to 3 inches below the finished floor surface to allow for a brick floor. (Final photo below right.) The jagged and irregular edges of the nearby concrete floor surfaces were marked with a chalk line and chipped straight with a chisel and hammer and sledge hammer. Concrete was packed down tight into the hole to remove all porosity and completely fill the entire hole with solid dense concrete. Rebar was used to strengthen the concrete and each of the wooden rebar support blocks were removed when the poured concrete reached them. None of the wooden blocks was left in the hole. Water cannot be allowed to come in contact with the rebar because the resulting rust will burst the concrete from the inside out. So concrete was packed all around the rebar and especially underneath and support blocks removed when the poured concrete reached them.
 Conclusion.
The
new concrete subfloors are well drained and should completely end the wet floor
problem. New brick surface will extend all the the way underneath and around the
forge foundation for one beautiful continuous floor surface. There is still 2/3rds of the concrete floor work
yet to finish, and I am
forced to take care of other chores. I will finish the concrete work in a few
weeks.
Conclusion.
The
new concrete subfloors are well drained and should completely end the wet floor
problem. New brick surface will extend all the the way underneath and around the
forge foundation for one beautiful continuous floor surface. There is still 2/3rds of the concrete floor work
yet to finish, and I am
forced to take care of other chores. I will finish the concrete work in a few
weeks.
 September
9th, 2024. Shop Update. Chimney foundation is now complete and
ready for construction of smoke box and flue sections. Earlier I wrote about
the need for creating a hollow section under the smokebox to bring air into the
fire from behind the chimney. Photos in this update show this hollow channel built into the lower chimney before the smokebox construction covers
the top of this part of the forge. Slip form construction was used to build
this section of chimney foundation.
September
9th, 2024. Shop Update. Chimney foundation is now complete and
ready for construction of smoke box and flue sections. Earlier I wrote about
the need for creating a hollow section under the smokebox to bring air into the
fire from behind the chimney. Photos in this update show this hollow channel built into the lower chimney before the smokebox construction covers
the top of this part of the forge. Slip form construction was used to build
this section of chimney foundation.
I have never done this type of construction before and thus I am terribly slow at it. My stone is purchased from a local quarry and much of it has a small amount of mud on it therefore each stone must be washed by hand before being used in construction. This adds more time. Temperatures were in the high 90s all during this phase of construction and I often began work in evening and working at night. Add to this getting up at 5 a.m. to scrape and brush the mortar joints while the mortar was still semi-soft. This was also a very busy three weeks with purchasing and transporting a power hammer, visiting friends during the holiday, finishing maintenance on equipment recently added to the shop, car repairs, and garden work. But the goal for this time was to finish the bottom of the chimney so that planning and preparation can begin for building the upper chimney section. Rebar was cut off before beginning this part of the chimney foundation. Up to this point I have been wasting huge amounts of time trying to find stones that fit in the corners between the rebar and the slip form boxes. This literally quadrupled the amount of time that I was spending to build this chimney foundation. Cutting out the rebar allowed the work to go much faster. This is a short chimney, it will be plenty strong without the rebar.

 At right are photos of the slip forms that were used to build the
lower section of chimney. The two smaller slip form boxes were attached to the
top of the larger box with screws so that they could be quickly disassembled and
removed. This allowed quick and easy access to the outside of the stonework for
scraping and brushing mortar. These are crudely attached to the frame of
the larger slip form to prevent them from moving or tilting while stone and
mortar are thrown into the boxes.
At right are photos of the slip forms that were used to build the
lower section of chimney. The two smaller slip form boxes were attached to the
top of the larger box with screws so that they could be quickly disassembled and
removed. This allowed quick and easy access to the outside of the stonework for
scraping and brushing mortar. These are crudely attached to the frame of
the larger slip form to prevent them from moving or tilting while stone and
mortar are thrown into the boxes.
Casting stone into a slip form results in an ugly solid concrete wall face. To create a beautiful exposed stonework appearance, the mortar is scraped and brushed off of the surface to expose as much of the stones as desired. This must be done while the mortar is still semi-soft, before the mortar has time to fully harden and cure. The slip form boxes were constructed to allow them to be partly disassembled and quickly removed so the outside face of the stonework could be scraped and brushed. The slip form boxes were quickly re-installed on the next evening and new layers of stone added. A laser level was used to check that the slip form boxes were level each time that the boxes were assembled. The laser level also shows when the stonework is level with the planned forge hearth height.


 First
photo (left photo) shows the slip forms are being reinstalled, the fronts still
open showing the partially finished stonework inside. After taking the first
photo (left photo), the fronts of the boxes were re-installed and the boxes
anchored to the lower slip form with screws. The slip forms are mounted very flimsy, so stonework begins by
first
placing mortar and stones in each corner to help anchor the boxes in
place. In the last two photos at right, the upper slip forms were filled level
with stone - look closely - the outer surfaces of stones in the left box have already been
scraped and brushed and the boxes are re-installed. I re-installed the boxes to
prevent the mortar from drying out before it could cure.
First
photo (left photo) shows the slip forms are being reinstalled, the fronts still
open showing the partially finished stonework inside. After taking the first
photo (left photo), the fronts of the boxes were re-installed and the boxes
anchored to the lower slip form with screws. The slip forms are mounted very flimsy, so stonework begins by
first
placing mortar and stones in each corner to help anchor the boxes in
place. In the last two photos at right, the upper slip forms were filled level
with stone - look closely - the outer surfaces of stones in the left box have already been
scraped and brushed and the boxes are re-installed. I re-installed the boxes to
prevent the mortar from drying out before it could cure.
 August 18th, 2024. Shop Update. Chimney base has been
built. The chimney base is heavy and tedious work. This is due
to the huge mass of stone and mortar that are put into the base. Finished lower
section section of chimney base is shown in photo at right. Roughly 4-5 hours
after stone masonry work is finished, mortar is still soft enough to allow it to
be scraped and brushed off of stones and out of joints to expose the stones. To
further clean any mortar that might still be clinging to surface of the stones
as a thin film, a good mosonry sponge is soaked in water and used to gently wash
the mortar film from the surface of the stones.
August 18th, 2024. Shop Update. Chimney base has been
built. The chimney base is heavy and tedious work. This is due
to the huge mass of stone and mortar that are put into the base. Finished lower
section section of chimney base is shown in photo at right. Roughly 4-5 hours
after stone masonry work is finished, mortar is still soft enough to allow it to
be scraped and brushed off of stones and out of joints to expose the stones. To
further clean any mortar that might still be clinging to surface of the stones
as a thin film, a good mosonry sponge is soaked in water and used to gently wash
the mortar film from the surface of the stones.
A cut out must now be built into the upper half of the chimney base. This cut out creates an opening in the chimney base for air to be piped from behind the chimney, through the base underneath the chimney and into the fire. I determined the ideal height of my new forge and measured the height of firepot and tuyere air supply duct from the floor level. I used this dimension as the height of the slip form box that is seen in photos at right. That is why I used a laser level to set the height and level of the slip form box. Stones at either side of the box can be higher or lower than the slip form box, it does not matter, because construction will continue upward on each side. But the center stonework must be perfectly level with the slip form box because this is the lower surface height of the cutout for the air ducting that will supply air to the fire. This will be easier to explain later when I have photos of the next construction step completed.
The orange bubble level was being used as straight edge to check that the height of the stone in the center section was level with the sides of the slip form box. The laser level was used to check that the sides of the box were both level and at the correct height. The laser line in the closeup photo at far right can be seen extending onto a pencil line on the wall. This verifies that the laser level is at the correct height. I shoot the line at 1/16 inch from the top edge slip form box so that it can be visible and check for level. A bubble level is used to verify the slip form box is level from front to back.


 The concrete subfloor has greatly improved working
conditions. In the photos at right, there is a concrete subfloor surrounding the
chimne base and the front forge hearth pedestal stonework. This concrete is the
subfloor for a new brick floor that will be built after the forge is
finished. I was a bit concerned that there might still be high water level
problems, but the concrete subfloor has prevented much of the ground water from
soaking under the floor of the shop. The shop floor is now drying out despite
recent rainy weather. And while this is only a
subfloor for a future brick floor, it is much more comfortable and
safer to walk on and much easier to clean. There is still one small section of
wet floor (out of view to the left side of photos next to the forge foundation)
but that section of floor will be torn out immediately after the forge is
finished and replaced with a new concrete subfloor and brick finished floor. Dry
floor means less humidity to cause rusting tools and machinery.
The concrete subfloor has greatly improved working
conditions. In the photos at right, there is a concrete subfloor surrounding the
chimne base and the front forge hearth pedestal stonework. This concrete is the
subfloor for a new brick floor that will be built after the forge is
finished. I was a bit concerned that there might still be high water level
problems, but the concrete subfloor has prevented much of the ground water from
soaking under the floor of the shop. The shop floor is now drying out despite
recent rainy weather. And while this is only a
subfloor for a future brick floor, it is much more comfortable and
safer to walk on and much easier to clean. There is still one small section of
wet floor (out of view to the left side of photos next to the forge foundation)
but that section of floor will be torn out immediately after the forge is
finished and replaced with a new concrete subfloor and brick finished floor. Dry
floor means less humidity to cause rusting tools and machinery.

 July
25th, 2024. Shop update. Base layer of chimney and front
pedestal started, and concrete subfloor layer poured and ready for future brick
floor shop upgrade. Another milestone event because this ends the problem of
dirt falling in and caving in from the sides of the trench. Chimney construction
above ground can now begin in a few more days after the concrete cures. All high
water level problems in forge masonry work area are now completely eliminated.
July
25th, 2024. Shop update. Base layer of chimney and front
pedestal started, and concrete subfloor layer poured and ready for future brick
floor shop upgrade. Another milestone event because this ends the problem of
dirt falling in and caving in from the sides of the trench. Chimney construction
above ground can now begin in a few more days after the concrete cures. All high
water level problems in forge masonry work area are now completely eliminated.
First two photos at right are before and after with the base layers of the chimney foundation and hearth pedestal started and the second photo showing the concrete subfloor layer poured. Until now I was working in a very cramped work space making stone laying very awkward. The trench sides were continually crumbling and this dirt needed to be constantly cleaned out around the forge foundation. A new brick floor is planned for this part of the shop and a small part of that floor will extend under the forge. Concrete cannot bond with existing masonry work if the surfaces are dirty, so dirt falling into the trench was cleaned out often to avoid any of it sticking to the masonry before concrete could be poured. And to prevent more dirt falling into the masonry work area, I was forced to stop all unecessary forge work or air hammer work. New subfloor stabilizes the walls of the trench. Most importantly, the work area is now nearly level with the existing shop floor and thus safer to work on, and the forge and air hammer can be used
 Third
photo lower right shows the trench before pouring the concrete subfloor. Dirt
can be seen in the sides of the trench. It was necessary to clean out this dirt
every day to avoid wet dirt sticking to the masonry.
Third
photo lower right shows the trench before pouring the concrete subfloor. Dirt
can be seen in the sides of the trench. It was necessary to clean out this dirt
every day to avoid wet dirt sticking to the masonry.
A bandsaw has also been added to the shop equipment.

 June 16, 2024.
Shop update. First layer of rock has been layed down. This is a milestone event
because after spending 5 weeks pumping water out of the trench every day, the
top surface of the stone masonry is now above the ground water level, and ground
water flooding is unlikely to impose any more problems. Construction work can
finally proceed witout any further delays.
June 16, 2024.
Shop update. First layer of rock has been layed down. This is a milestone event
because after spending 5 weeks pumping water out of the trench every day, the
top surface of the stone masonry is now above the ground water level, and ground
water flooding is unlikely to impose any more problems. Construction work can
finally proceed witout any further delays.
Photos at right show the first layer of stonework finished. This is a foundation layer. The only material that will be visible above ground will be stone masonry.
With rain storms threatening almost daily I finished the stonework as quickly as possible. This first layer of stone was finished only two days ago (June 14th, 2024), and last night rain arrived again and has partially flooded the trench, again, but only a couple inches in depth (photos at right were taken before the rain storms arrived). The stone layer is roughly 3-1/2 inches thick, and the water is only 2 inches high in the trench, so the stone is still above the water level. This little bit of water is not a problem and I expect the stone mortar to cure just fine. In a few more days the mortar should be cured well enough to allow me to walk on it and start the main stone construction in earnest. As of now I don't expect rain and high ground water to cause any more delays.
Construction notes. During the open trench construction, forge work is impossible. I wanted to forge some tools while waiting for the ground water level to go down, but realized immediately what folly this would have been. Dirt walls in the trench are unstable. The dirt walls crumble continuously and the dirt falls into the hole. This problem is compounded by ground water because the ground water softens the dirt and causes the dirt to move slowly and back-fill the trench. Dirt weakens mortar and concrete if it gets mixed in accidentally, and so all dirt must be cleaned out and off of any ongoing masonry or concrete work. Any vibration, shaking, or pounding of ground nearby the trench will increase this falling dirt problem AND can cause the dirt walls of the trench to completely cave in - making a total mess of the work. The best course of action is to get all open trench work done as soon as possible and backfill the trench with the desired material before the dirt backfills itself into this space and makes it impossible. And don't do any forging or operate power hammers nearby the open trench until the trench is backfilled.
 May
11th, 2024. Shop update. Foundation work finished. Storms and
high ground water level created many delays but the bulk of the work below
ground level is finished. Storms arriving roughly every two to three days
brought much needed rain. But in my area this also means high ground water
levels.
May
11th, 2024. Shop update. Foundation work finished. Storms and
high ground water level created many delays but the bulk of the work below
ground level is finished. Storms arriving roughly every two to three days
brought much needed rain. But in my area this also means high ground water
levels.
There is no space in the shop for storing conrete indoors. So when the rain comes, the bagged concrete was covered up. Breathing raw uncured concrete dust is dangerous and can be fatal, so mixing concrete with a mixer must be done outside. So again, when rain comes, everything must be shut down and covered up. Storms threatened almost every day, and while these storms actually arrived every two to three days, just a threat of a nearby storm system was enough to prevent uncovering everything and starting concrete work. Even though these storms often bypassed my location, they did bring small amounts of rain.
Spent most of the time pumping water out of the trench so that concrete work and block construction could proceed. Water that gets under mortar will thin out and weaken the mortar, so it was necessary to pump out water and keep it off the top surface of the concrete pad. This problem can be seen in the photo at far right. The pump can only pick up water to a depth of 1/4". It was necessary to dig a small hole outside of the concrete pad so as to get the pump down below surface of the concrete pad and get the water drained off of the pad.


 Photos
at right show water being pumped out after flooding the trench during
construction. In one of the photos, the blocks are completely submerged under
water. Even after pumping out the trench, the individual holes in each of the
concrete blocks still needed to be pumped out with a shop vac. And even today
water removal continues day and night to keep ground water from refilling the
trench while concrete work cures. But the good news is that the most important
part of the foundation is complete and curing in preparation for stone chimney
construction.
Photos
at right show water being pumped out after flooding the trench during
construction. In one of the photos, the blocks are completely submerged under
water. Even after pumping out the trench, the individual holes in each of the
concrete blocks still needed to be pumped out with a shop vac. And even today
water removal continues day and night to keep ground water from refilling the
trench while concrete work cures. But the good news is that the most important
part of the foundation is complete and curing in preparation for stone chimney
construction.
More concrete will be poured to fill in gaps around the sides of the foundation while the block work is curing.
April 15th, 2024. Shop update. Concrete has had time to cure. Waiting on time to begin construction of forge foundation. This will take a while as other tasks are more urgent including running new electrical cables, garden work, repairing 2 other buildings, and yard cleanup. Shop is a disaster zone, need time to clean up shop, put tools away, clean equipment, and prepare for next stage of forge foundation construction. Fences and gates need mainenance work. Horses turned wild again, need to take time to catch them and train them. Got tired of all the construction work so I am planning some down time to forge some tools. Mostly horseshoeing tongs and other tools. Maybe forging a bit of animal head handles for other tools for fun.
The open trench was wet and muddy and caused a high humidity problem that started to rust the surface of the anvils and tools again. This section of floor where the new forge is being built was once the wettest section of floor in the building. It was first to start getting wet during rainy weather, and took the longest to get dried out. For many years since the shop was built, this wet section of floor was the cause of the high humidity and rusting tools. With the concrete pad now sealing the bottom of the trench, the humidity problem has been significantly reduced, but not entirely eliminated yet. The encouraging news is that the amount of rusting of tools is noticably less in just a few days after concrete began to cure. This upcoming weekend I will begin building the concrete block part of the forge foundation and fill in the open ground around it and further reduce the humidity problem by maybe 75%. And humidity problems should be almost entirely eliminated after the actual forge and chimney construction begin on top of the foundation and rust should never be a problem ever again. This new forge project will satify one of the goals of my original shop renovation plan namely to eliminate or greatly reduce the humidity and rust problems.

 April
6th, 2024.
First photo (near right) shows the concrete
foundation pad poured and finished last night. Now we wait for a week for the
concrete to cure before begining main construction.
April
6th, 2024.
First photo (near right) shows the concrete
foundation pad poured and finished last night. Now we wait for a week for the
concrete to cure before begining main construction.
Photo at far right shows the rebar and wooden concrete form in place and ready for pouring concrete. Lots of hurry up and wait. Weather caused delays but finally got a good stretch of weather for concrete work. And just in time, rain will arrive again today - just hours after the concrete work was completed.
Pad is 7 inches thick. Rebar throughout the pad and vertical rebar carefully placed to go through the holes in the concrete blocks. This will be a stone forge, so concrete blocks are only used below ground level in the unseen part of the foundation. The only material that will be visible above ground will be the cobblestones that the forge is built from.
I decided to increase the size of the pad after digging the trench. So the new larger wooden concrete box form was now too large for the trench. I removed the back section of wooden box to allow another inch and a half length, and simply cast concrete right up to the rear of the trench. Wooden spreaders were used to hold the sides of the wooden form apart until concrete could fill in wooden form and the spreaders could be removed to finish filling with concrete. This is a bear of a job. Can't kneel beside the concrete form because the pad is down inside a hole. The only way to finish the concrete was to place the spreaders on the sides of the wooden box and kneel on the spreaders, moving them around as needed to be able to trowel all parts of the concrete surface.

 March
24th, 2024. Updated 2024 show dates for steam power shows on the
Steam Power & Antique Engine Shows page.
March
24th, 2024. Updated 2024 show dates for steam power shows on the
Steam Power & Antique Engine Shows page.
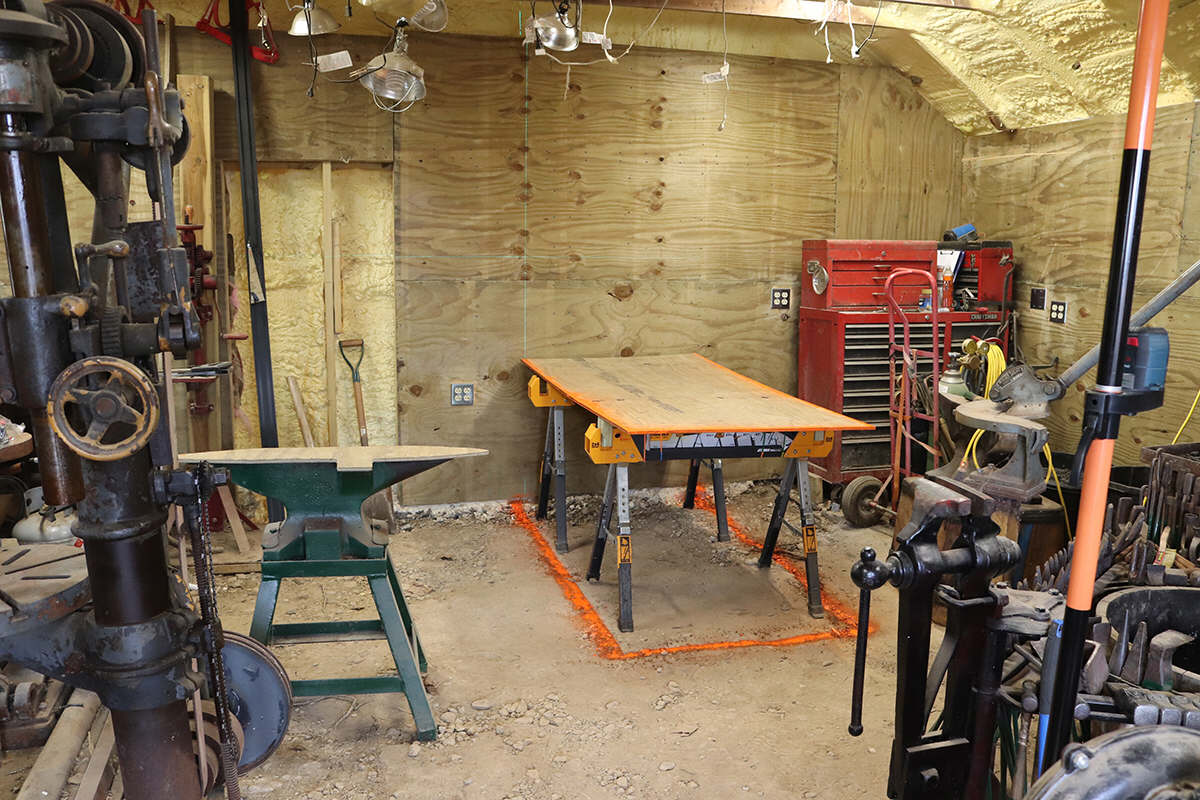
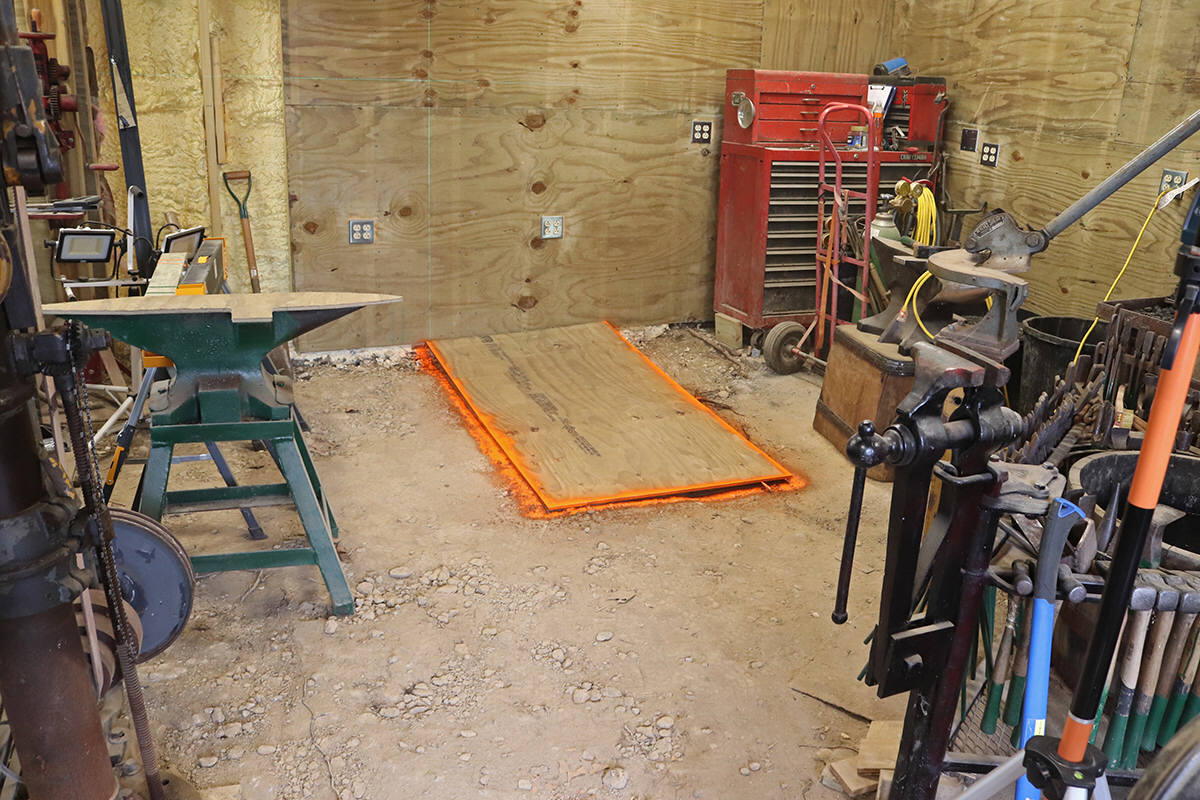
Photos of the shop ( 2 at near right - top row of photos) was taken just days after the New Year holiday. Christmas season photos always make a good set. Piles of new building materials and construction rubble everywhere. Far right two photos show mockup and layout of new forge template. A piece of plywood is cut to the approximate dimensions of the new forge and chimney. Plywood rests on adjustable sawhorses to get a feel for location and height. The new anvil is much larger than the older anvils but the new anvil is to heavy to move around easily. So a plywood template of the top face of the new anvil was set on top of the the older lighter anvils as a mockup of the heavier anvil, and this helped with measuring and testing for best location of new forge and anvil. In the second row of photos (near right), this plywood anvil template is more easily seen. The shop is very small and I want to make sure there is enough space around forge and anvil to work efficiently while at the same time keeping as much free space on the opposit side of the forge for another forging area. A laser level is used to align the forge mockup. In the last photo (top row, far right), a faint green vertical line can be seen extending up the wall from the left rear corner of the plywood mockup. The laser level line extends from floor to ceiling, and aftter carefully centering the lazer stand in the shop, this laser line can be seen and measured by moving a board or tape measure and adjusting the position of the plywood mockup. The small laser is seen mounted on the orange and black laser stand at the right side of this photo.
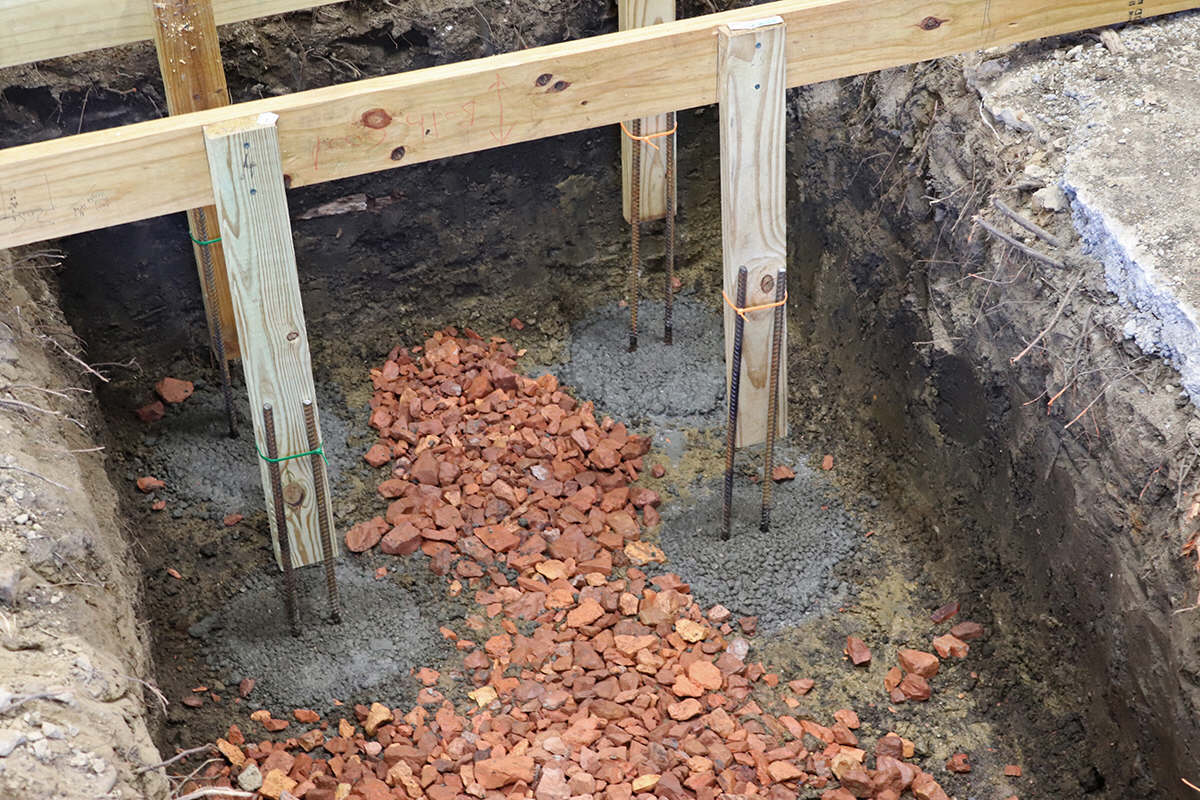
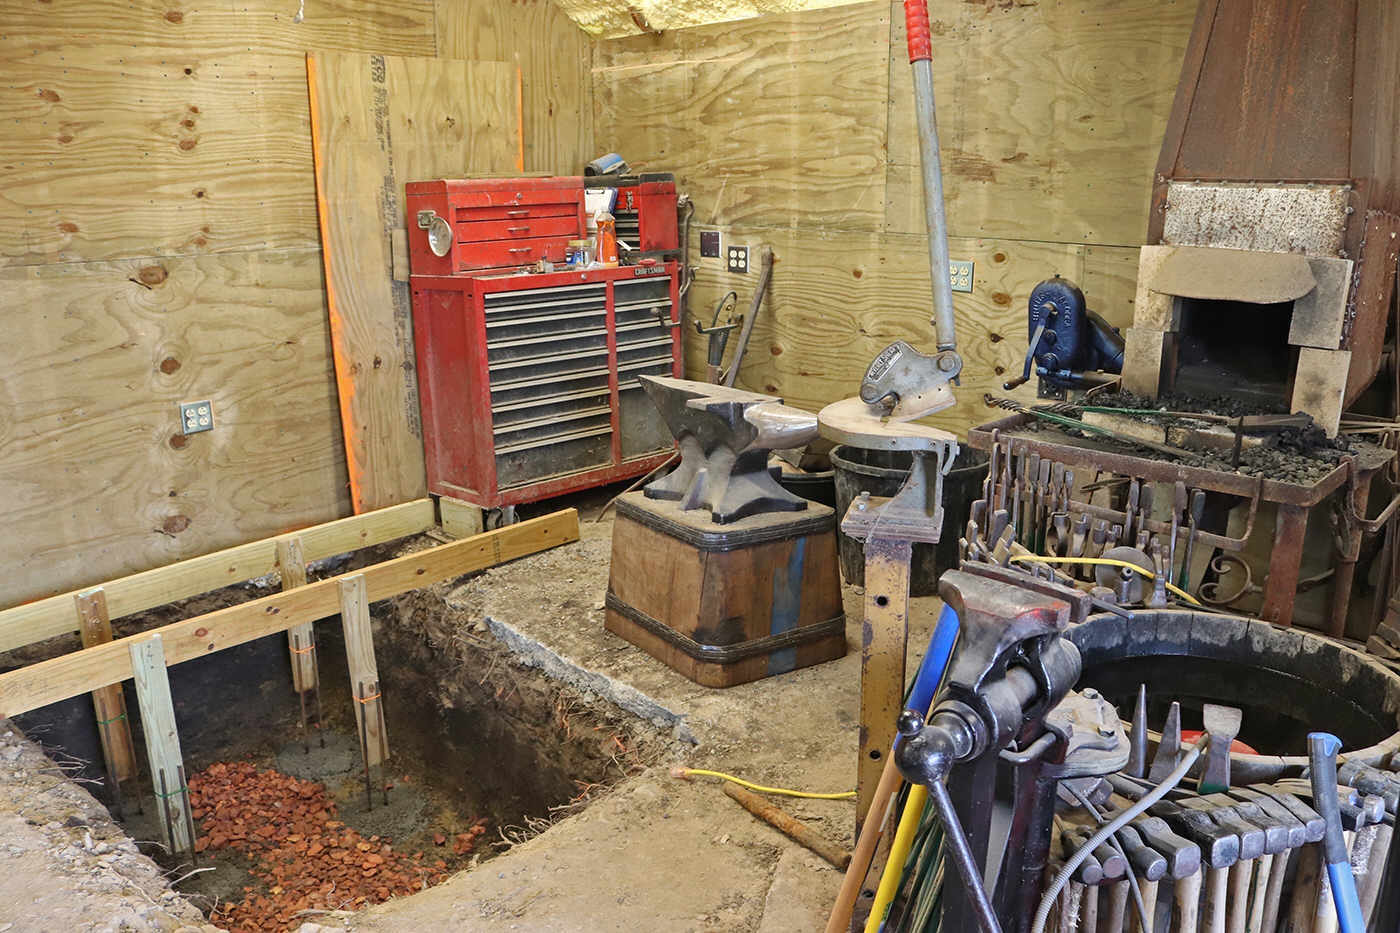
 In the second row of photos at right, the piers have
been poured and the rebar reinforcements are tied to overhead wooden planks to
support them upright while the concrete cures. The bottom of the trench is wet
due to high ground water level, and rock was dumped on the bottom of the
trench so I could walk and kneel on a dry surface while working. More of this
same rock will be spread on the floor of the trench before pouring the concrete
foundation pad. I ordered an auger for drilling concrete pier holes in
mid-December. It arrived in February - more than 6 weeks later. This was a waste
of time. The drill hit rocks and was unable to drill pier holes. I ended up
digging the trench by hand. Next problem was high ground water. The high water
level turned the excavation work into a muddy mess. Next came a hard freeze
during the time that I planned to pour the concrete pier holes. More delays
waiting for warm enough weather to pour concrete. Finally the weather broke and
I was able to pour the piers. While waiting for good weather for mixing
concrete, my concrete stash has been sitting under a tarp. Very bad.
Moisture/humidity comes up from below the pallet and seeps into the bags of
concrete, and despite the plastic lining of the bags, the moisture seeps in and
ruins some of the concrete.
In the second row of photos at right, the piers have
been poured and the rebar reinforcements are tied to overhead wooden planks to
support them upright while the concrete cures. The bottom of the trench is wet
due to high ground water level, and rock was dumped on the bottom of the
trench so I could walk and kneel on a dry surface while working. More of this
same rock will be spread on the floor of the trench before pouring the concrete
foundation pad. I ordered an auger for drilling concrete pier holes in
mid-December. It arrived in February - more than 6 weeks later. This was a waste
of time. The drill hit rocks and was unable to drill pier holes. I ended up
digging the trench by hand. Next problem was high ground water. The high water
level turned the excavation work into a muddy mess. Next came a hard freeze
during the time that I planned to pour the concrete pier holes. More delays
waiting for warm enough weather to pour concrete. Finally the weather broke and
I was able to pour the piers. While waiting for good weather for mixing
concrete, my concrete stash has been sitting under a tarp. Very bad.
Moisture/humidity comes up from below the pallet and seeps into the bags of
concrete, and despite the plastic lining of the bags, the moisture seeps in and
ruins some of the concrete.
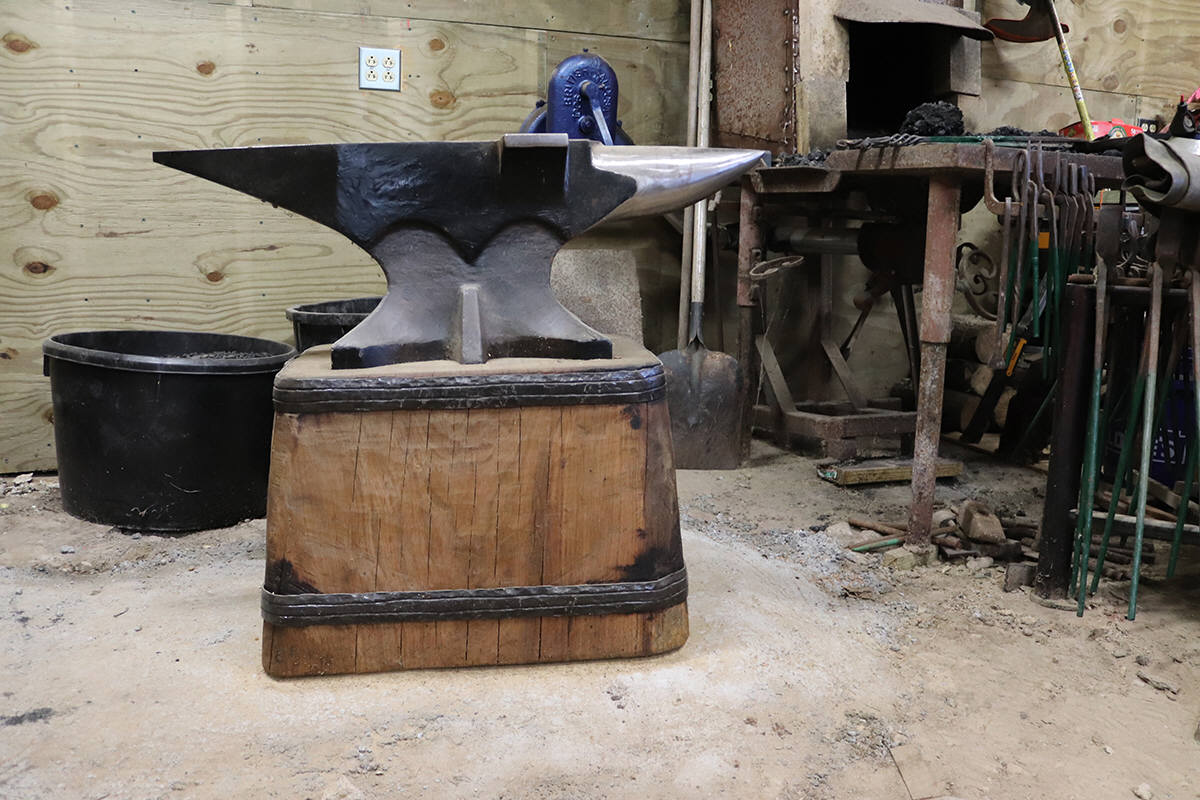 The
last/third row of photos is the anvil and block that I put together in late
summer of 2023. Forgot to show the progress on this item last year. The iron
banding still needs flower-head nails to secure the bands in place. The flower
nails will be made later. For now the anvil and block are ready to forge some of
the parts that are going into the new stone forge.
The
last/third row of photos is the anvil and block that I put together in late
summer of 2023. Forgot to show the progress on this item last year. The iron
banding still needs flower-head nails to secure the bands in place. The flower
nails will be made later. For now the anvil and block are ready to forge some of
the parts that are going into the new stone forge.
 November
13th, 2023. Work is currently stalled as I am cleaning up around
the property while I still have a helper. Also need to clean up wood shop
workspace as well so that renovation and construction work on the shop and house
can continue more easily. It is nice to be able to find tools again and actually
have more clean space for working.
November
13th, 2023. Work is currently stalled as I am cleaning up around
the property while I still have a helper. Also need to clean up wood shop
workspace as well so that renovation and construction work on the shop and house
can continue more easily. It is nice to be able to find tools again and actually
have more clean space for working.
Shop Update. Before work stopped, the back of the shop was cleared out to make space for building a new forge. Welding table was also cleaned off. Forging area was tested (forged a pair of spring handles for a a couple new spring swages) to make sure that the everything works well before proceeding with forge construction.
Plans changed again. A plywood mock-up has been set up to help visualize size and lcoation of the new forge. It appears that there may not be enough space for a double forge, so back to the orginal plan for 3 single forges.
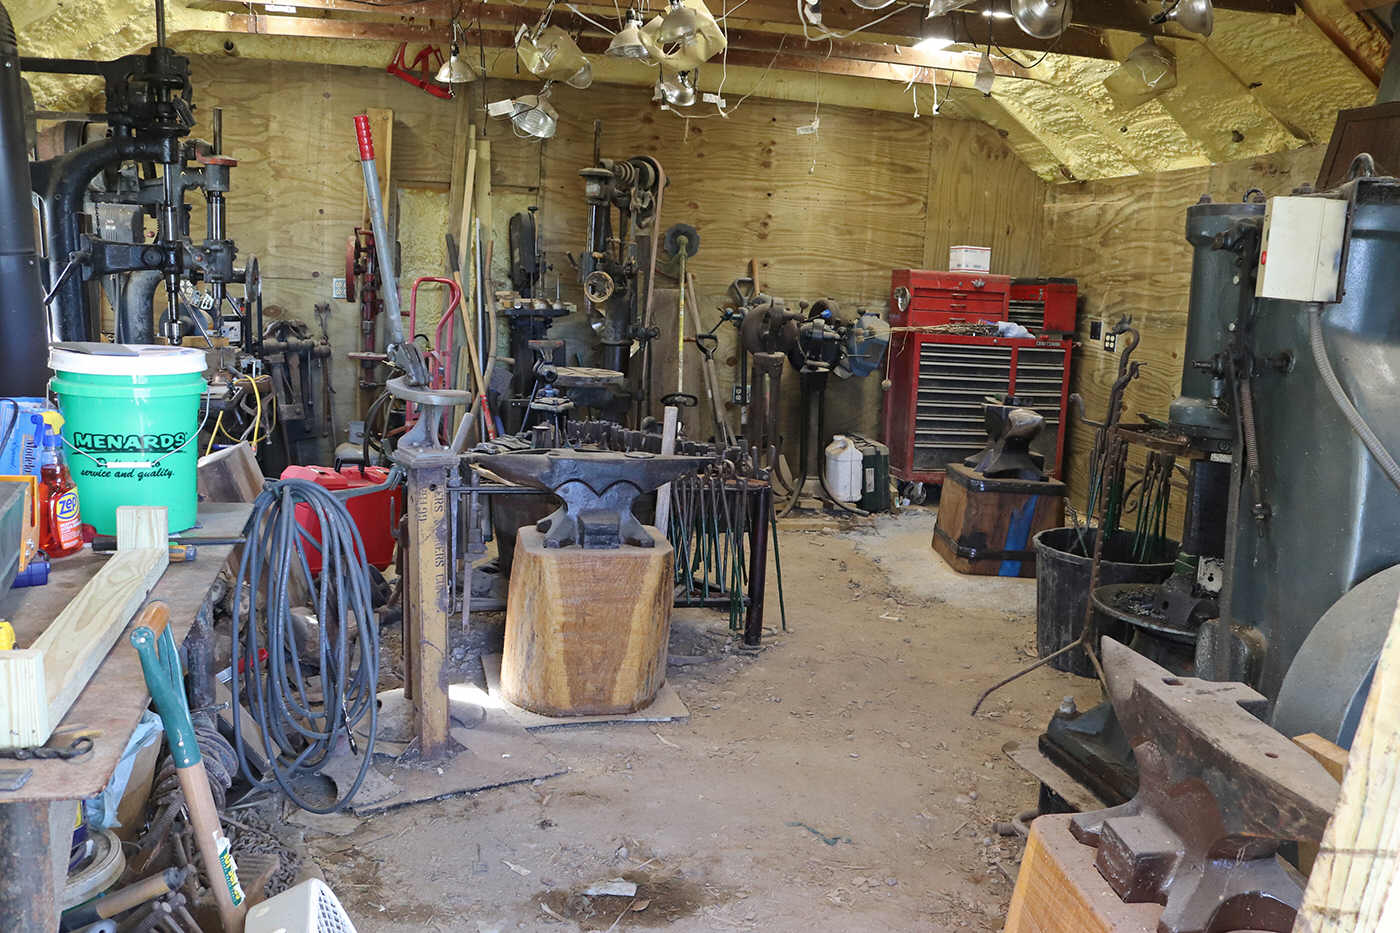
 October
20th, 2023. An urgent task kept me away for 3 weeks but I
am back. With luck, I will be able to stay on new forge construction until it's
complete.
October
20th, 2023. An urgent task kept me away for 3 weeks but I
am back. With luck, I will be able to stay on new forge construction until it's
complete.
Shop Update. Patched hole in floor near older temporary steel forge. The new 460 lbs Fontannini anvil is mounted on the new anvil block and moved over onto the patched floor area. The iron banding on the anvil block still needs decorative nails to permanently fasten them in place, but the block is useable without them for now. This new larger anvil will be used for most of the forging work during construction of the new stone forge. In the photo at near right, the new anvil is seen in its new location near the temporary steel forge. The blue streak on the front of the anvil block creates a bright visual highlight. The blue glitter-filled epoxy repair really stands out, where once was a serious flaw in the original wooden block is now an attractive visual highlight.
The shop photo at far right is the last photo of the rear wall taken before construction work begins. There will never again be any equipment stored near the rear wall - a new stone forge will occupy that space permanently. The welding table at the left side of photo is piled high with tools and stuff left over from renovating the building, and all of this stuff must be cleared off and put away to make space for forge construction work. Moving and cleanup begins today.
 September
27th, 2023.
Steam Power & Antique Engine Shows page updated with highphotos from the
2023 season. I will be posting hundreds more photos from these shows soon. Show
dates for the 2024 season will be added later as they are announced.
September
27th, 2023.
Steam Power & Antique Engine Shows page updated with highphotos from the
2023 season. I will be posting hundreds more photos from these shows soon. Show
dates for the 2024 season will be added later as they are announced.
Shop Update. Switching tasks to begin building the stone forge. Designing and building a good stone forge by hand takes a couple months to complete. Forge construction is now a priority as forge construction must be finished before freezing temperatures and possibility of wintry weather arrive in the next two months. Materials for this project are being gathered now. The first two tons of river rock cobblestones for use in constructing the new forge can be seen in one of the photos at right. Rosette nails and tool making can wait until after the new forge is finished and snow is on the ground.
Plans continually change. The new stone forge will be a double forge - two firepots and two blowers/bellows. I was originally planning three individual forges but the shop does not have enough space for this. However there is enough space for one double forge and one single forge. The only downside to this plan is that one forging area becomes a modified left-handed work space. Some blacksmiths may find this orientation a little bit awkward but still works fine for most tasks. On the other hand this modified arrangement allows plenty of work space for three blacksmith's forging stations and offers two of the blacksmiths an opportunity to work at a stone forge with a stone chimney and bellows. Some smiths actually choose to build their shops with this forge and anvil orientation, and I have worked at one shop years ago that was built with this anvil forge arrangement and it worked out ok. So I expect this new plan to work out well
Prep for construction begins now. All equipment and machinery must be moved out of the area to make space for the new forge. A path thru the middle of the shop must be cleared to make way for moving materials and scaffolding in and out of the shop. All anvils are now placed on new oak blocks, and all are ready for use. The new 460 lbs. anvil is much larger than the others, so to help clear a pathway thru the middle of the shop for construction work, the 460 will be moved into the old forging area for making parts for the new stone forge. The banded block can be used despite having not yet installed the rosette nails to secure the iron bands in place. But as said before, the special nails for the banding can be made later after wintry weather arrives and the new forge is finished. Floor space near the temporary forge must be patched before moving the anvil, and this is being done now. Patching will require several days for concrete to cure. I have other work to do around the farm while the concrete is curing, including cutting up trees that were blown down in a recent storm. If it's not one thing, it's another. One of those downed trees will be cut up to be used for swage block stands and other useful items.


 September
15, 2023. Took some time off to visit a few steam
power and antique engine farm shows. Photos will be posted on the Steam Power &
Antique Engine Shows page soon. Also took some time off from renovation
work to test the new shop setup by forging some small hardware items and animal
heads.
September
15, 2023. Took some time off to visit a few steam
power and antique engine farm shows. Photos will be posted on the Steam Power &
Antique Engine Shows page soon. Also took some time off from renovation
work to test the new shop setup by forging some small hardware items and animal
heads.
Shop update. Finished forging the iron banding for the anvil block. The banding still needs handmade rosettes and flower head nails to permanently fasten the the banding in place, and these nails will be forged soon. To create a completely hand-made look, every inch of the iron banding was forged and the ends of the bands were riveted together. The iron banding needed to be heated red hot to bend them around the corners of anvil block. By so doing, this created a scorched area around the corners that I think adds hand-made character to the overall appearance.
Currently there are some urgent tasks that need to be done around the farm and this has reduced my shop time all week. But I do have some evenings coming up that I plan on spending some time finishing up construction of tools for making the flower head nails and rosettes that will soon permanently fasten the iron banding on this anvil block.
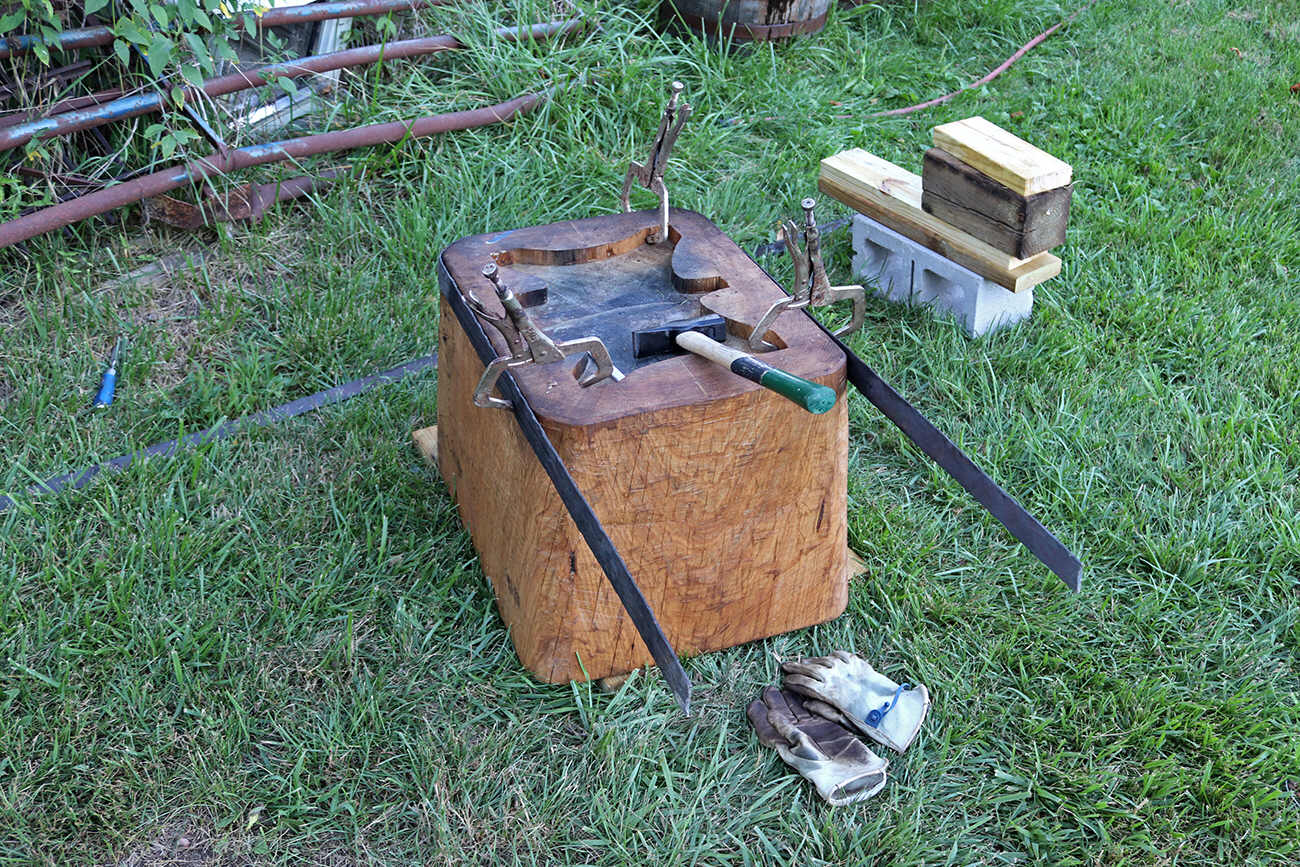
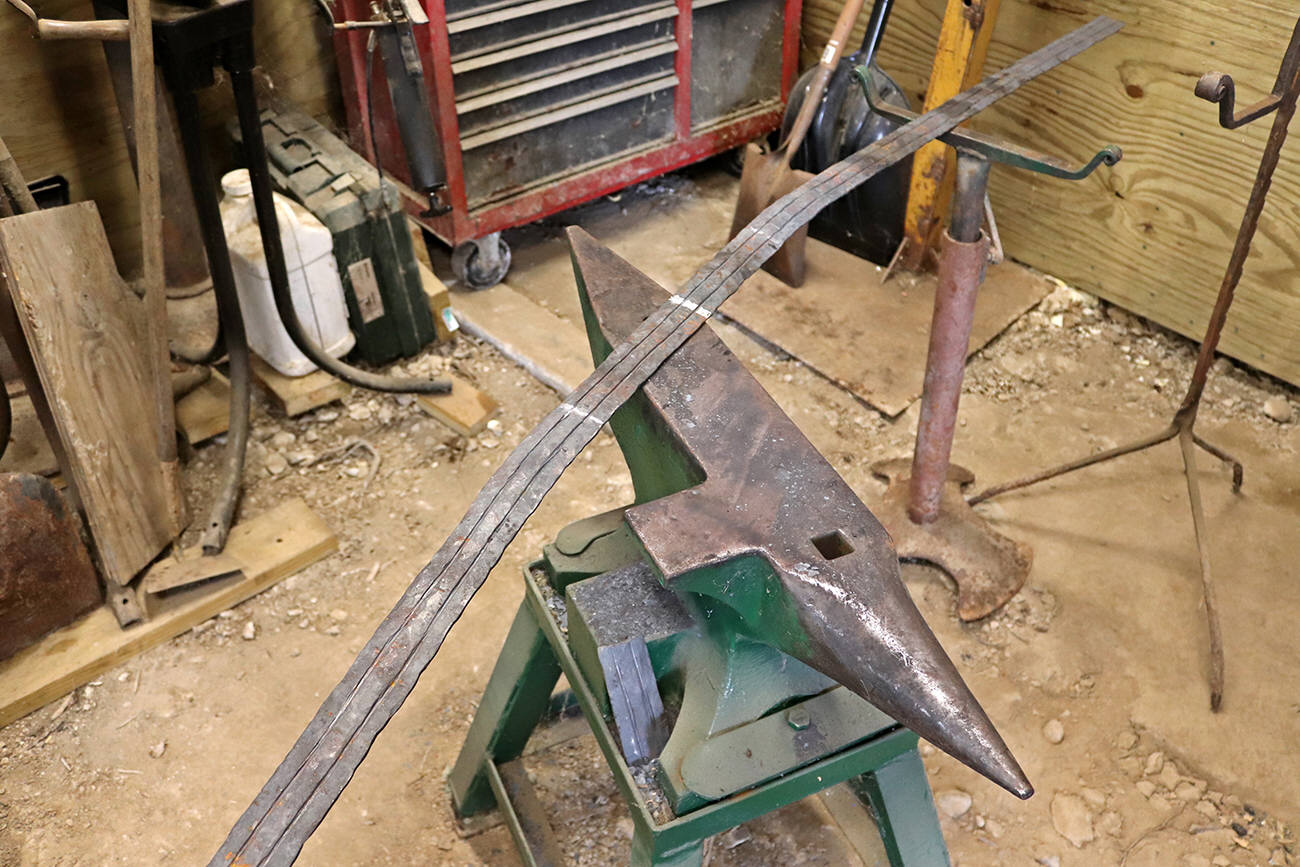

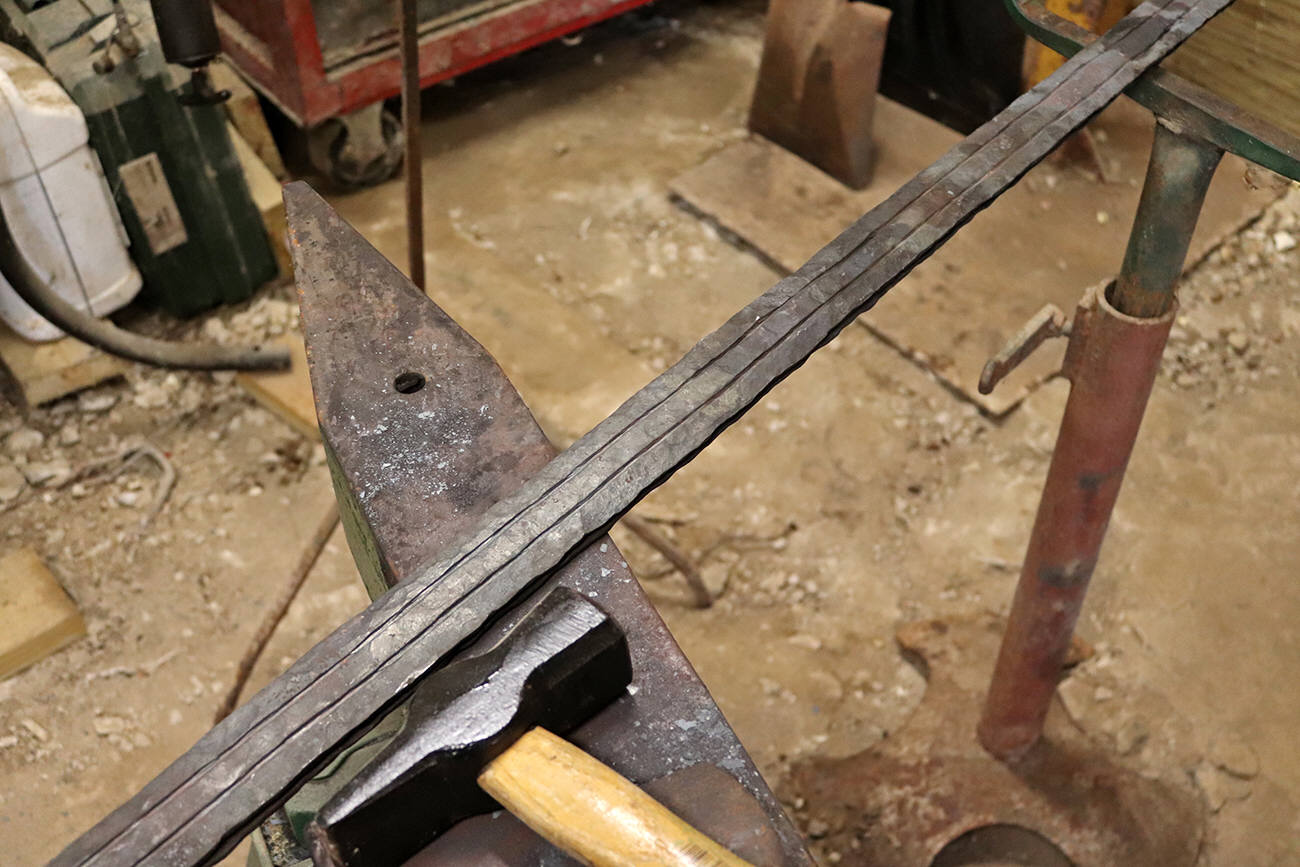
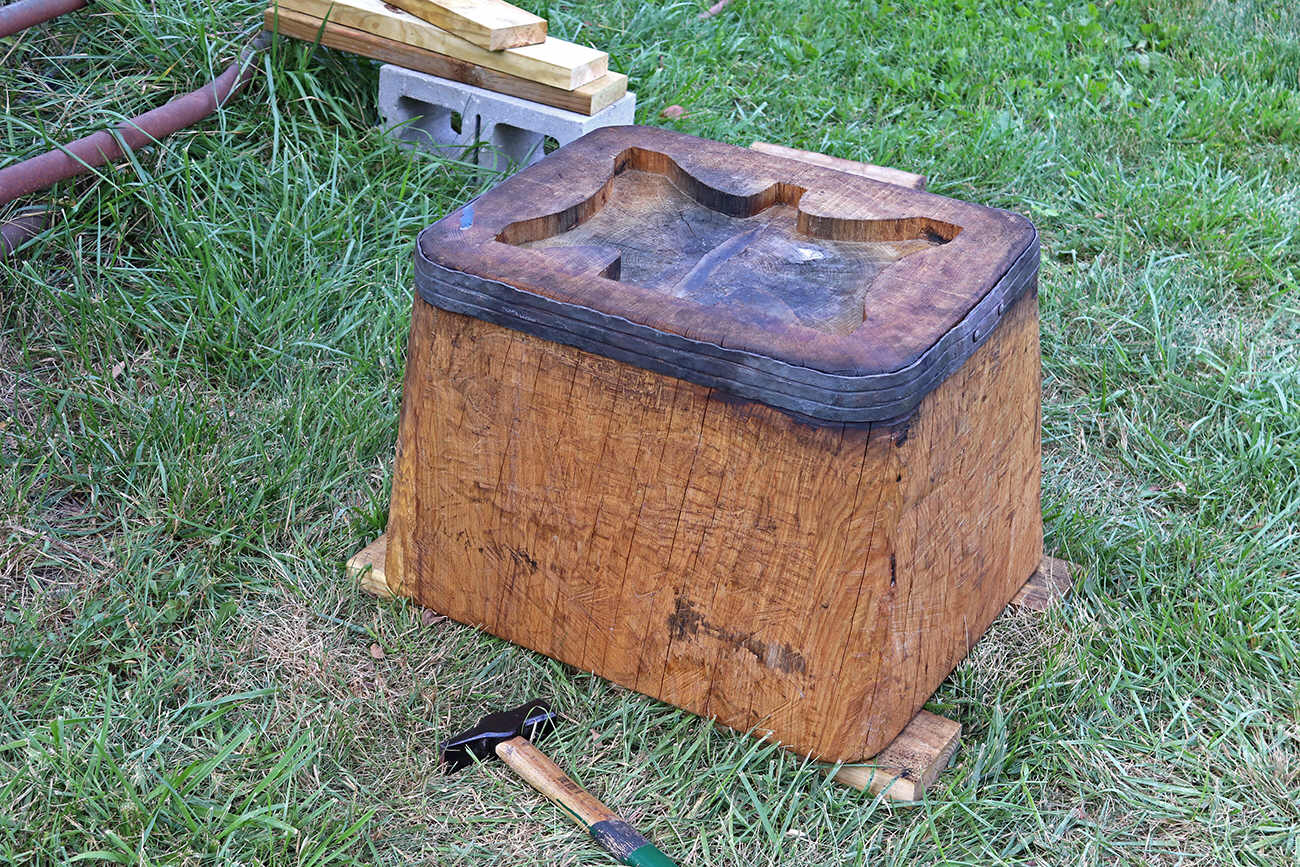 August
30th, 2023. Shop update. Last
minute work on large wooden anvil stand. First iron band is ready for nailing.
Second band nearly complete. After the second iron band is ready for nailing,
work changes to making other items for upcoming show and tell. Photos here at
right show the band material being prepared and finally the first band is
finished and wrapped around the block. Decorative flower head nails will be made
soon for permanently attaching the bands to the block. The wooden anvil block
has tapered sides and thus the iron bands must wrap
around a tapered surface. The easiest way to make the band material lay flat
against the sides of the block, is to bend the iron on edge at each location
where the band wraps around the corner of the block. In the last photo at right
this can be seen where I have pre-bent the band material before heating and
wrapping around the wooden anvil block. These bands were 8 feet long and
required work stands to support both ends during the forging process. Two work
stands at the forge, anvil, and air hammer - for a total of 6 workstands. With
the shop still full of construction tools and equipment and blowers for the new
forges, this didn't leave much room to move around.
August
30th, 2023. Shop update. Last
minute work on large wooden anvil stand. First iron band is ready for nailing.
Second band nearly complete. After the second iron band is ready for nailing,
work changes to making other items for upcoming show and tell. Photos here at
right show the band material being prepared and finally the first band is
finished and wrapped around the block. Decorative flower head nails will be made
soon for permanently attaching the bands to the block. The wooden anvil block
has tapered sides and thus the iron bands must wrap
around a tapered surface. The easiest way to make the band material lay flat
against the sides of the block, is to bend the iron on edge at each location
where the band wraps around the corner of the block. In the last photo at right
this can be seen where I have pre-bent the band material before heating and
wrapping around the wooden anvil block. These bands were 8 feet long and
required work stands to support both ends during the forging process. Two work
stands at the forge, anvil, and air hammer - for a total of 6 workstands. With
the shop still full of construction tools and equipment and blowers for the new
forges, this didn't leave much room to move around.
I wanted a handmade look as much possible for the anvil block. This means lots of forging to modify the cross section of the band material Edges of the banding were tapered with round faced hammer tool on air hammer to help draw out the edges. The surface of the material was intentionally left in a rough forged condtion - not flattered. A dull hot cut tool was used to incise dual lines along the center of the bands for additional eye appeal. The effect was perfect.
August 7th, 2023. Steam power shows coming up every weekend from now thru September. While I list only a few annual events on the Steam Power Shows page, there are many more in other states. See the Steam Power Shows page for upcoming show dates and photos from past steam shows events. All of these steam power show events have at least one working blacksmithing demonstration. The Midwest Old Threshsers has three working blacksmith exhibits. These shows offer an opportunity for the beginner to see how blacksmith tools are set up and used.
Shop Update. Waiting for sealant on bottom of anvil log to dry. Preparing to make banding for anvil log. Weather is raining nearly every day for past week. We have had 6-1/4 inches of rain in just 2-1/2 days. Total of around 9 inches for the week. Very high humidity. Ground was terribly dry so this rain is a very welcome relief. As rain clowds were developing, I moved everything inside in anticipation of heavy rain, so work is progressing with no delays. Forging the banding will be an interesting task. Bands are made from long bars (3/16" x 1-1/2" stock) and require saw-horses and/or work rests to support both ends of the bar. There is limited space available so fitting two each sawhorses and work rests at the air hammer, anvil, and forge will create an awkward workspace.
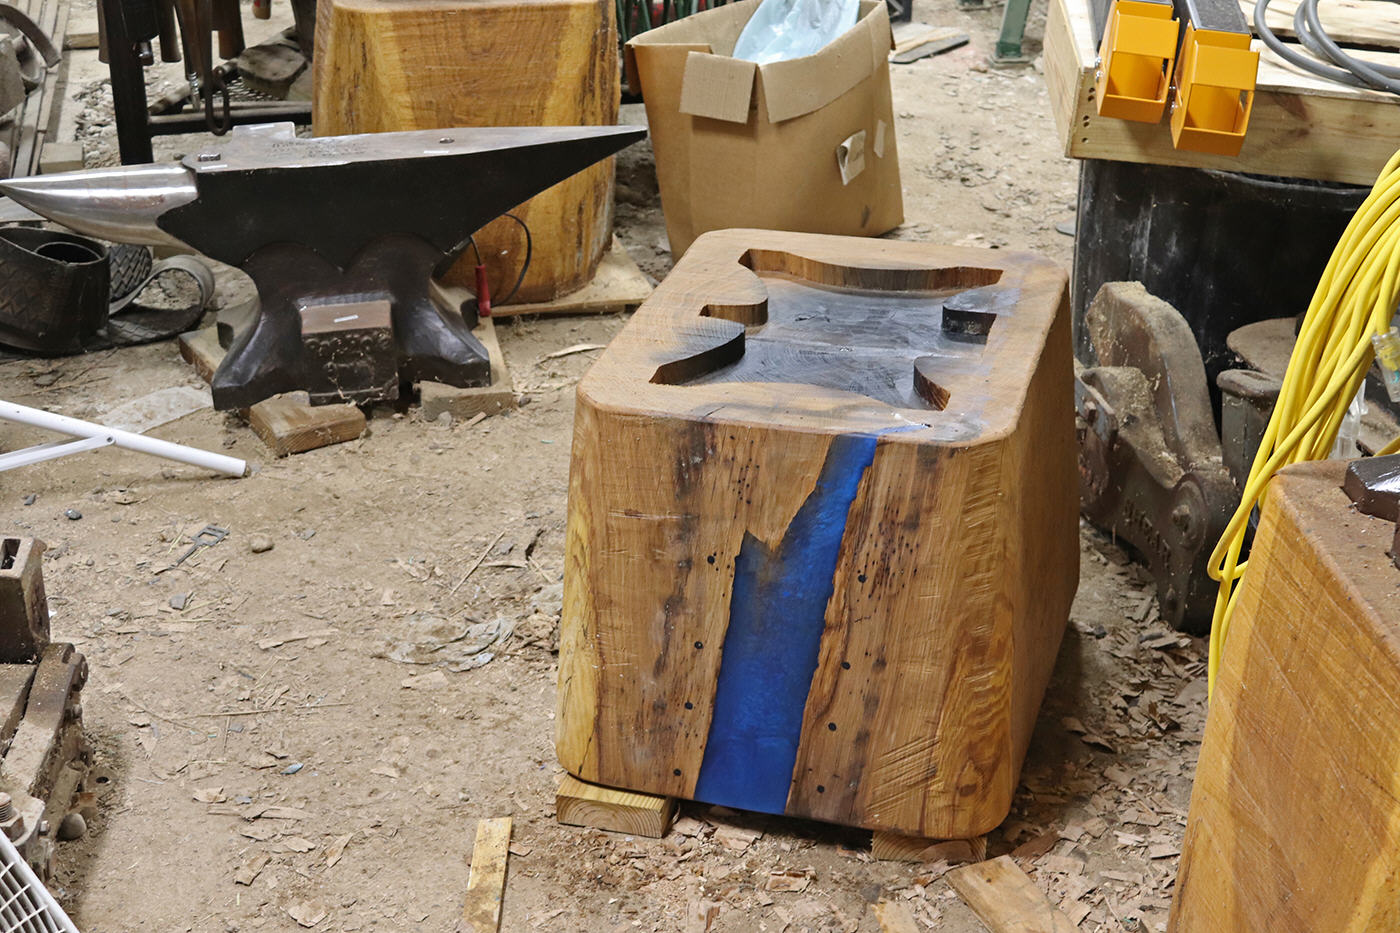

 August
3rd, 2023. Shop update. In between farm repairs and maintenance
and a tremendous work schedule at another location lasting from June right
through July (and contining through the first part of this month), I did manage to get a new and better anvil log stand started for the 460
lbs anvil. Photo at far right show this latest log stand nearing completion. The
new log came from a white oak tree that was partially dead and partly living. I
chose blue glitter to color the epoxy that was used to fill the large crack on
one side of the anvil log. There is no hiding the gap in the side of the log, so
the idea here was to turn this flaw into an attractive feature.
August
3rd, 2023. Shop update. In between farm repairs and maintenance
and a tremendous work schedule at another location lasting from June right
through July (and contining through the first part of this month), I did manage to get a new and better anvil log stand started for the 460
lbs anvil. Photo at far right show this latest log stand nearing completion. The
new log came from a white oak tree that was partially dead and partly living. I
chose blue glitter to color the epoxy that was used to fill the large crack on
one side of the anvil log. There is no hiding the gap in the side of the log, so
the idea here was to turn this flaw into an attractive feature.
A major delay in finishing this log was caused by delamination around one side of the log as it began drying out. Initially this resulted in a huge broken gap on one side of the log, but as it dried out, this gap closed in a bit. And then another huge crack began developing in the center of the log which threatened to split the log completely in half. These cracks needed to be stabilized to save the log. So I filled both cracks with epoxy. The center crack was easily dammed up on the bottom of the log and filled with clear epoxy from the top. But the huge delamination on the side of the log required a major effort to dam and fill. The side crack was first cut away to open up the damaged area, and dammed with window caulking and tape. This turned into a disaster. The epoxy wets the area that the caulking sticks to and bursts through the dammed area - making a huge mess as the epoxy floods down the sides of the log and glueing the log to floor. A strong mechanical dam is needed to seal the epoxy in place. This turned out to be a slow-curing epoxy so I had to wait 3 days for it to cure before making another attempt.
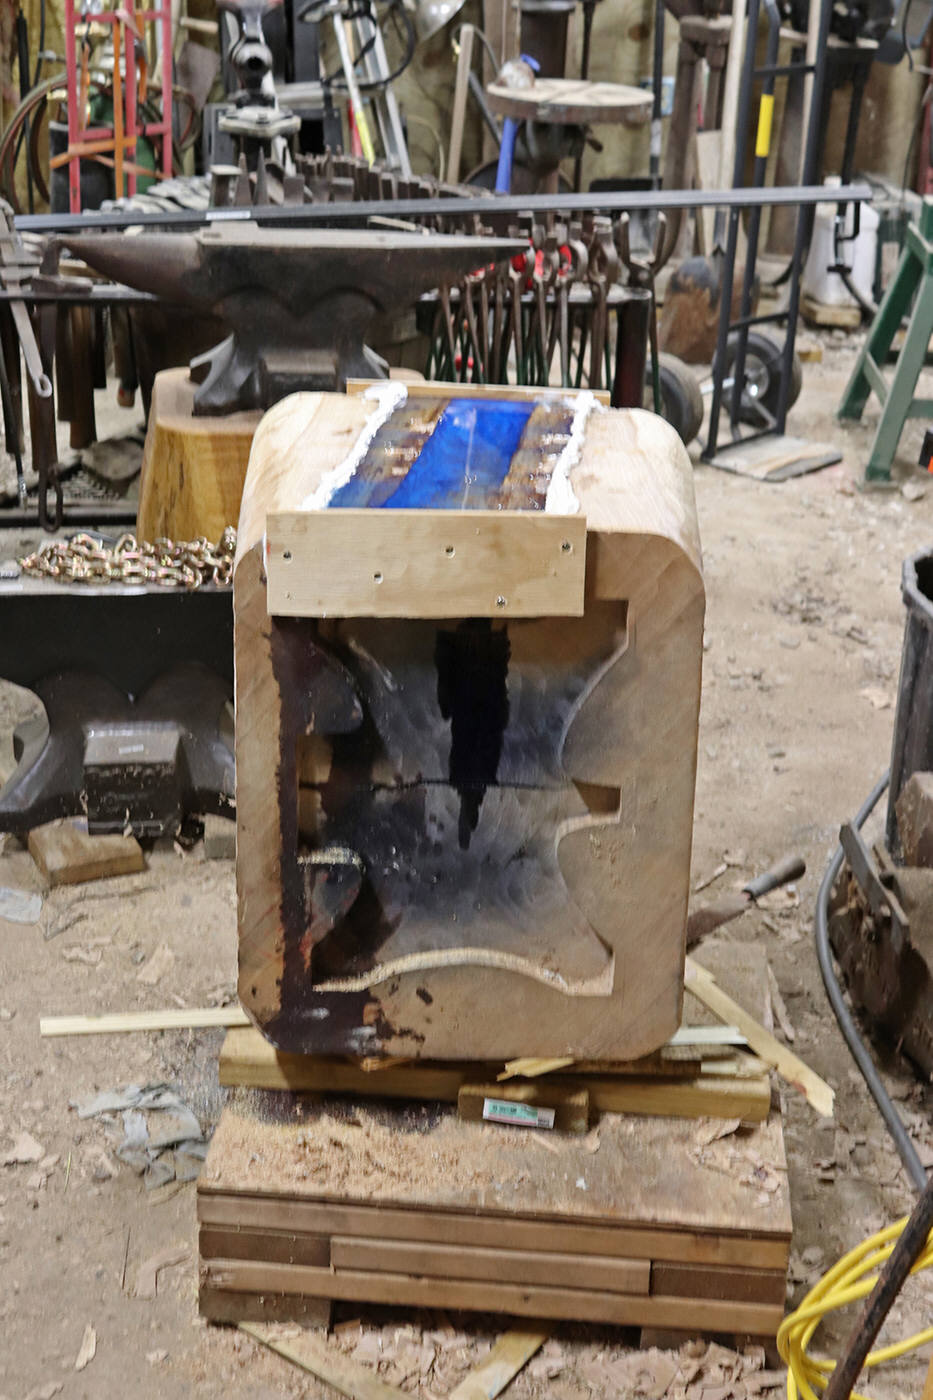
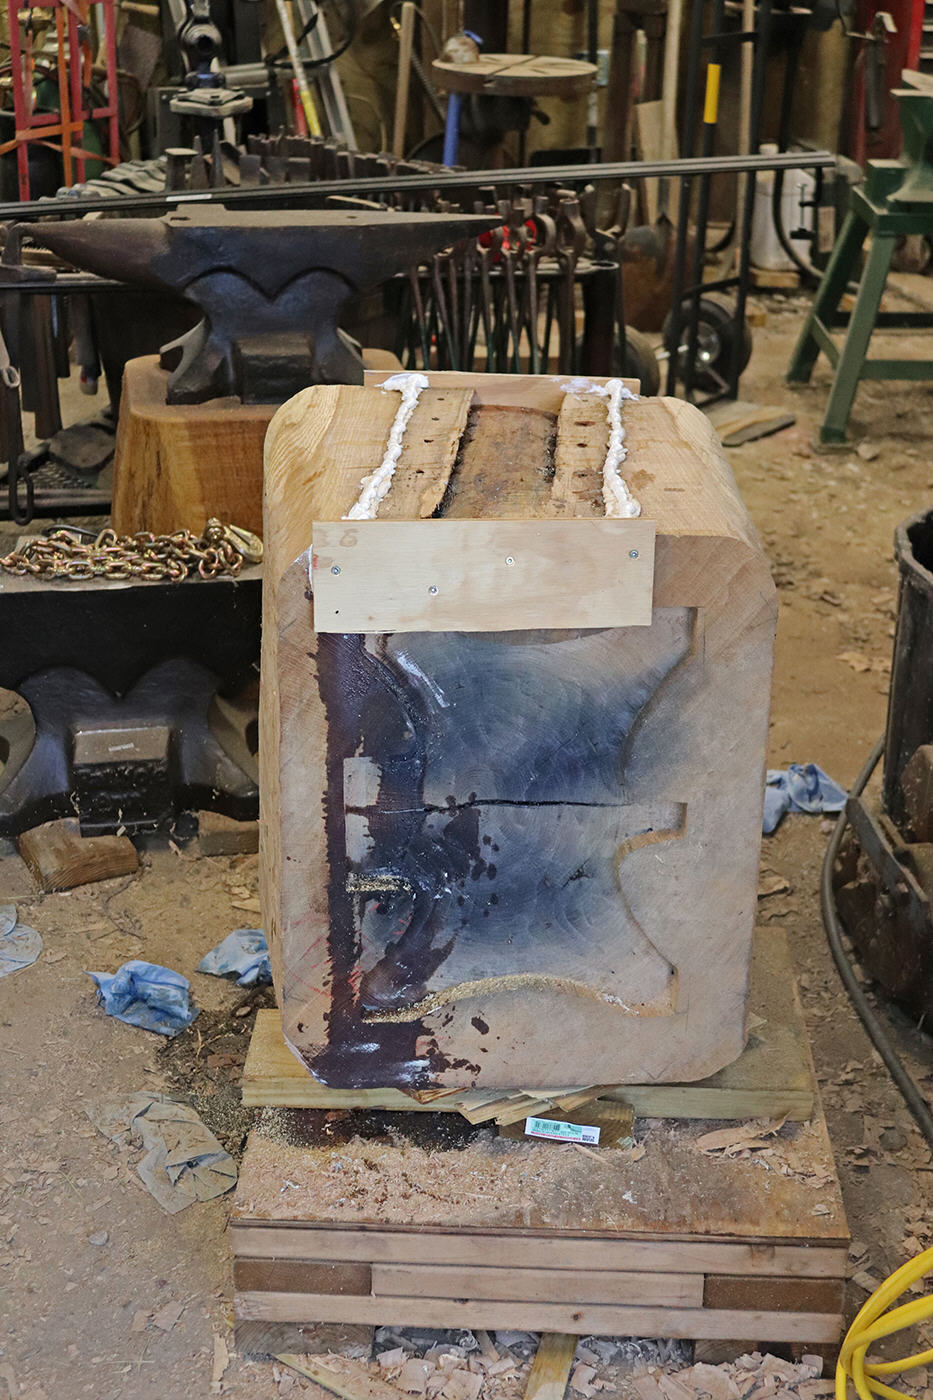 After
the first epoxy fiasco attempt, I cut up some pieces of plywood, taped the epoxy
side of the plywood to make easy separation later, sealed around the fill-area
with window caulking again, and screwed the plywood down tight over the sealant.
After waiting for the caulking to cure for at least a day, the second pour was
successful. The blue glitter filling was a great color for this project. My only
mistake was in using too much. It takes only a pinch of glitter to make the
epoxy completely opaque. I wanted a semi-transparent bluish epoxy finish, but
after using a quarter teaspoon, the result is opaque. Despite this mistake, the
color turned out to be nice enough for this task. Note for next time - just a
pinch is all that is needed.
After
the first epoxy fiasco attempt, I cut up some pieces of plywood, taped the epoxy
side of the plywood to make easy separation later, sealed around the fill-area
with window caulking again, and screwed the plywood down tight over the sealant.
After waiting for the caulking to cure for at least a day, the second pour was
successful. The blue glitter filling was a great color for this project. My only
mistake was in using too much. It takes only a pinch of glitter to make the
epoxy completely opaque. I wanted a semi-transparent bluish epoxy finish, but
after using a quarter teaspoon, the result is opaque. Despite this mistake, the
color turned out to be nice enough for this task. Note for next time - just a
pinch is all that is needed.
You can see the second pour in the photos (below right). The very dark black streaks on the left side are the remains of the epoxy that broke out and spilled down the sides of the log. The dark stains in the center of the log indicate hardware grew inside this tree. I hit multiple nails while cutting with a chain saw and while machining with router. It was necessary to finish cutting through the nails. After the slabs were cut off, the nails were easy to chip out with a chisel.
The sides of the log are both chain saw cut and hand hewn with hammer and chisel. Nothing is flat so it was necessary to sand the epoxy until level with the surrounding wood. The epoxy was then scrubbed with a treated 3-M pad that was made for polishing, and then buffed with a cotton disk and polishing compound.
As of today, the log has already been given a second coat of water sealant and protectant. This requires at least 48 hours to dry. The bottom needs the same treatment twice. This anvil log will be ready for banding in 5 days.
Everything delays were terribly this past month. Pardon my discombabulated grammar here but literally everything you can think of, was taking me away from getting any work done. I was called in for several very large projects and unable to get any work done in the shop except for working on the replacement anvil stump shown in the photos here. Talking with another guy that has a line on some stone for constructing the new forge. Buying concrete block for the foundation. researching and looking at different types of materials. And all this while working some huge projects for the past two months at another location. Prepping the shop for forge construction comes next week.
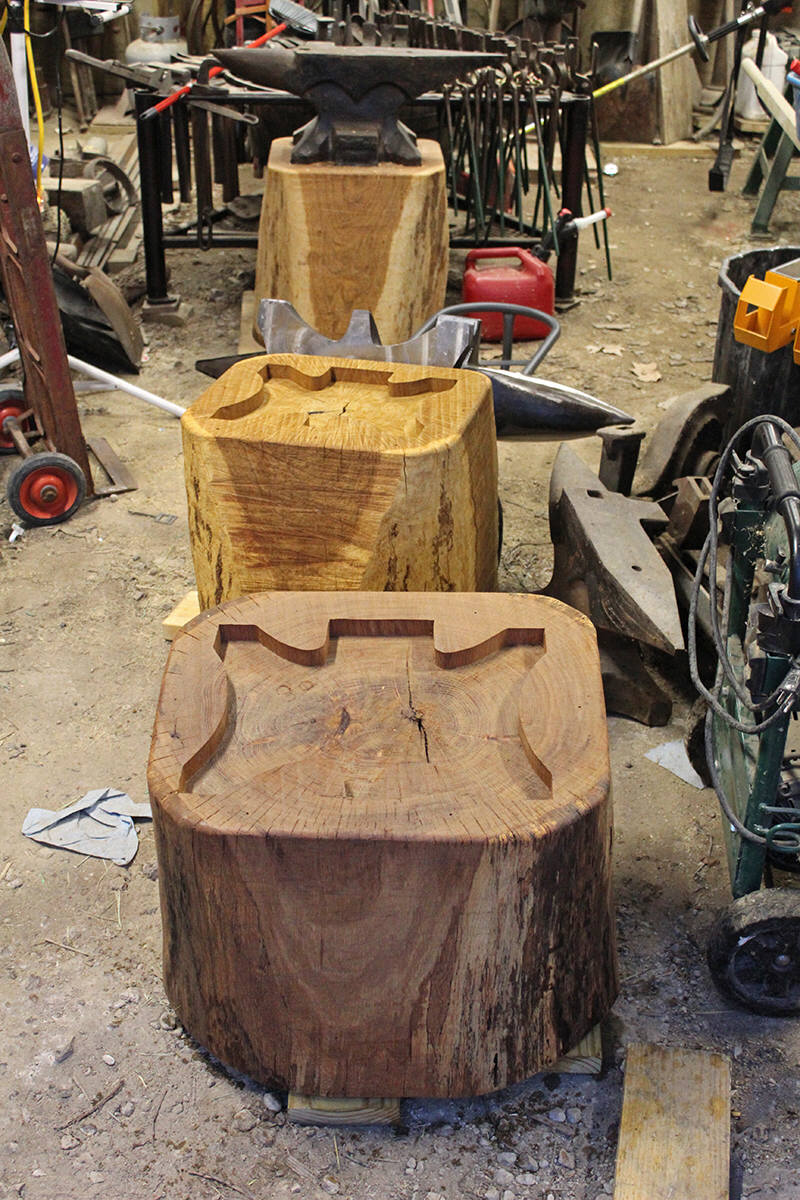
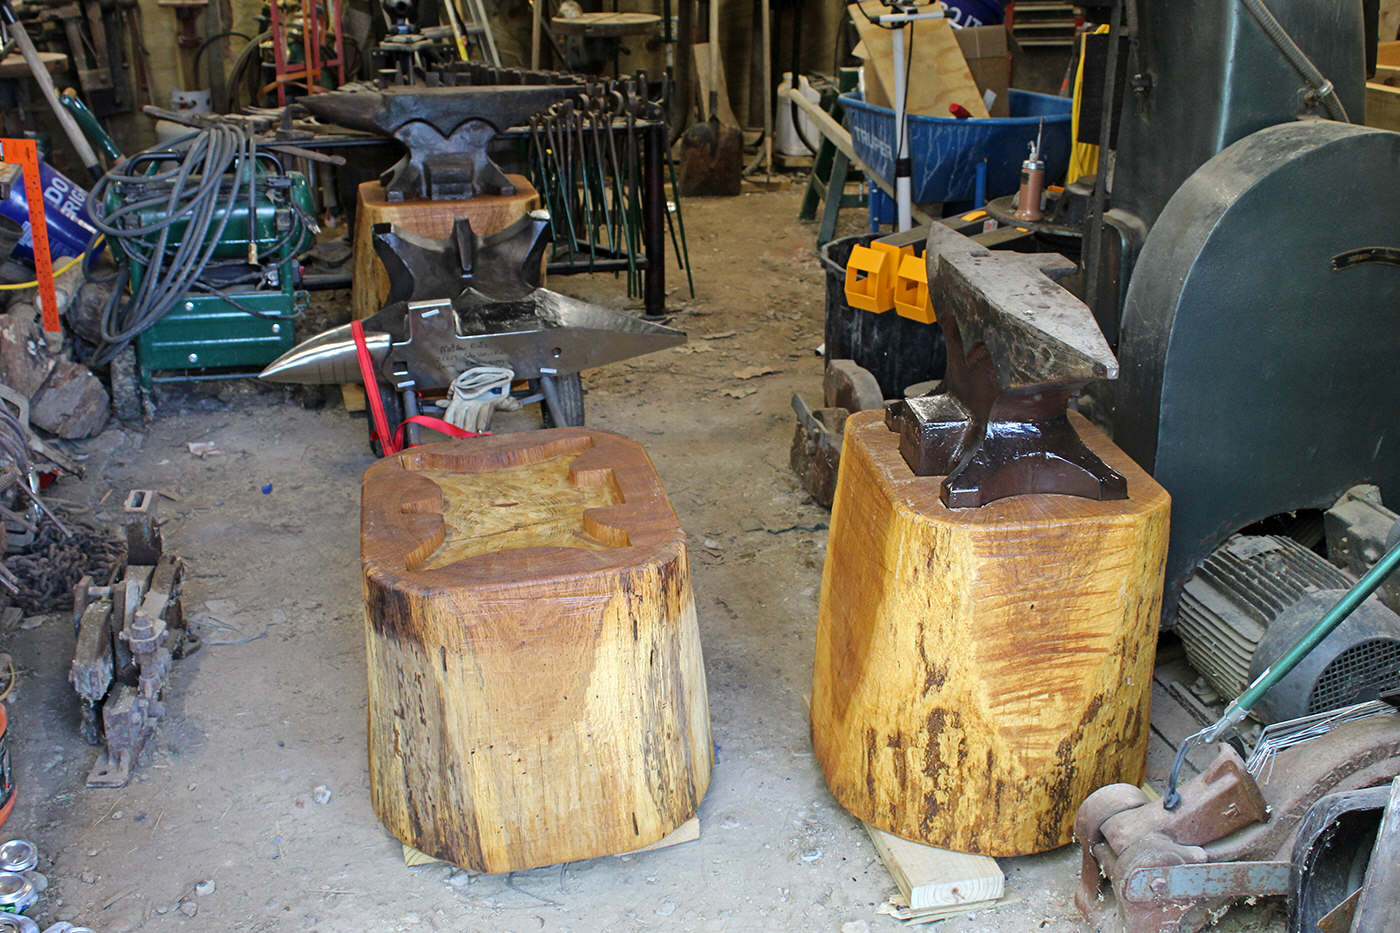
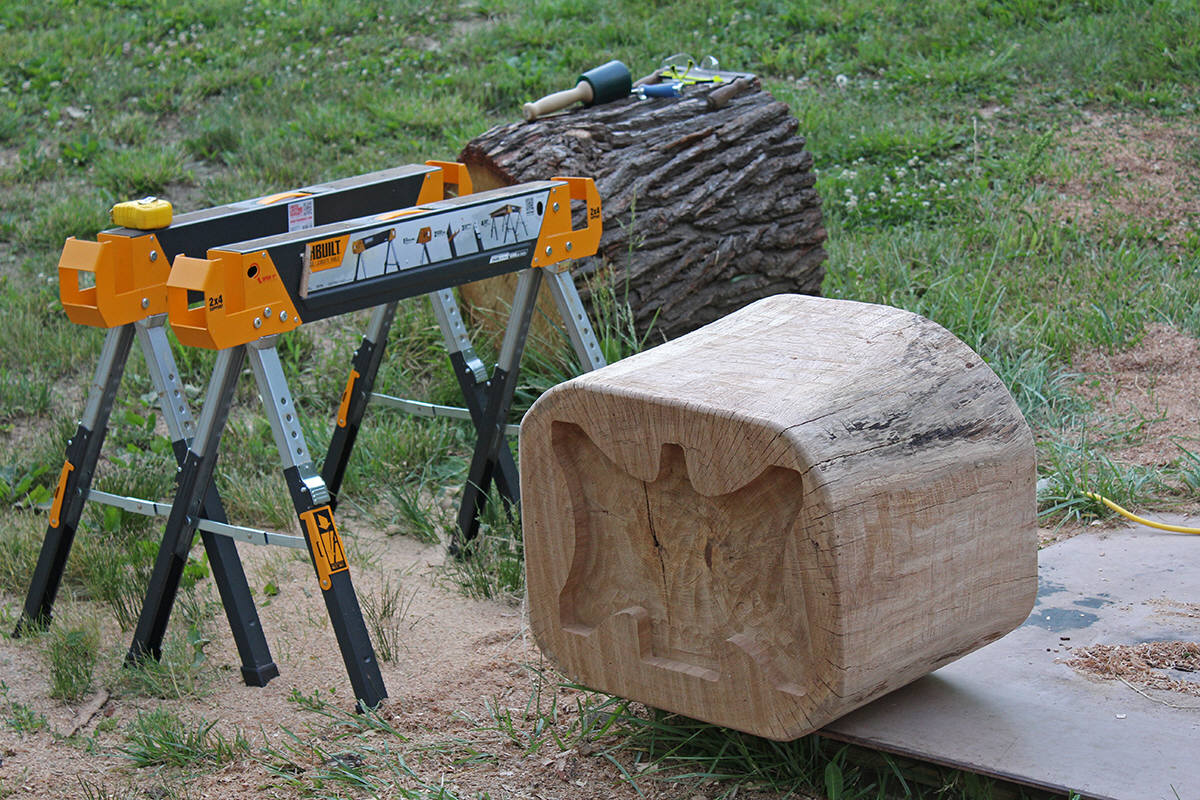 July
2nd, 2023. Shop update. Got
another larger log (30" by 32" diameter slightly oval shaped) from a friend and
this one is much better for a 460 lbs. anvil. The last anvil log stand was a bit
too small for the new anvil. So one more round of machining a new anvil log.
Weather delays. Rained out 3 days. And more work around the farm. Machining of a
new version of this anvil log is now more than 50% complete. Another 4-5 hours
of woodwork yet to be done. The reason it takes so long is because after the
machining is done I finish the sides with drawknife, mallet, and chisel.
July
2nd, 2023. Shop update. Got
another larger log (30" by 32" diameter slightly oval shaped) from a friend and
this one is much better for a 460 lbs. anvil. The last anvil log stand was a bit
too small for the new anvil. So one more round of machining a new anvil log.
Weather delays. Rained out 3 days. And more work around the farm. Machining of a
new version of this anvil log is now more than 50% complete. Another 4-5 hours
of woodwork yet to be done. The reason it takes so long is because after the
machining is done I finish the sides with drawknife, mallet, and chisel.
Giving away this log. The log (photos at right) will be given away to somebody that needs a good anvil stand log. The log was intended to finish at an overall anvil height of 31" for use with a 460 lbs Fontanini anvil. Log height is 17-5/8". Anvil depression in the top of the log stand was machined 1-1/8" deep. This allowed the anvil to sit down in a 5/8" depth well, with 1/2" depth layer of sand underneath to deaden noise. If a new owner wishes to use a different brand or size of anvil, this log can be machined flat again to 16-1/2" total height. Log is made of White Oak and was partically treated, beginning with two coats of Cabot all around, and with Thompson's Waterseal on bottom surface. Top surface was coated with Tung Oil before work was stopped. There is nothing actually wrong with the log, I just don't like the finished product and I expect to do a better job with the next one. So I will give this one away to anyone that wants it.
How to measure for correct height of an anvil. While standing next to a table or flat surface, wearing work shoes that you normally wear while working, stand up straight with arm relaxed and straight down at your side, with fingers curled loosely as though holding a hammer. Measure from the second finger joint knuckles to the floor. This is ideal total working height of the top surface of the anvil.
To verify this measurement, set up a temporary work surface at this measured height. An adustable drill press table works great for this task. Select the main hammer that you work with the most. Imagine that you are standing beside your anvil and holding a hammer with the face of the hammer resting flat and level on the anvil. While standing straight up with arm and hand straight at your side, (with hammer in hand) the hammer face should rest perfectly flat and level on the anvil surface and the hammer handle should be horizonal and level also. Both of these methods will give the same exact measurement.
 June
12th, 2023 re-edited. Shop update.
Two new anvils have been mounted on new log stands. A third anvil waits for one
more log stand to be finished. Photos at right. I included
closeups of only one anvil, but there are two finished 250 lbs. setups and both
are identical. The large anvil log stand will also be getting iron banding and
custom ornamental nails to prevent the edges breaking out along with three more
coats of sealant. This wasn't part of the original plan, but I think the result
will be quite spectacular.So there will be another two weeks before I
can finish the last one. I have yard work and repair work to take care of so all
work in the shop will stop for a week. When that is finished, I will be back in
the shop to finish the third anvil log stand.
June
12th, 2023 re-edited. Shop update.
Two new anvils have been mounted on new log stands. A third anvil waits for one
more log stand to be finished. Photos at right. I included
closeups of only one anvil, but there are two finished 250 lbs. setups and both
are identical. The large anvil log stand will also be getting iron banding and
custom ornamental nails to prevent the edges breaking out along with three more
coats of sealant. This wasn't part of the original plan, but I think the result
will be quite spectacular.So there will be another two weeks before I
can finish the last one. I have yard work and repair work to take care of so all
work in the shop will stop for a week. When that is finished, I will be back in
the shop to finish the third anvil log stand.
There is a good reason for everything taking so long. From this point forward, I am literally making three of everything, and thus everything now takes three times longer to finish. Three anvils, three forges, three sets of tools, three sets of vise stands, etc.
Staggered completion dates. There is around a 5-day interval between starting dates for each of the log stands. The anvil log stand in right side foreground of the first photo received its final sealant coating last week but the anvil needed repainting after sitting on the dirty shop floor for over a year. This second anvil was mounted on its log stand yesterday. In the second photo is a close up of how the anvils look after the log stands are finished.
Dirt-covered anvils. One of the hazards of building renovation is the tremendous amount of sawdust and other kinds of dust that fall and cover everything in the work area. And to complicate that further, I still have a damp floor in the shop that raises humidity to very high levels and causes all steel surfaces to rust. So to protect the anvil surfaces from rust for the long term, I coated unprotected surfaces with bees wax and linseed oil. This stuff is sticky, and construction dust sticks to it like glue. That is why the anvils are so dirty - construction dust and saw dust covered this sticky stuff on the anvils while I worked to rebuild the shop. This should be easy to clean up after the floor is fixed. The floor will get fixed after the new forges are built.
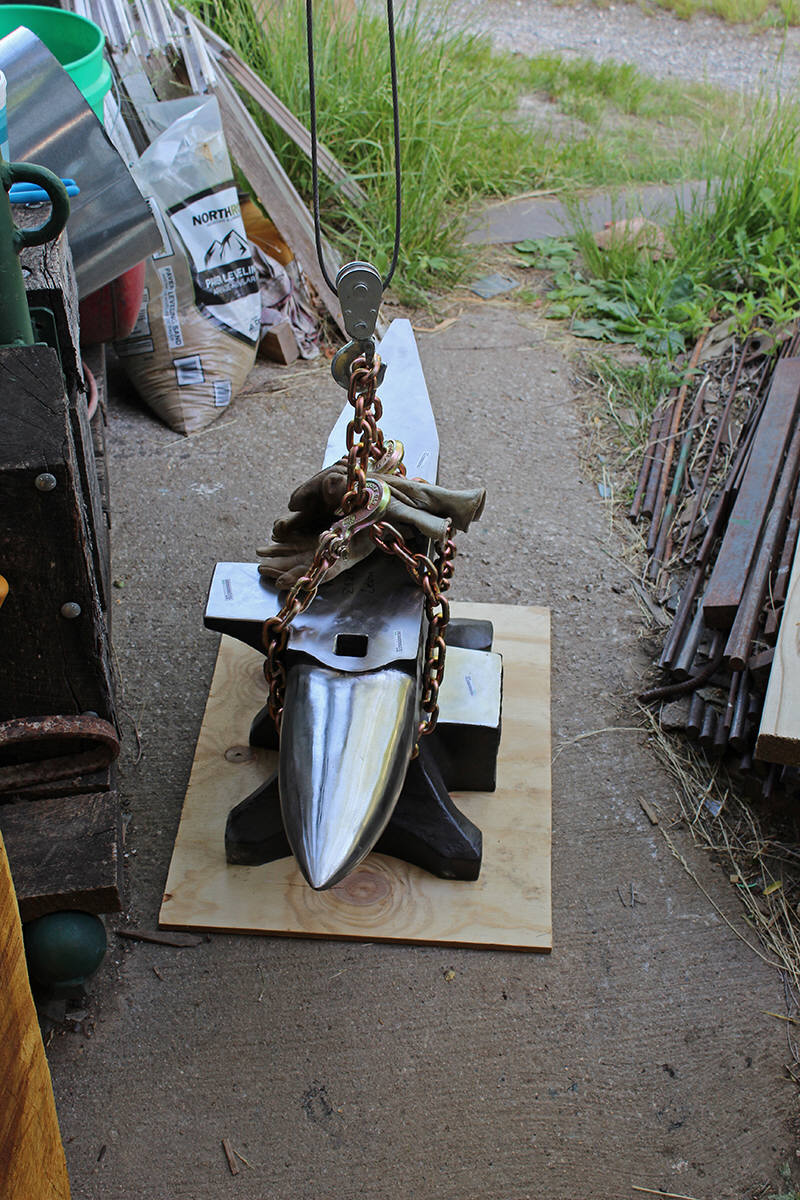
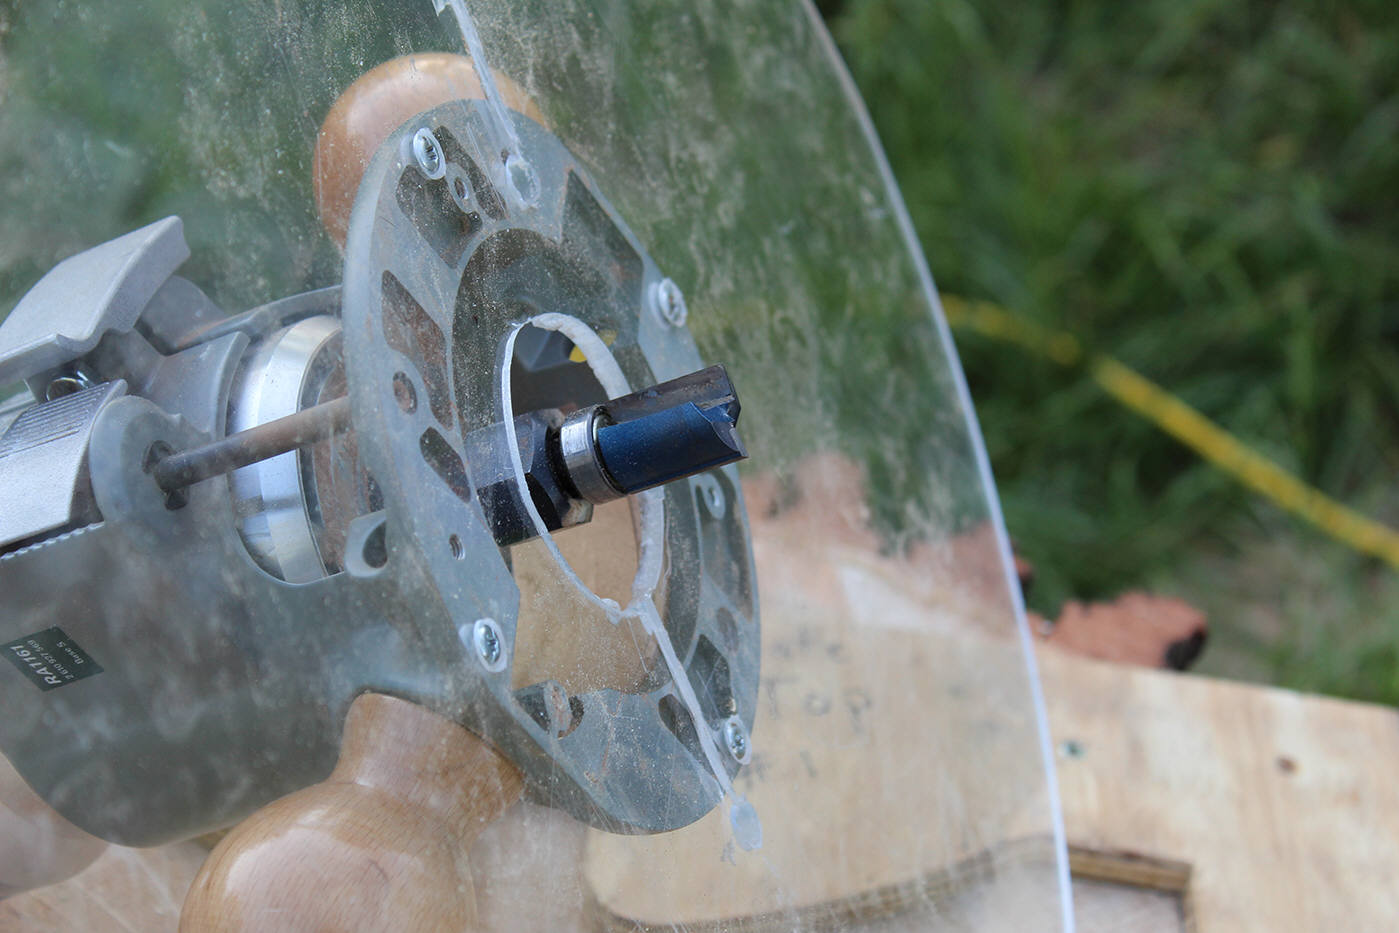
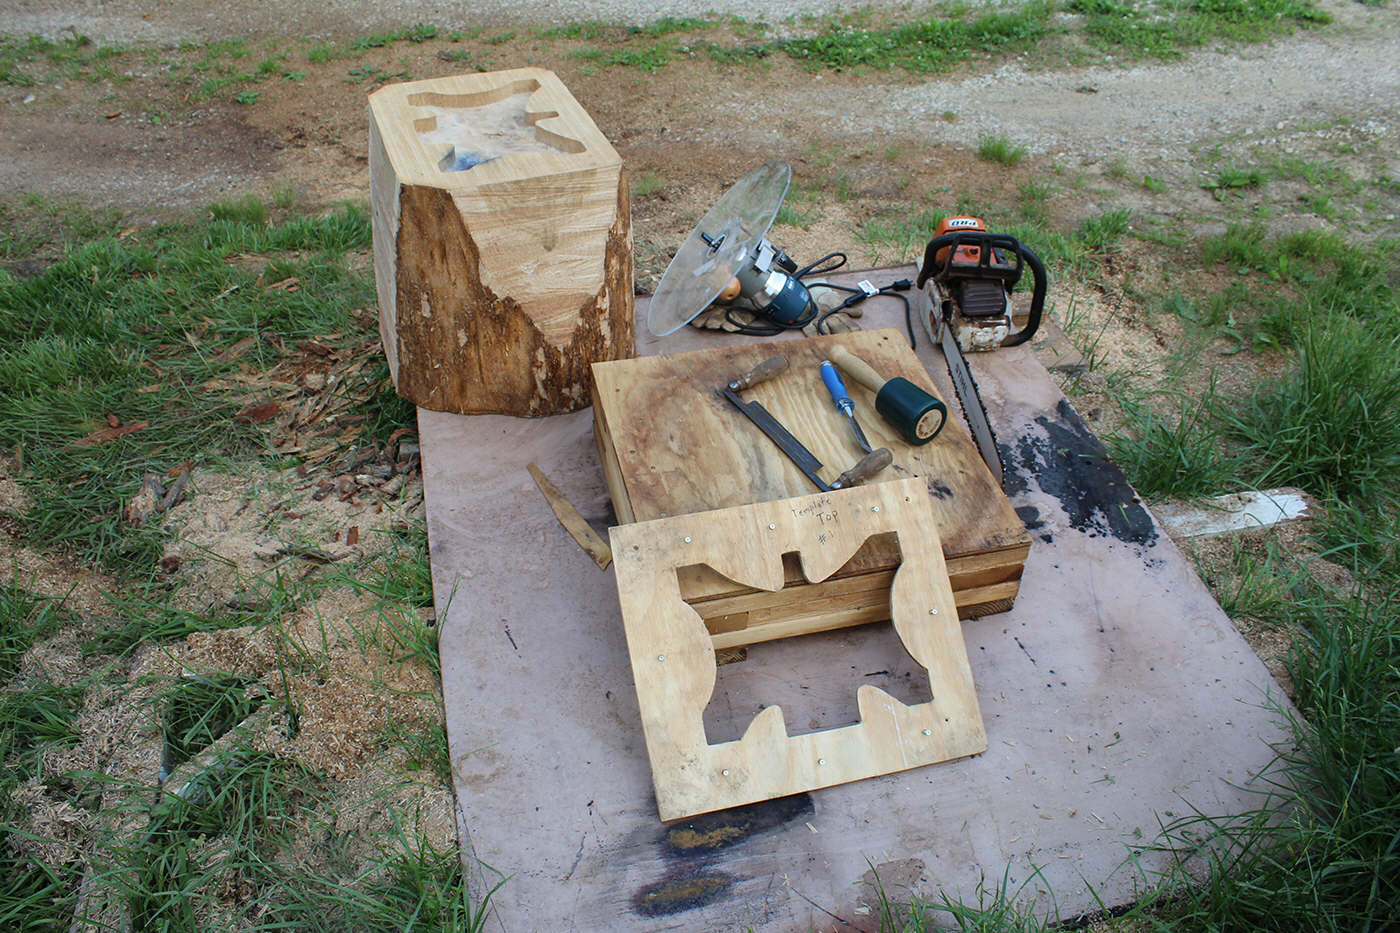

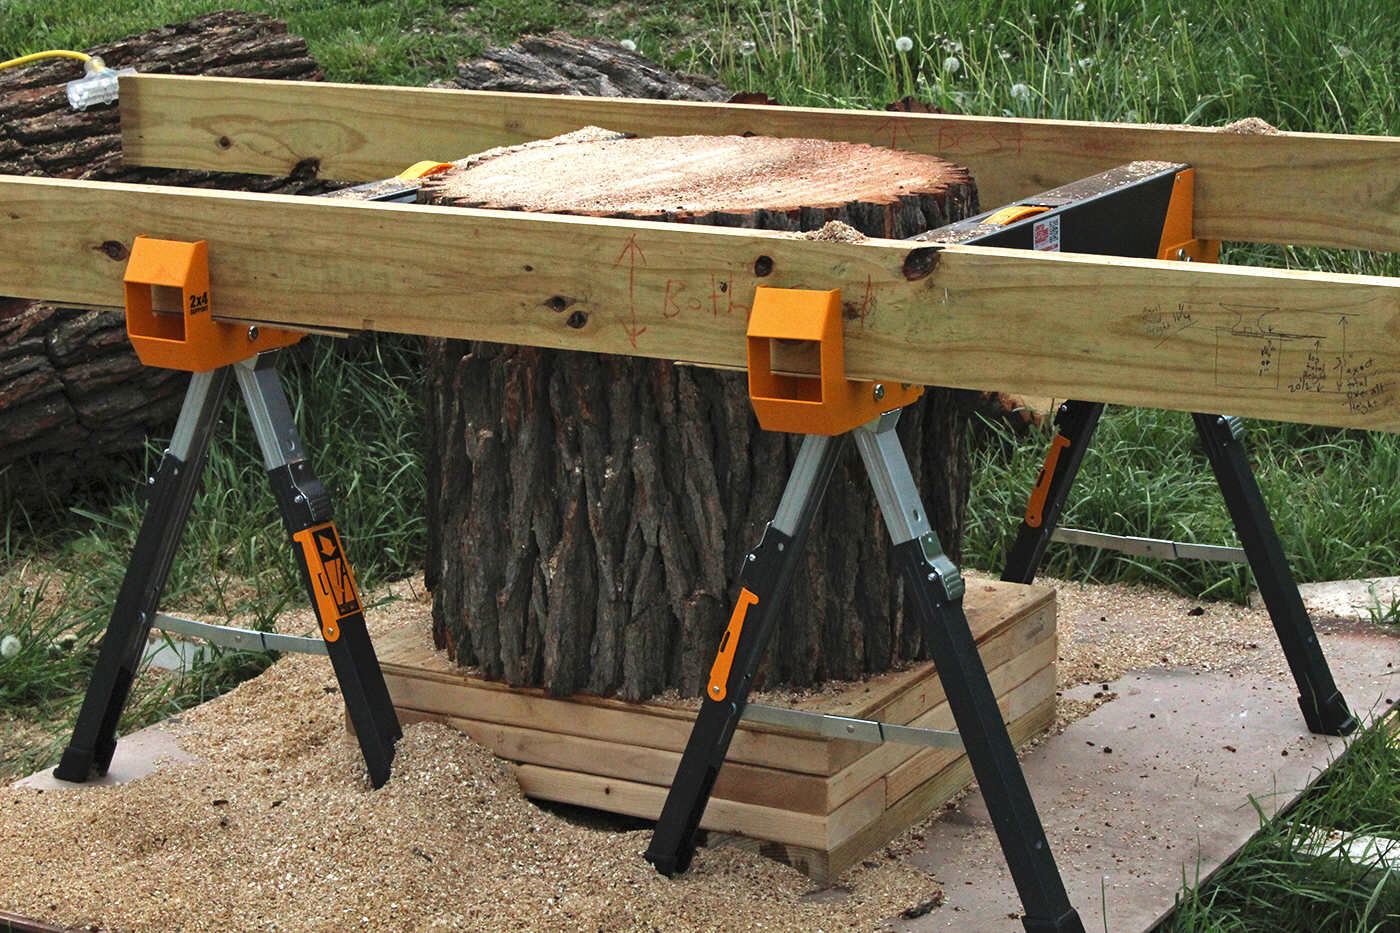 Running the router sled. This series of
photos shows the work that went
into making log stands like these. I wanted anvil mounts there are perfectly level and flat, and I
didn't trust that I could do this accurately enough freehand with a chainsaw.
The tree service that gave me these logs - cut them any way that can to get the
trees out of the customer's yards. This means cuts are not straight. So the logs
must be jacked up and shimmed in place to be as straight up as possible. The
router and sled will mill the top surface flat and level. This flat new surface
is then placed down on a flat level platform and the opposite end can be
machined after simply setting up sled frame level with the platform.
Running the router sled. This series of
photos shows the work that went
into making log stands like these. I wanted anvil mounts there are perfectly level and flat, and I
didn't trust that I could do this accurately enough freehand with a chainsaw.
The tree service that gave me these logs - cut them any way that can to get the
trees out of the customer's yards. This means cuts are not straight. So the logs
must be jacked up and shimmed in place to be as straight up as possible. The
router and sled will mill the top surface flat and level. This flat new surface
is then placed down on a flat level platform and the opposite end can be
machined after simply setting up sled frame level with the platform.
But there is a a problem. I bought commercially made steel saw horses with adjustable legs. The saw horses legs can be adjusted only so far down. After the initial end of each log was planed flat with the router and sled, the logs were then trimmed with a chain saw to get them closer to the finished length. After the half-finished logs are trimmed down close to their finished length, they are now too short to continue machining with the pair of saw horses that I am using for the router sled. The solution was to set up a steel plate that was made as level as possible, and them making a wooden platform to raise each of the logs up to a height that would work with the adjustable saw horses and router sled. What a misuse of time. I wish I had simply looked into a better way to achieve this with a chainsaw. However this work did result in logs that were perfectly flat and level after the ends were machined.
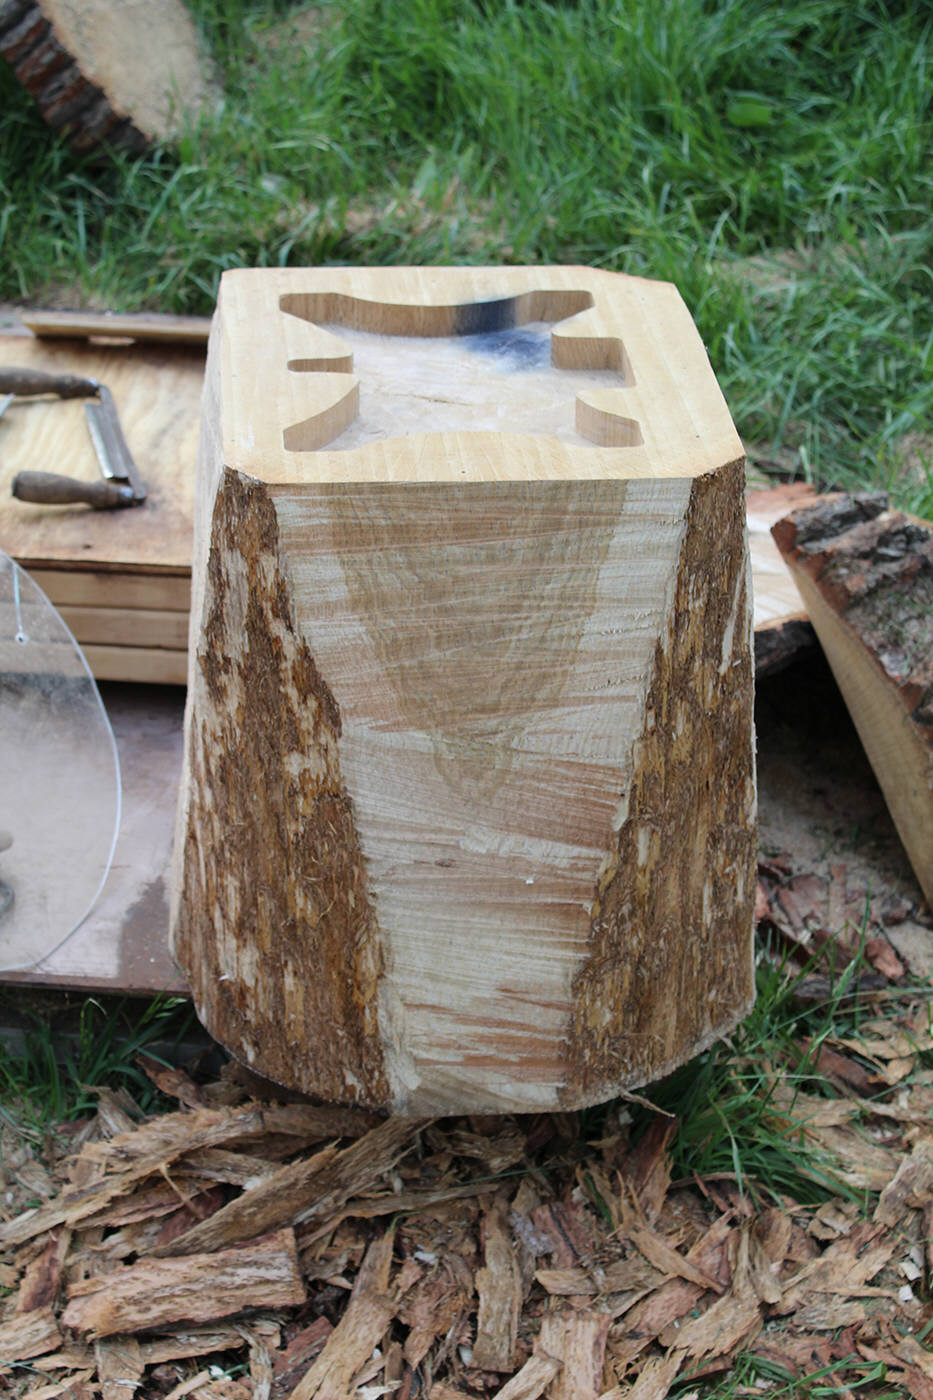
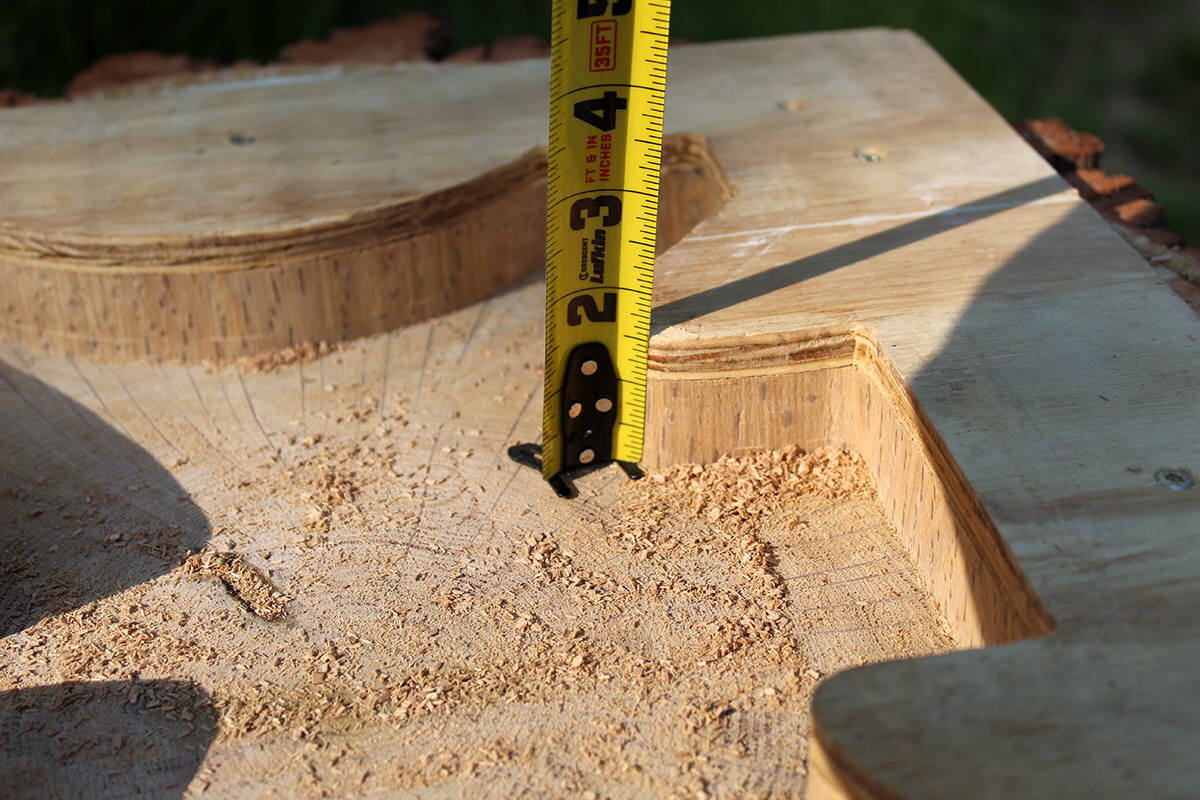

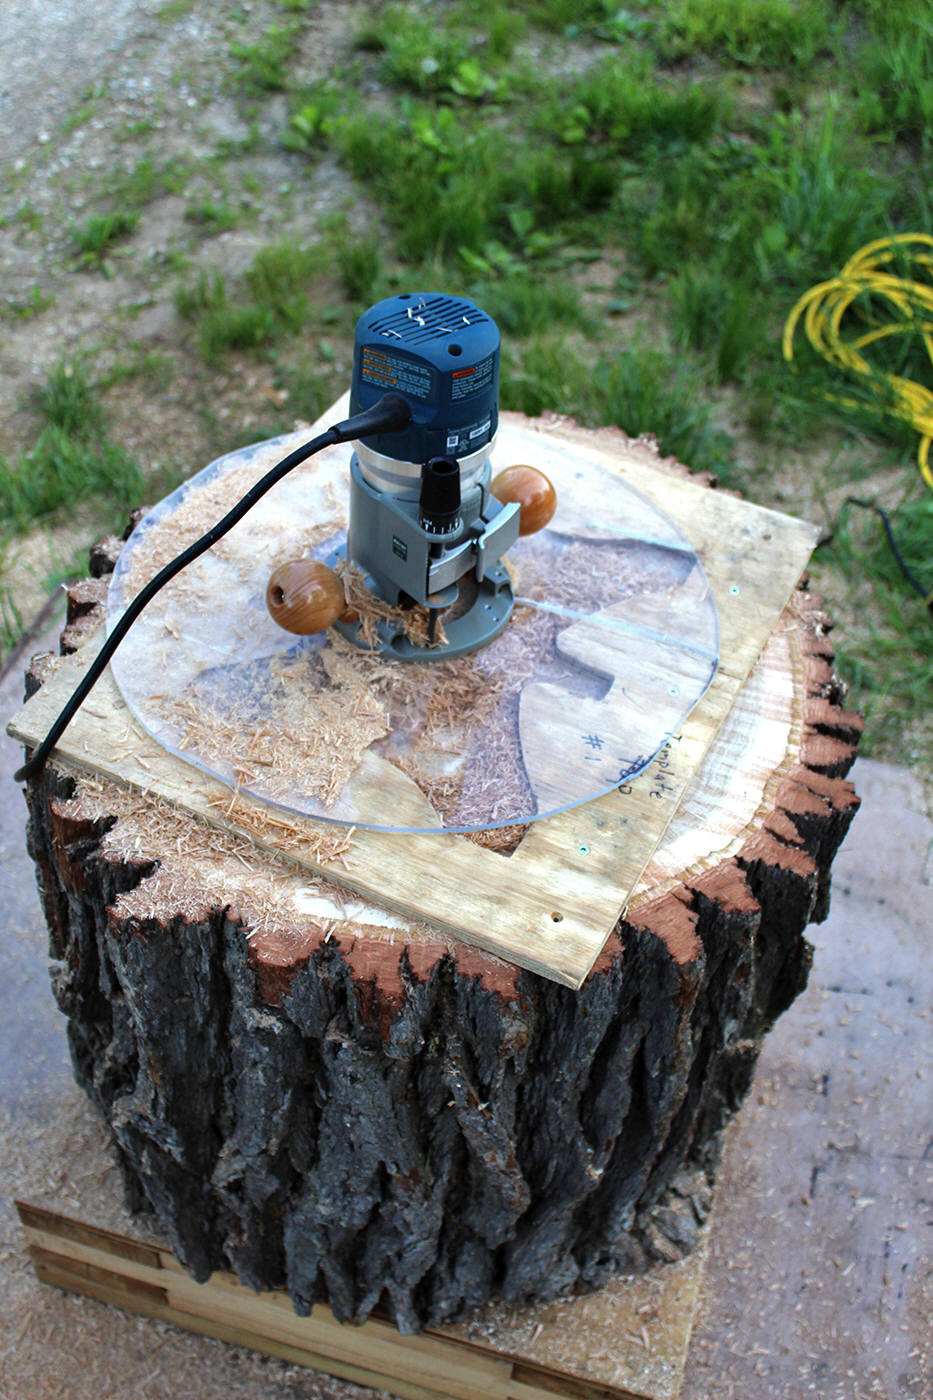
 Routering the anvil shape in top of the log. Sand deadens the high noise level of
steel anvils. I saw this in a YouTube video by another Fontanini anvil owner; he
routed this same depression in the top of his log stand and filled it half-full
of sand. The depression is cut roughly an inch or more deep, a half inch of sand
fills the bottom of the depression, and the anvil sets in the upper half inch or
so of the depression. The top surface of the sand would be level with the height
that anvil would have been mounted if the anvil had been instead mounted to a
plain wooden log. My anvils are set at 31". So to plan this style of anvil
mount, my log would be 5/8ths of an inch taller (longer) than I would normally
cut them. This is because my anvil would sit down 5/8ths of an inch in the
depression. And the depression would be cut an additional 1/2-inch deeper for a
1/2-inch fill of sand. In summary, my anvil logs would be cut 5/8ths of an inch
longer, and a 1-1/8ths inches deep depression would be routered in the top of
the log.
Routering the anvil shape in top of the log. Sand deadens the high noise level of
steel anvils. I saw this in a YouTube video by another Fontanini anvil owner; he
routed this same depression in the top of his log stand and filled it half-full
of sand. The depression is cut roughly an inch or more deep, a half inch of sand
fills the bottom of the depression, and the anvil sets in the upper half inch or
so of the depression. The top surface of the sand would be level with the height
that anvil would have been mounted if the anvil had been instead mounted to a
plain wooden log. My anvils are set at 31". So to plan this style of anvil
mount, my log would be 5/8ths of an inch taller (longer) than I would normally
cut them. This is because my anvil would sit down 5/8ths of an inch in the
depression. And the depression would be cut an additional 1/2-inch deeper for a
1/2-inch fill of sand. In summary, my anvil logs would be cut 5/8ths of an inch
longer, and a 1-1/8ths inches deep depression would be routered in the top of
the log.
Template routering. So to make a router template for this work, an anvil was placed on a piece of 1/2-inch plywood, and the bottom footprint of the anvil was traced on the plywood with a pencil. The plywood was then cut out and trimmed to make it easier to handle. The finished template was screwed to the top of the log. A special transparent router base plate was made from lexan plastic and attached to the router base. This clear base plate helps float the router on top of the hole in the template and allows the user to see the router work being done underneath. With this template and large transparent router plate, the work took only minutes to complete - and left a perfect smooth flat and level depression in the top of the anvil log. Router bits leave round corners. A carpenter's chisel and mallet were used to chip out the corner for the feet of the anvil and make the sqare so that the anvil would fit perfectly in the depression.
Tapered anvil blocks. The anvil blocks are tapered slightly to make it easier to work all around the anvils. If the anvil had simply be set on top of a log without tapering the sides, then taccess to and around the anvil would have been restricted. Tapering the sides allows larger/bulky work pieces to be worked on and around the anvil. First the anvil depressions were cut in the top of the log stands. The anvil depressions make it easy to see where the anvil will finally be mounted. The tapered slabs were then cut from the sides of the logs. And then the sides of the logs were cleaned up with a carpenter's chisel and mallet and drawknife. After the log was cleaned up, the top and bottom edges were rounded with a router and round-over bit. This left smooth rounded edges on top and bottom to reduce chances of the top or bottom edges splintering.

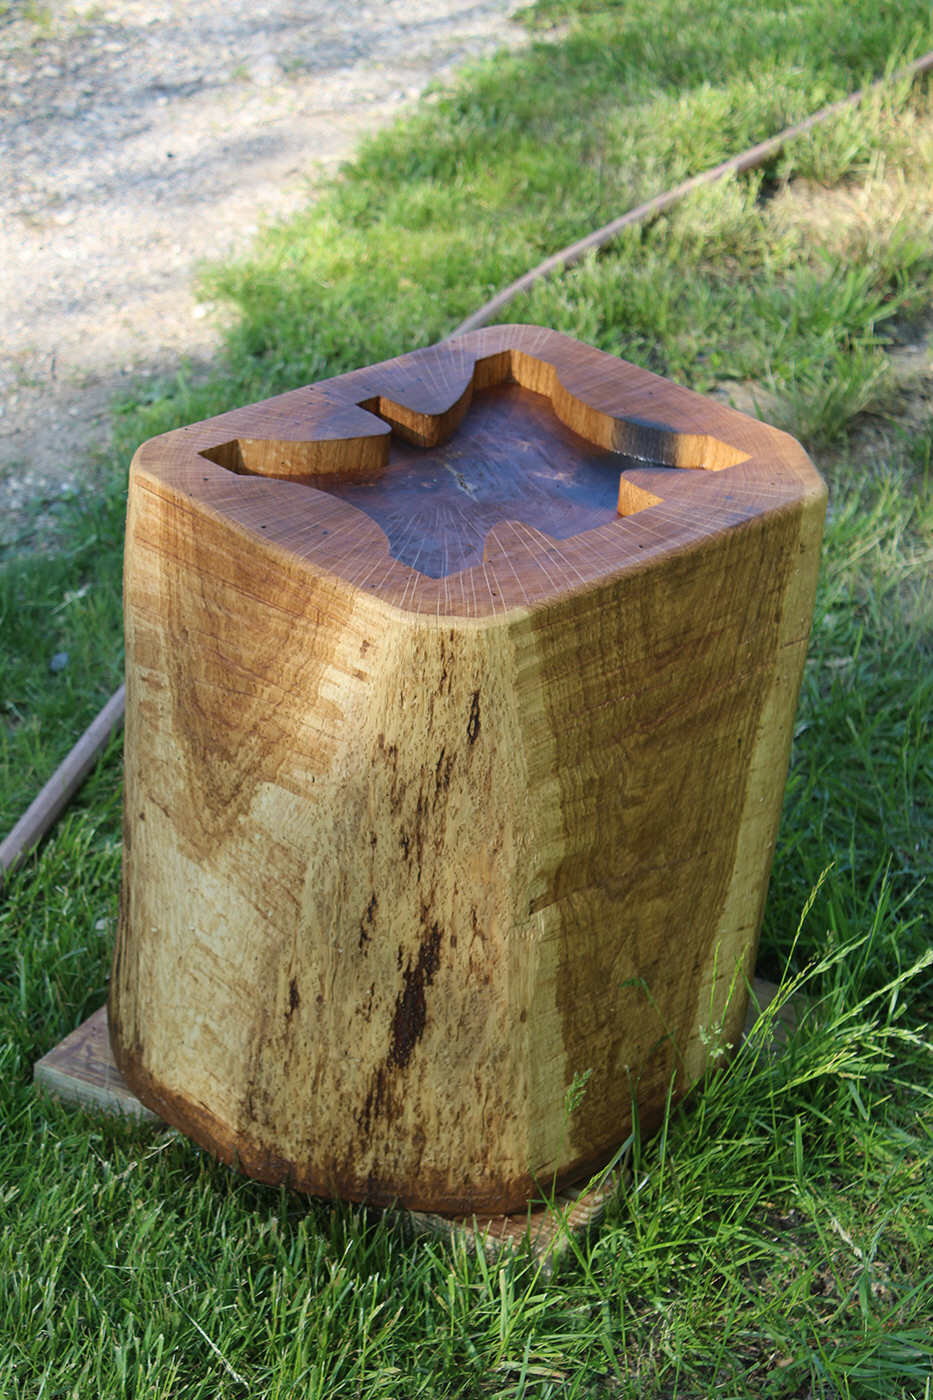
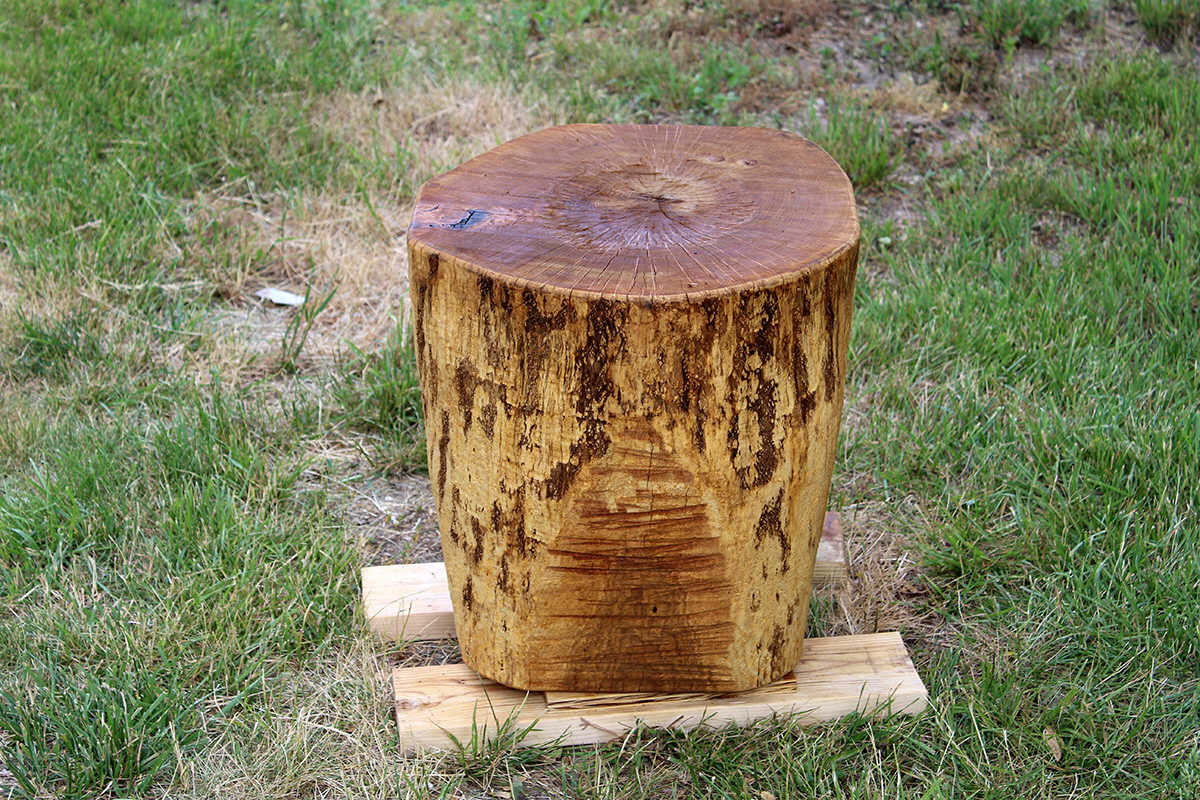 Ridiculous paint jobs. Multiple coating of wood preservatives and treatments
were applied all around the anvil log stands- top, sides, bottom, especially the
bottom. Cabot, Thompson's Waterseal, Boiled Linseed Oil, Tung Oil, Beez Wax
Turpentine Linseed Oil, whatever seemed to be the best for this task.
Ridiculous paint jobs. Multiple coating of wood preservatives and treatments
were applied all around the anvil log stands- top, sides, bottom, especially the
bottom. Cabot, Thompson's Waterseal, Boiled Linseed Oil, Tung Oil, Beez Wax
Turpentine Linseed Oil, whatever seemed to be the best for this task.
Sound deadening. The anvil depression on tops of the logs are filled with a 1/2-inch layer of sand and smoothed flat, anvils are carefully lowered onto the stands. A bed of sand absorbs the extremely loud ringing of the anvil. This will make it easier to talk to people while working.
Two down, one to go. Ok one anvil log left to finish. This one will take a while. The block was a little small for this anvil. This larger oak log was oval shaped, roughly 22" x 26". This was actually a bit small for an avil with a base of the 460 lbs. anvil. A 28" diamter round log would have been better. To reduce splintering or breaking out of the edges of the log, iron banding must be made to fit tightly around the top edge of the log. And it might as well be decorative. And the nails too. Can't hide the nails, so they might as well be flower heads. This will take a few days to make.
And I am out of the shop for a week again. There are outdoor repairs and yardwork that urgently needs done. So I am out of the shop for another week.
And yuck Next up is moving time. The floor space will need to be cleared to make room for building a new stone forge. In the photo with the anvil, you can see a ladder, drill press, and other equipment leaning up against the back wall. All of this stuff must be moved out of here so that the floor can be torn out and a new forge foundation built in its place. So there is still quite a bit of work to be done before the floor demolition can begin.
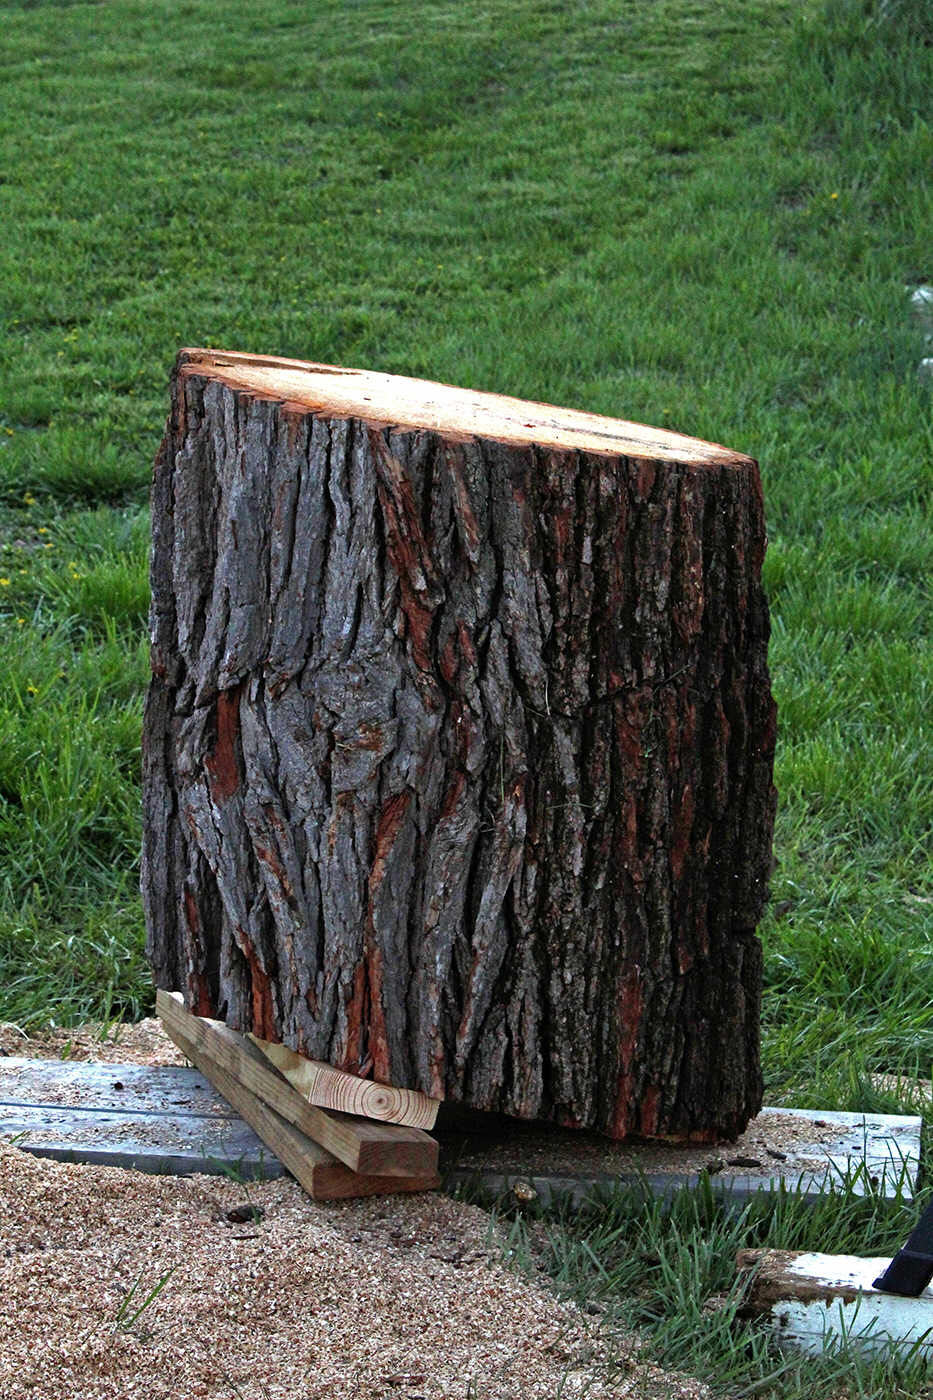
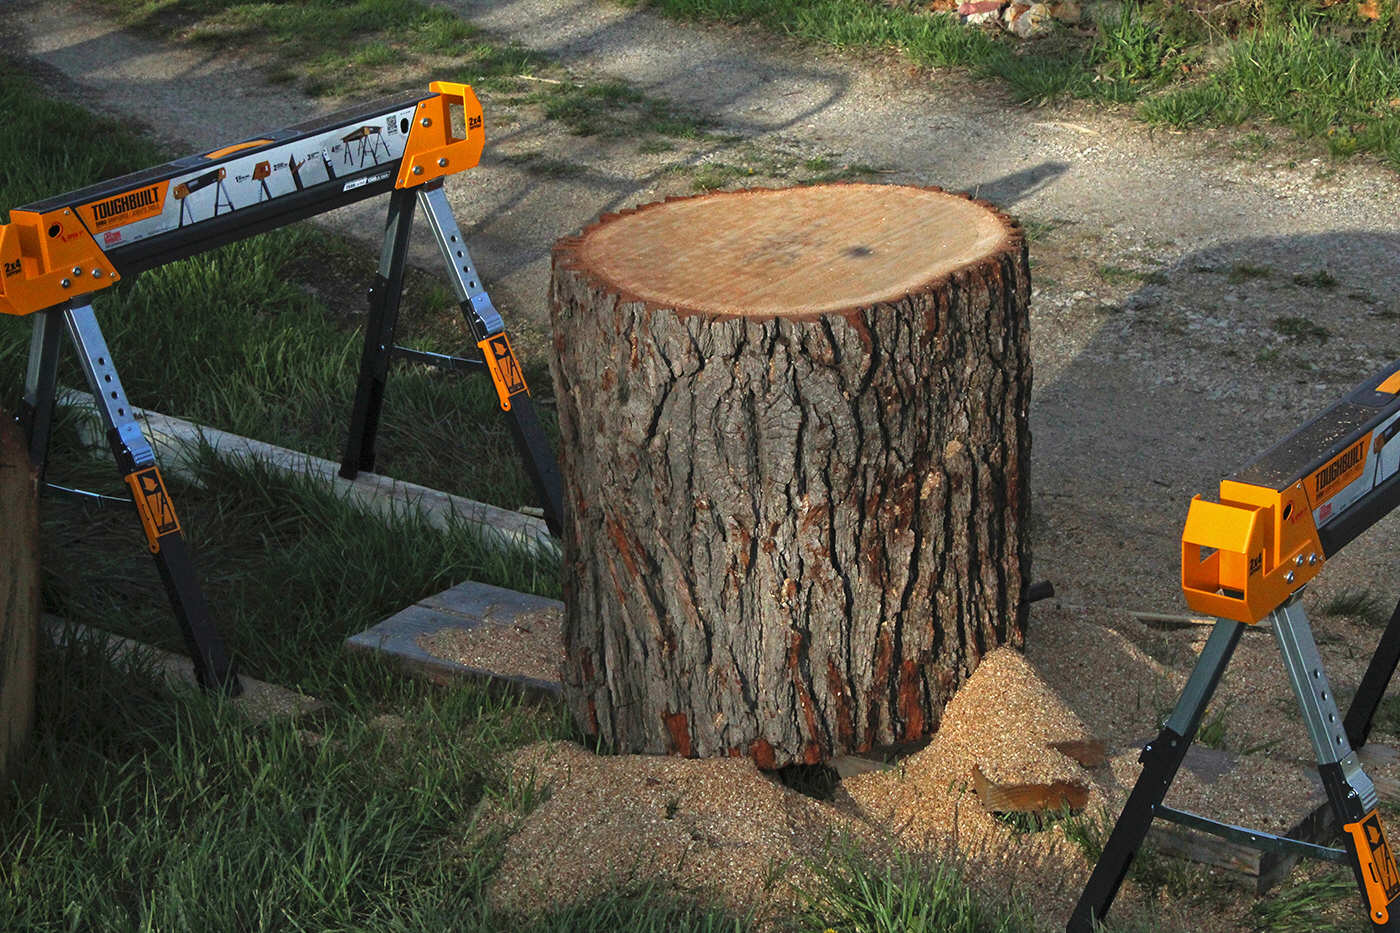
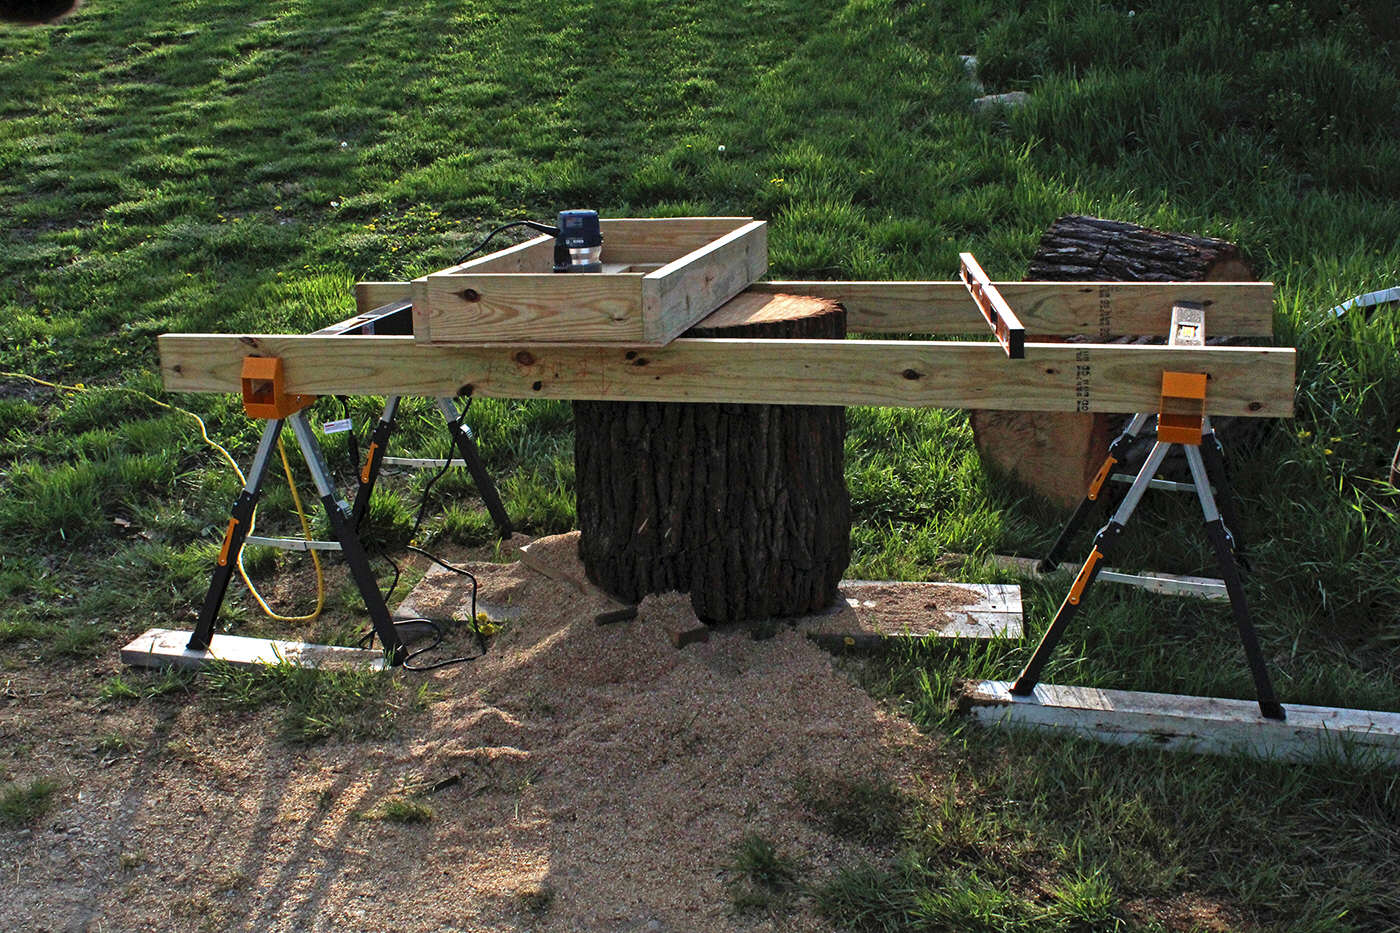
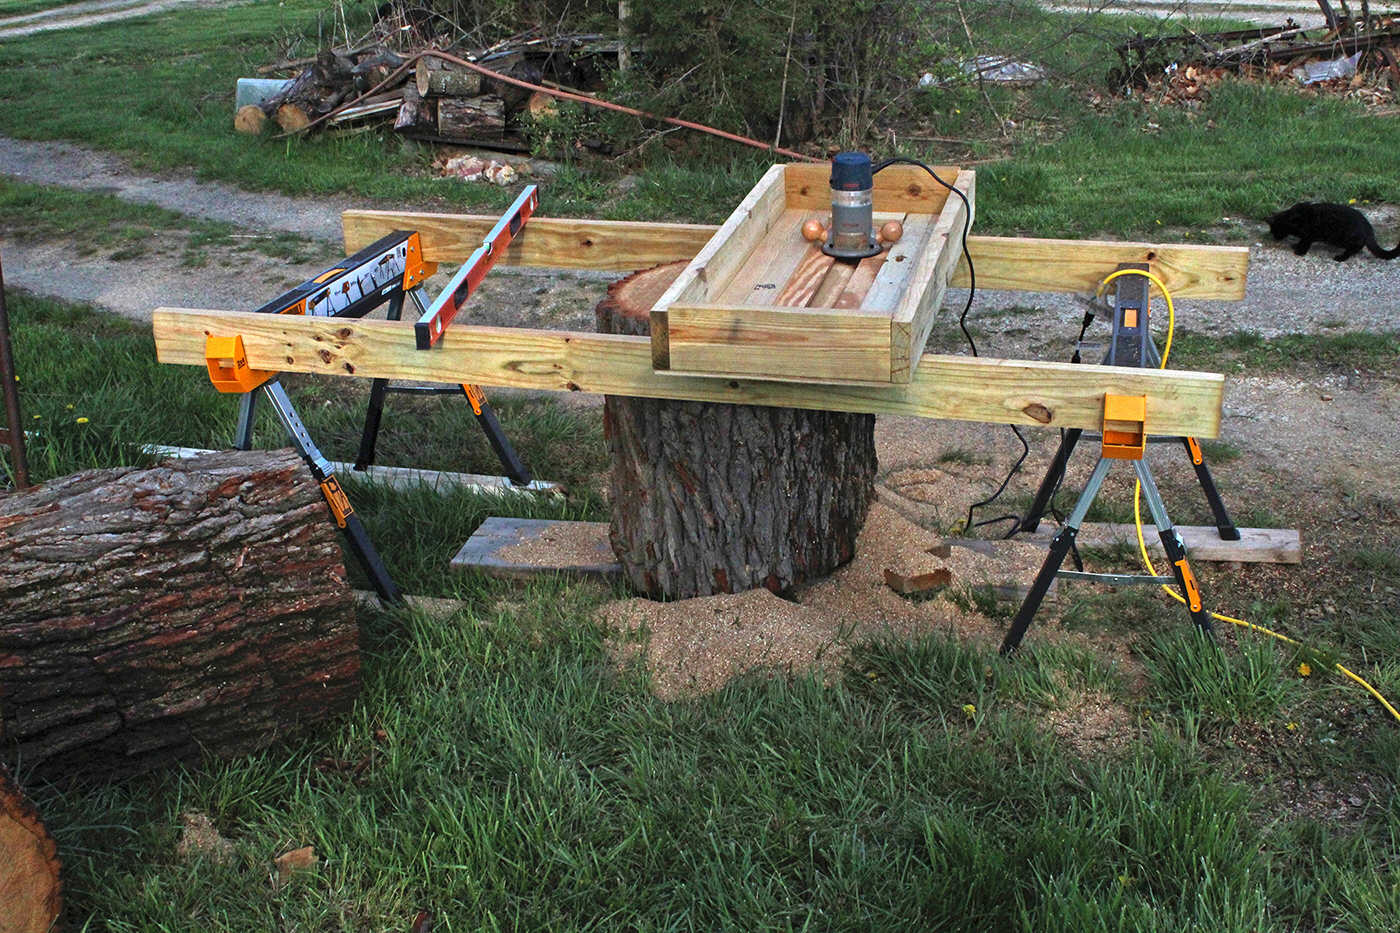
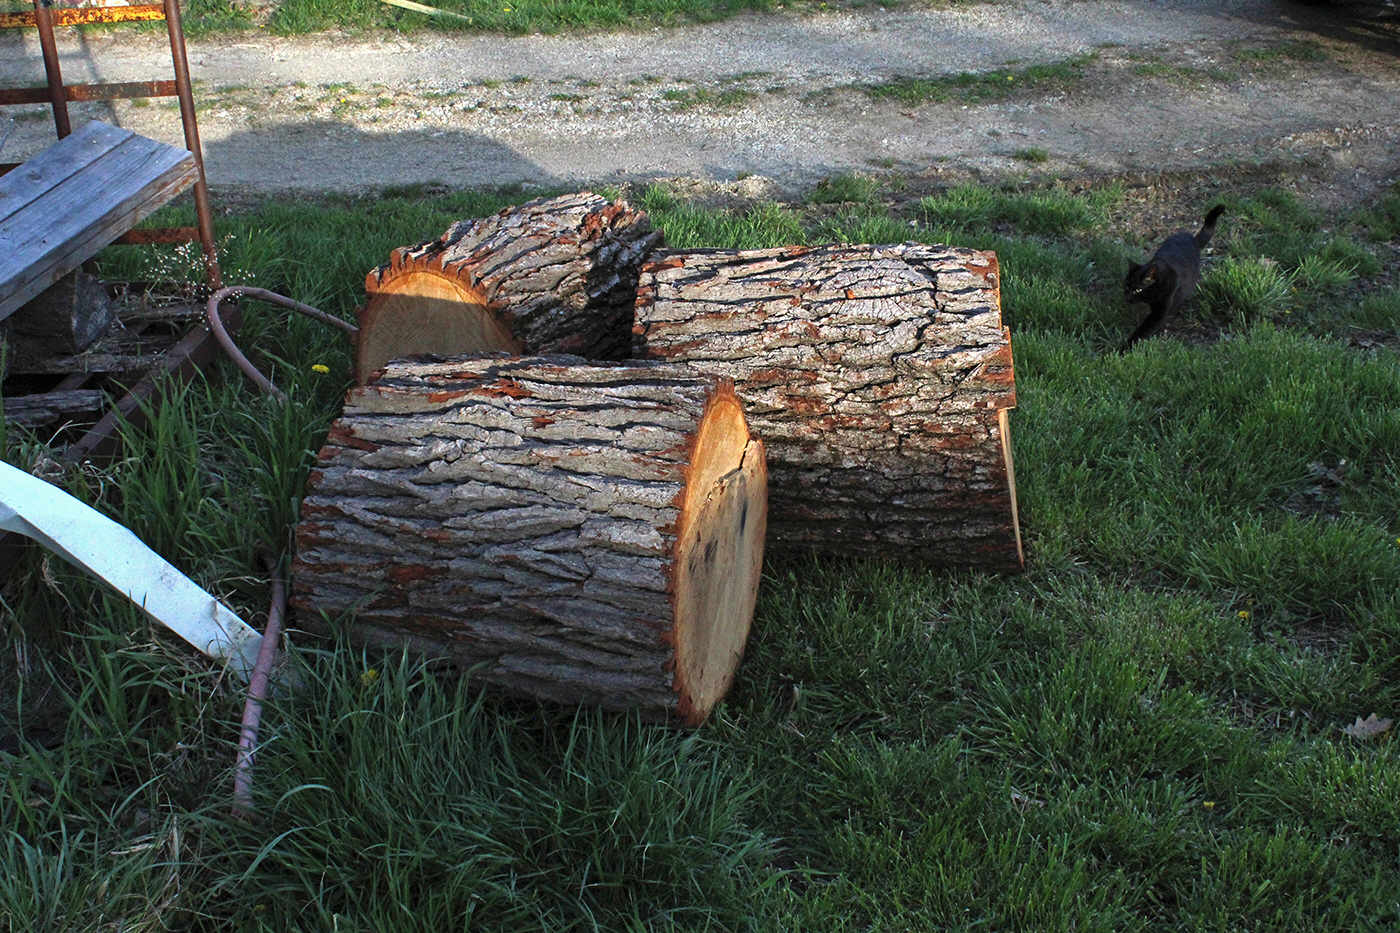 May
2nd, 2023. Work in shop is still
halted for now. House renovation and landscaping have priority.
May
2nd, 2023. Work in shop is still
halted for now. House renovation and landscaping have priority.
Latest additions for the shop include logs for mounting new anvils. These are oak and very heavy. These oak logs are just under 22 inches in diameter and the ends are not cut straight. The ends of these logs need to be flattened and plumb before they can be used for anvil stands. And for this work a router sled was assembled and used for machining the ends of the logs plumb and flat.
As I write this update, these anvil logs are only half finished. A flat and level platform still needs to be set up for final machining of the top anvil surfaces of the logs. I am working on three of these logs, and that is why it takes much time to do this work. In many cases I make multiples of a given item. Imagine making tongs for example, what it takes to make one pair, then multiply that by the number of different sizes that are needed, and then multiply that number by two or three again to equip multiple forging stations with each of those same tools. Three new anvils - three new anvil logs.
The photos at right show these logs and the router sled. Look closely at the photos and see just how far out of square that these logs were cut - one of the logs required 3 each 2 x 6s to shim it up straight for machining with the router sled. The bottoms of the logs are machined first. The flat bottoms are the reference surface from which the total length is measured for cutting, and for mounting square and plumb under the router sled for final machining of the top anvil surface of the logs.
A router sled is a simple box frame and a pair of rails. The rails have a perfect straight surface on top and are mounted with the upper surfaces perfectly level both along their length and perpendicularly across both rails. A router box slides freely on top of the rails. The router is placed in the box with the tool bit protruding through the bottom. The router and sled act like a planing machine to roughly cut a flat surface on the workpiece underneath. The router box is placed over the surface that is intended to be machined. The router is adjusted to cut a specific depth in the work piece underneath the box and is slid back and forth in the box to cut a series of flat grooves in the work piece. The box is slid across the rails as needed to allow the router to cut large or long surfaces. Guide rails inside the box limit or guide travel of the router as desired. The frame (sawhorses) that supports the rails must be adjustable for height. My sawhorses are steel with adjustable leg lengths and side hangers that were meant to support 2 x 4s, but I used 2 x 6 rails instead. Rails must be perfectly straight. Lumber is typically not straight enough for this purpose, but can be made straight by machining the edges on a jointer or, by cutting with a track saw (first edge) and then on a table saw (second edge).
This turned into a huge amount of work. Partly because these logs are green and very heavy and very difficult to move, and because the frame rails must be re-leveled and re-shimmed each time the machining progresses beyond the range of the router adjustments - which then requires the sled frame saw horses are lowered one notch. Saw horses with adjustable-height legs are necessary for this work. The waste left over from cutting straight edges on the 2 x 6 rails made perfect material for shims to get the rails perfectly level.
The router sled worked excellent. The machined surfaces of the logs are dead flat. As of today, this work is only half complete.
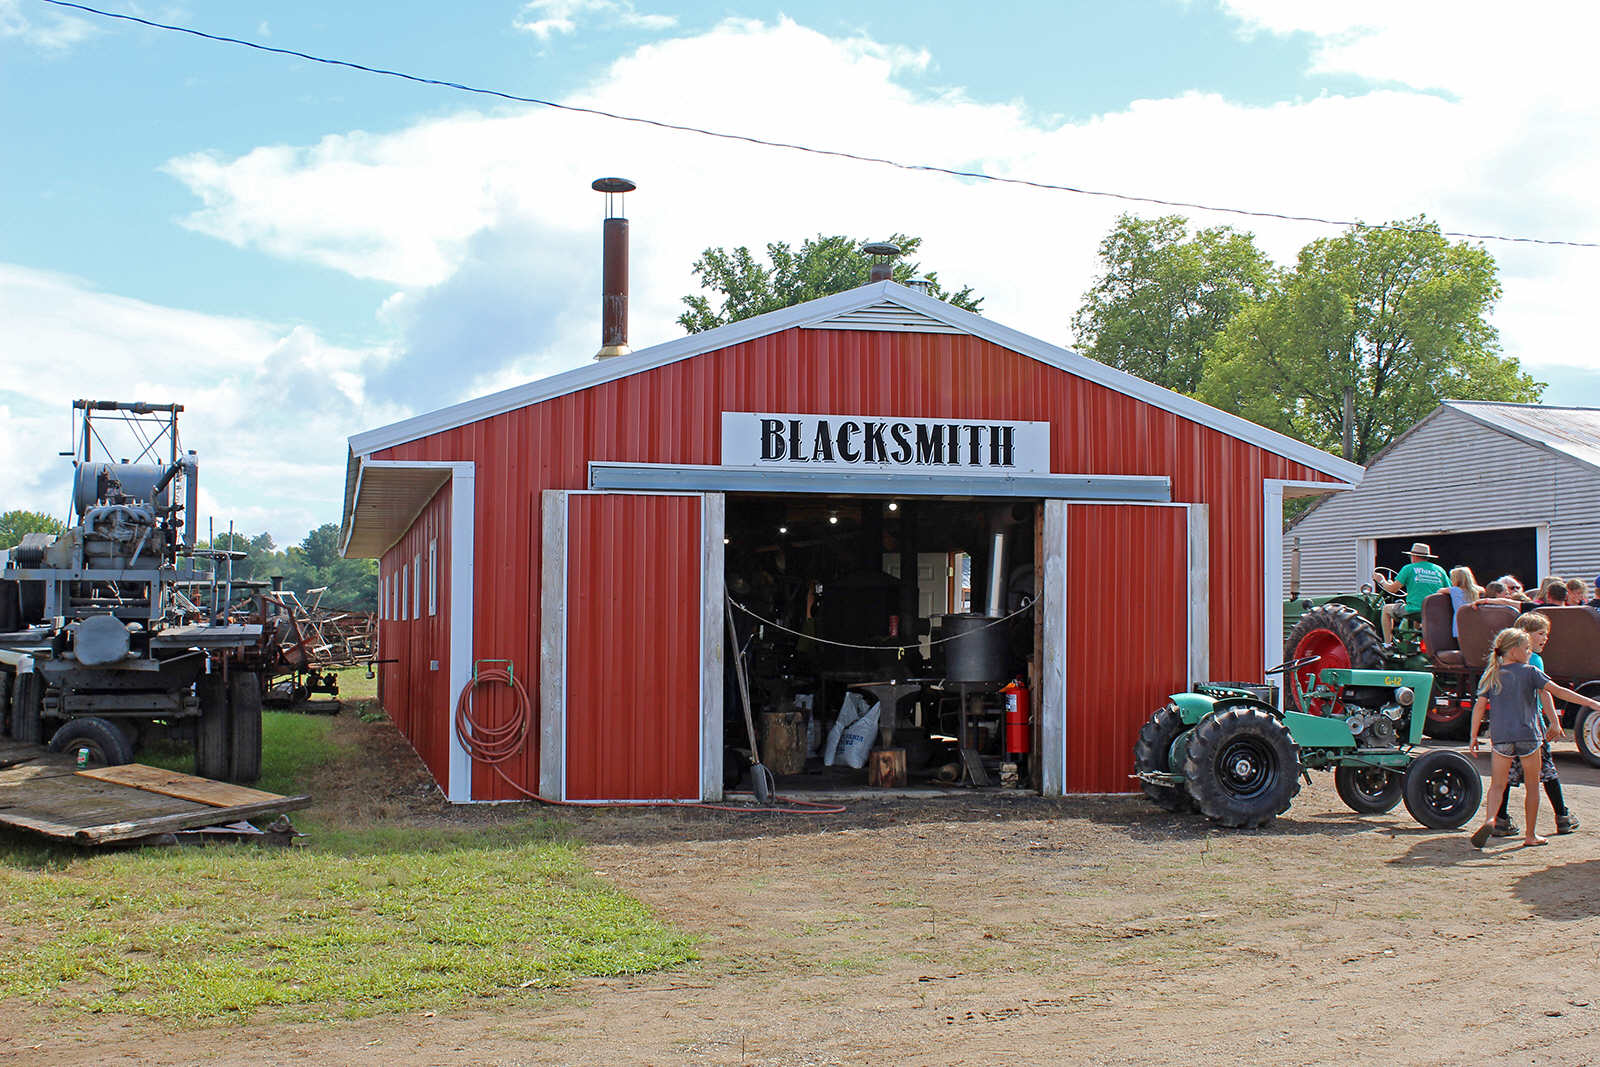 April 11th, 2023.
The
Anvil page has been
updated with new links for buying new two-horn anvils. Forge construction is
still on hold as I am still working on house renovation and landscaping. New
landscaping equipment that arrived last month took up quite a bit of time to
assemble and prepare for work. New photos for this website are being prepared
and there are literally hundreds of photos. I will be adding new content here
very soon. To see the new format that is being used for all 2020 and later
photos, have a look at some of the photo on the Steam Power Shows events page:
Steam Power Shows. There are still a few errors on this page, but all of the
new photos will be fully updated by tomorrow.
April 11th, 2023.
The
Anvil page has been
updated with new links for buying new two-horn anvils. Forge construction is
still on hold as I am still working on house renovation and landscaping. New
landscaping equipment that arrived last month took up quite a bit of time to
assemble and prepare for work. New photos for this website are being prepared
and there are literally hundreds of photos. I will be adding new content here
very soon. To see the new format that is being used for all 2020 and later
photos, have a look at some of the photo on the Steam Power Shows events page:
Steam Power Shows. There are still a few errors on this page, but all of the
new photos will be fully updated by tomorrow.
What makes these photos different is their larger size, both the thumbnails and the full size photos are larger and higher resolution. Compared with much older photos and thumbnails that were much smaller in size and resolution. This difference goes back to the old age of this website. When I first built this website, nearly everyone had only very low-speed dial-up internet connections. This meant files took a very long time to download because nobody had high-speed internet connections. And thus early photos were very low quality and size to allow them to download quickly for the slow internet speeds available way back then. As computer memory and monitor resolution increased, and the higher monitor resolution caused low resolution photos to be displayed in smaller and smaller sizes. Font size was affected and shrank in size also. So when visitors look at many of these pages that were created years ago, all of the old photos and thumbnailed photos are tiny and of poor quality. I am working to replace some of these but this is a terribly slow process. Preparing and editing photos to re-introduce them in higher resolution and quality is terribly time consuming - because there are literally hundreds and hundreds of photos to replace - and I have hundreds more of new photos to add.
Solution. This greatly speeds up the photo introduction process, and you will begin seeing many of these here soon. I have chosen a standard format and photo size and will introduce these photos into a single location - where they can be quickly selected and moved into final content pages. This makes the webpage-photo transition faster and easier, reduces searching for misplaced photos, and makes it easier to select the best photos for each article.
And this last part is HUGE! All amateur photographers are familar with this problem, and here is a fantastic and wonderful solution. For example, when making photos in a darkened blacksmith shop with sunlight streaming through a window or doorway, and the sunlight or flash overexposure causes color washout, and very dark areas behind the light. The extreme differences in light and shadow areas is a serious problem when taking documentary style photos. But there is a very fast and easy way to correct washed out color from the overeposed areas of a photo while simultaneously increasing exposure of dark sections of those same photos. This tool is available in Adobe Photoshop by using the Shadows & Highlights editing tool. And visitors here will be seeing some of these photos here soon.

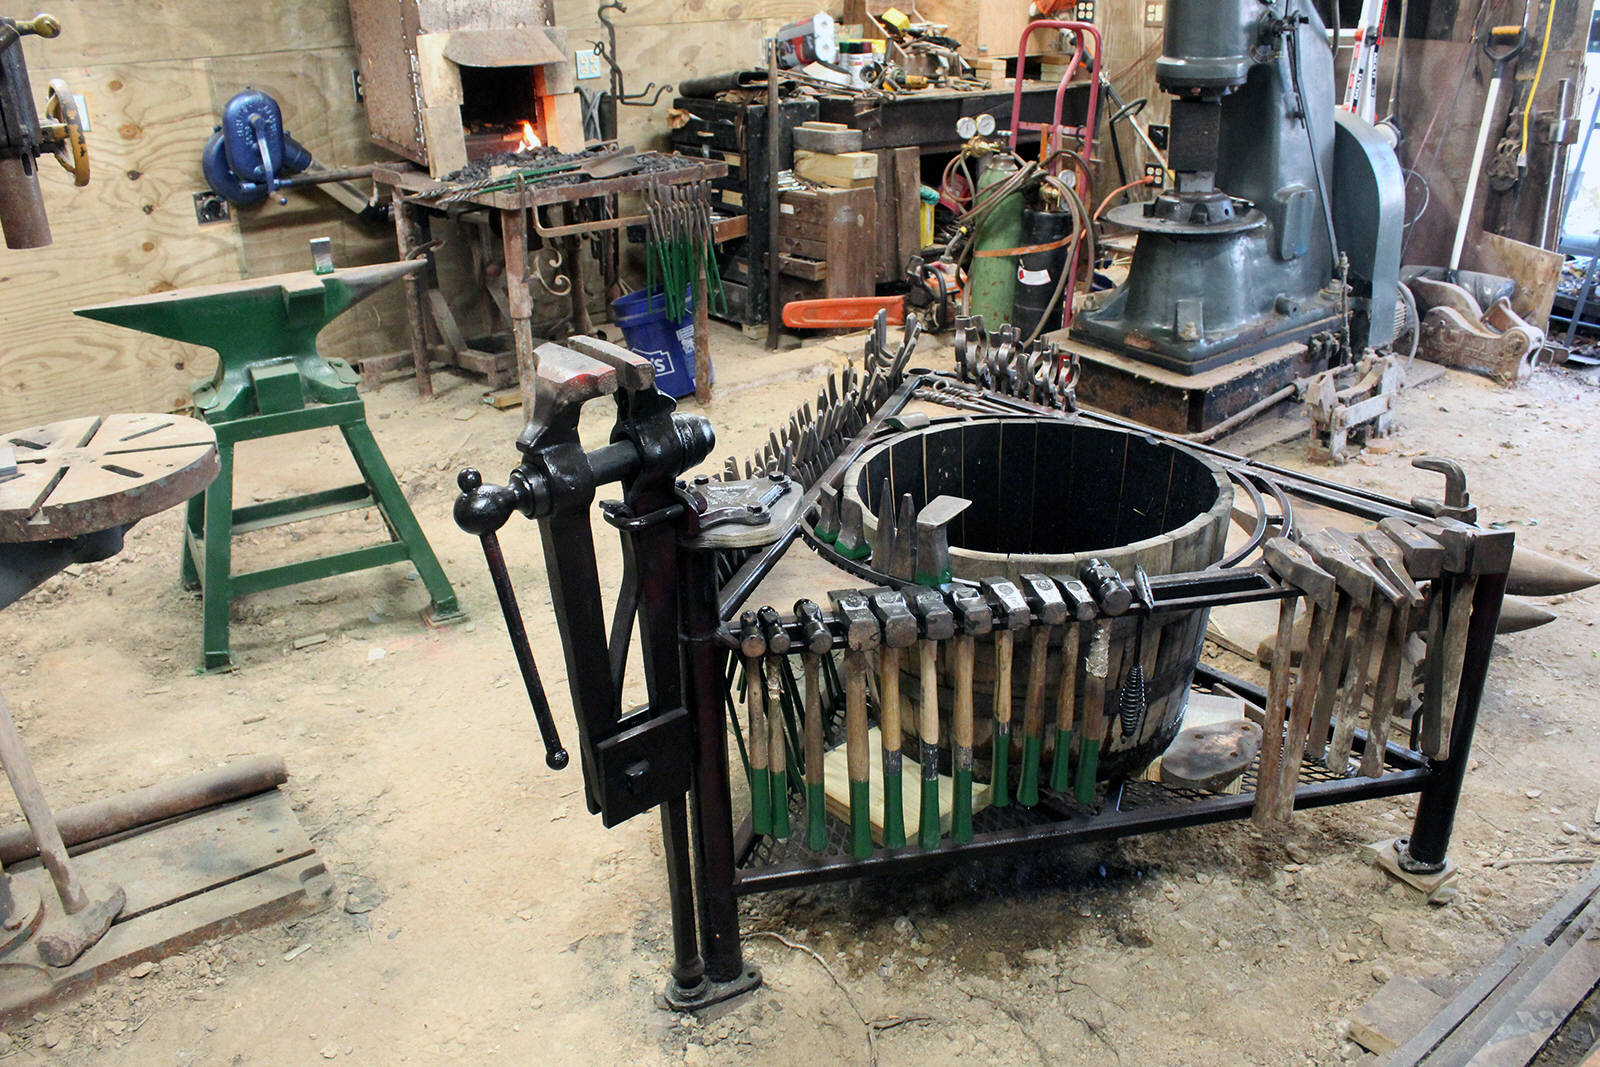
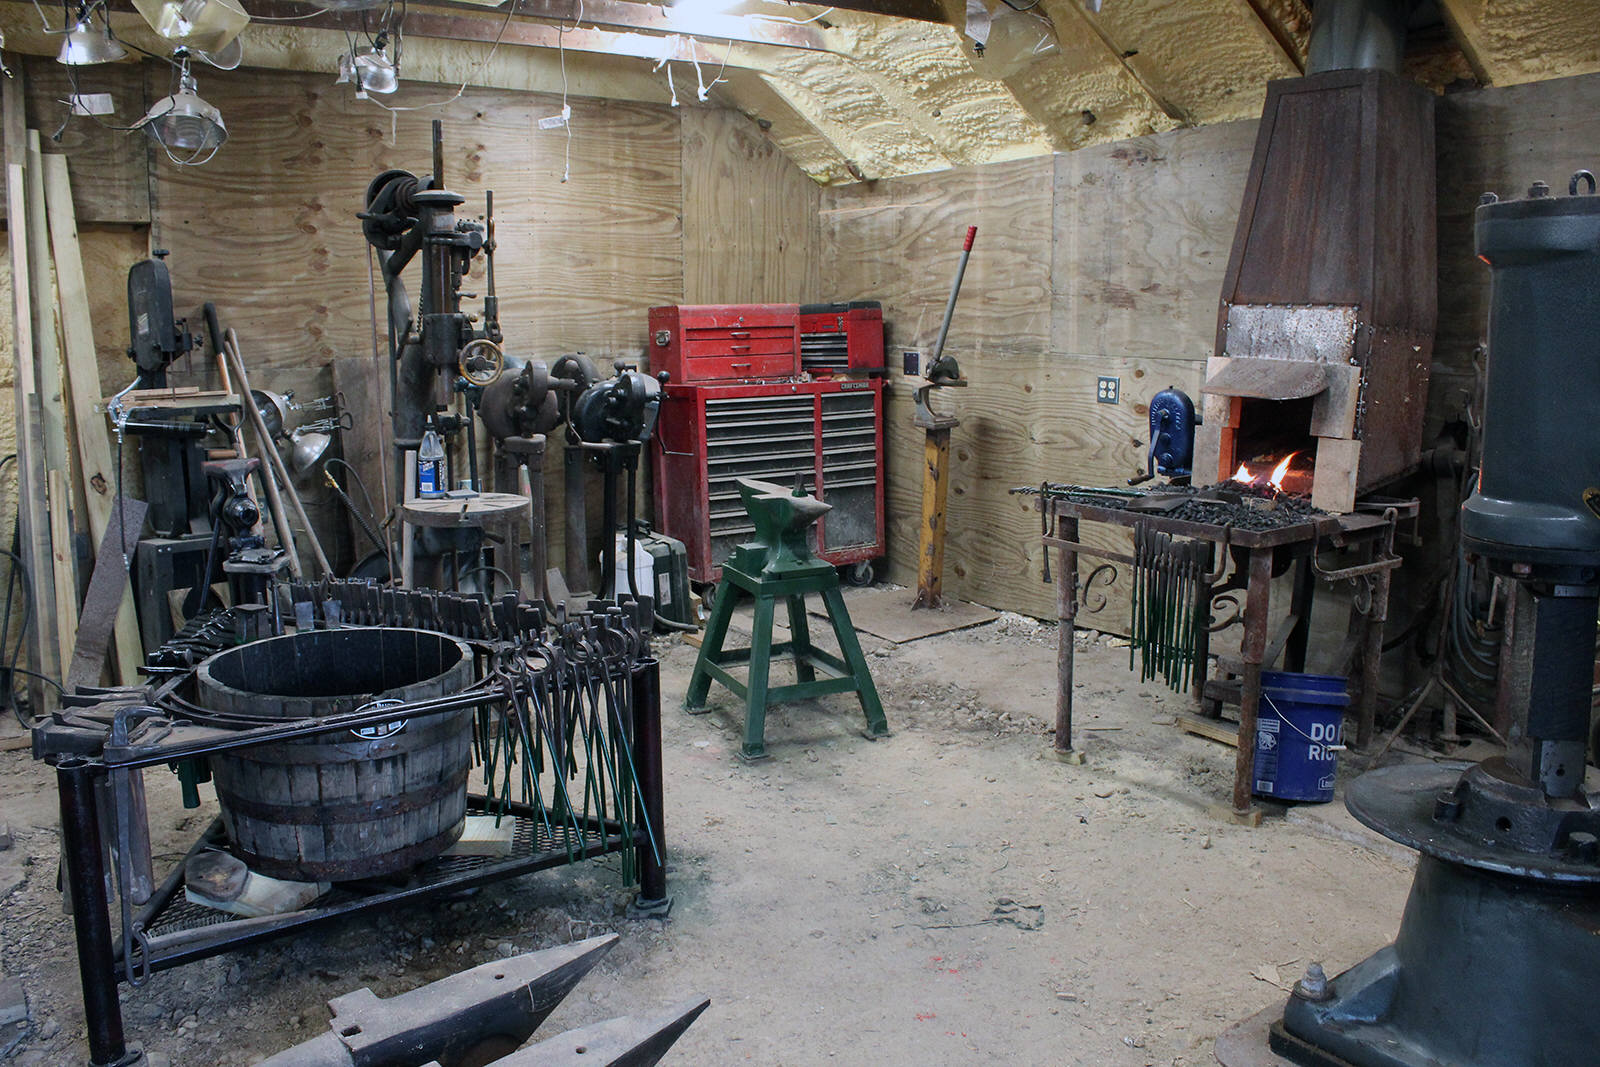
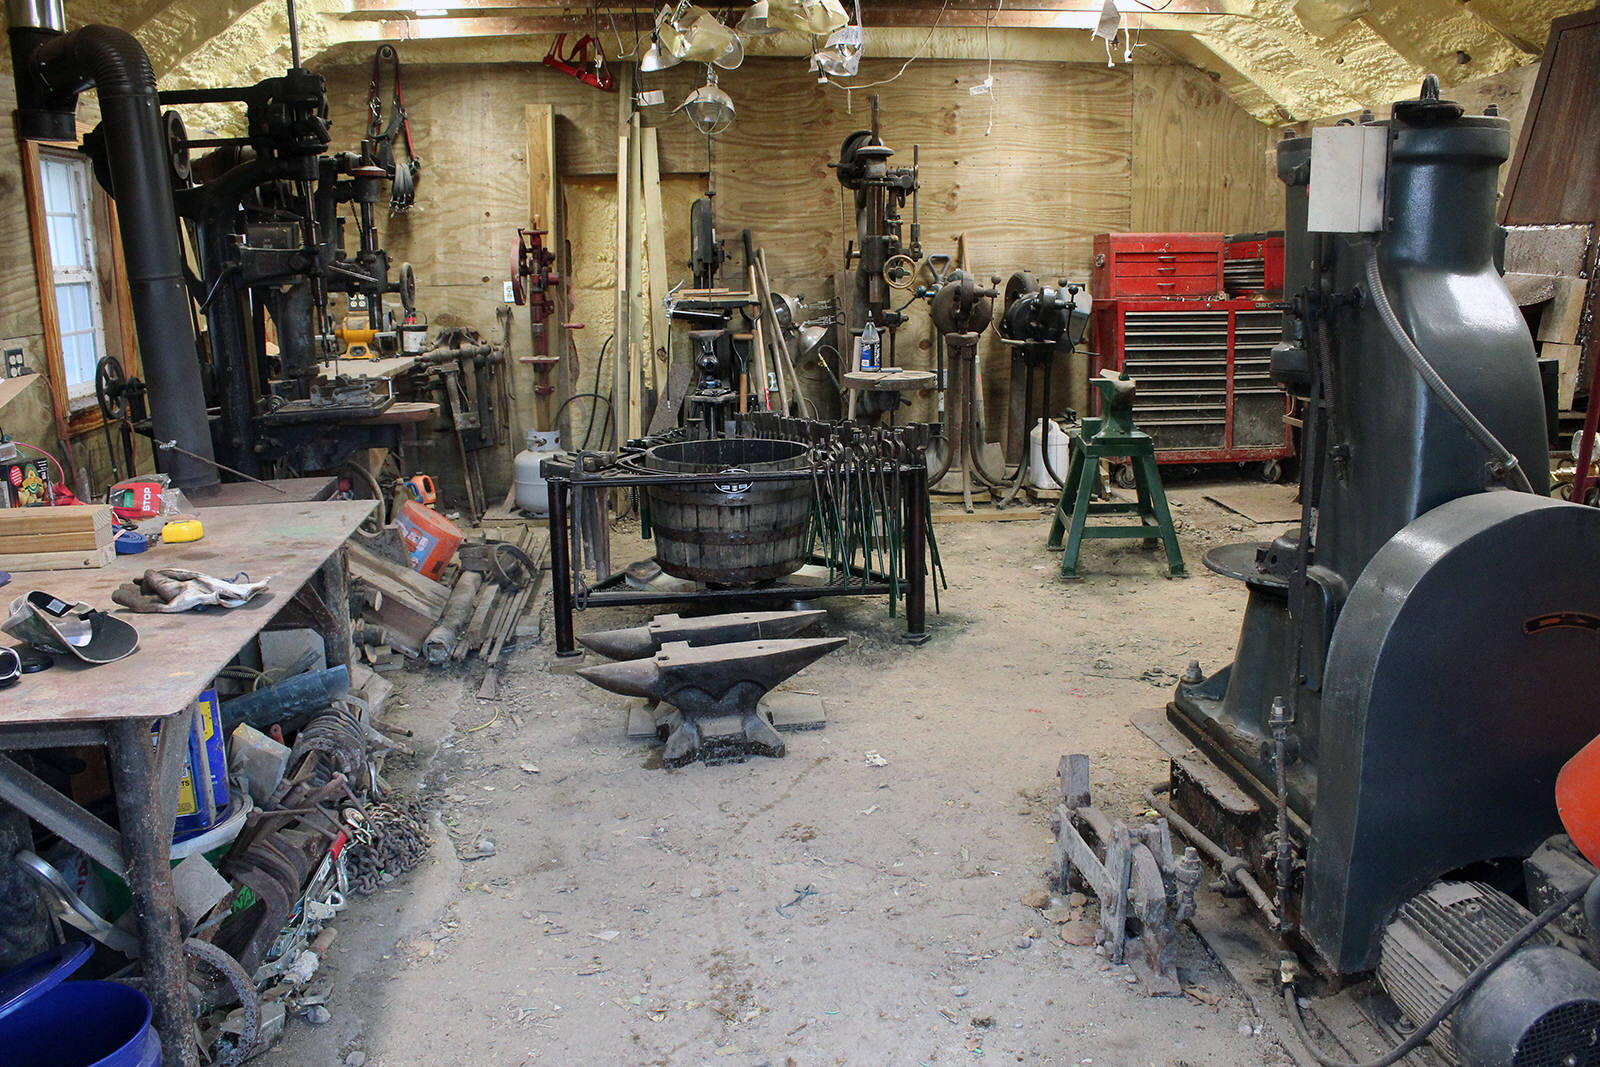 October
27th, 2022.
Shop renovation work has ended. New permanent shop forge will be
built during the upcoming winter season, and floor will be fixed after the new
forge. Now is time for clean up and getting machines, tools, and equipment ready
for service again.
October
27th, 2022.
Shop renovation work has ended. New permanent shop forge will be
built during the upcoming winter season, and floor will be fixed after the new
forge. Now is time for clean up and getting machines, tools, and equipment ready
for service again.
A larger 6-inch vise has been mounted on the three-cornerd vise bench, this vise replaces the smaller 5-inch vise that was originally mounted on the vise bench. The three-corned vise bench was originally planned as a temporary and semi-portable tool storage and vise platform but it ended up becoming a permanent part of the shop. The smaller vise that was originally mounted to this bench was too small for the regular work that I do, so it was necessary to mount a larger vise. The new vise was a perfect fit and makes this vise platform much more practical and useful.
Cleaning rusty tools is more time-consuming than I expected. This has been going on all week. Tongs, hammers, top tools, hardies, the high humidity from a continuously wet floor made for a terrible rust problem. New whiskey barrels are hit and miss. Some are good and some are not. I bought a new half whiskey barrel earlier this past summer and then spent the entire summer trying to soak it and keep it water tight. Last week it developed a series of leaks all around despite being full all summer. So I bought another half whiskey barrel and this one sealed up quickly. The new whiskey barrel can be seen in the photos here, it is in the vise bench and will be filled up slowly all week. Despite being dried out, this new barrel is already water tight up to a water depth of 6 inches, and I just started filling it with water 4 days ago. It also helped to have 2 long rainy days, the rain sped up the water soaking process. The barrel was outside in the rain for the entire 2 days and was already filled with water 1-1/2 inches deep after the rain stopped. It should be able to be filled completely full of water in a week.
There is more cleanup to do in the shop yet. At the end of this week I will halt shop upgrades to free up time to work on the house again. The shop is nearly ready to open up again.

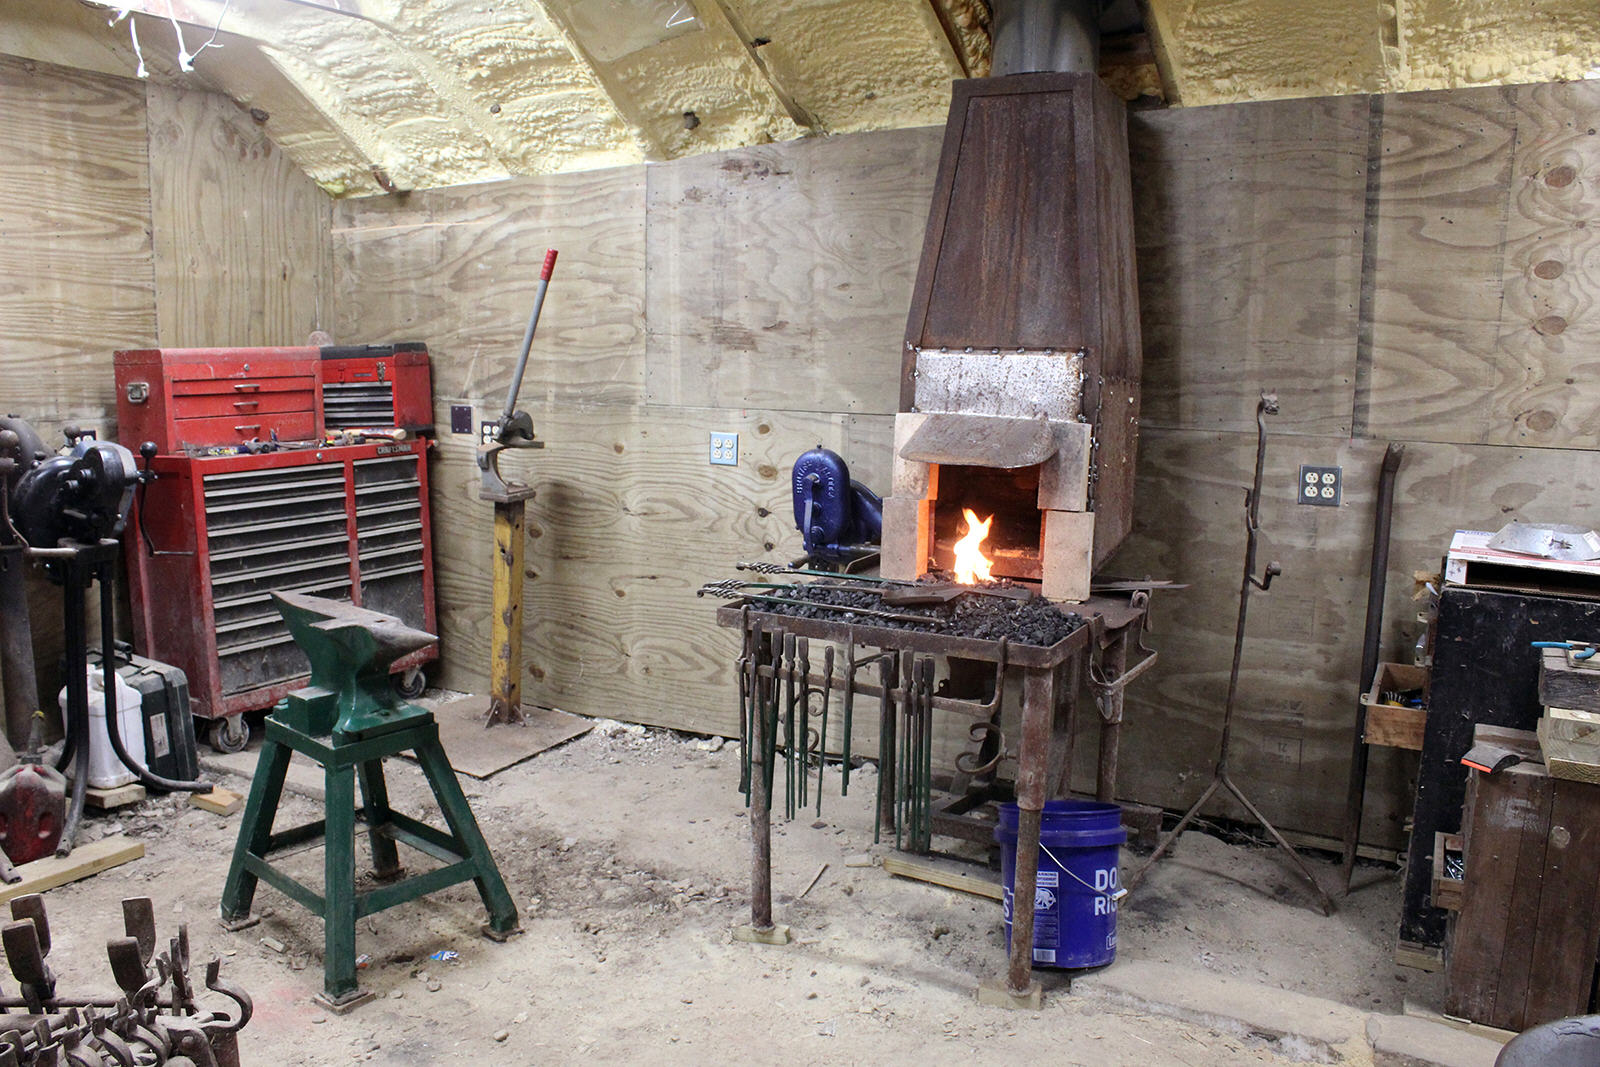

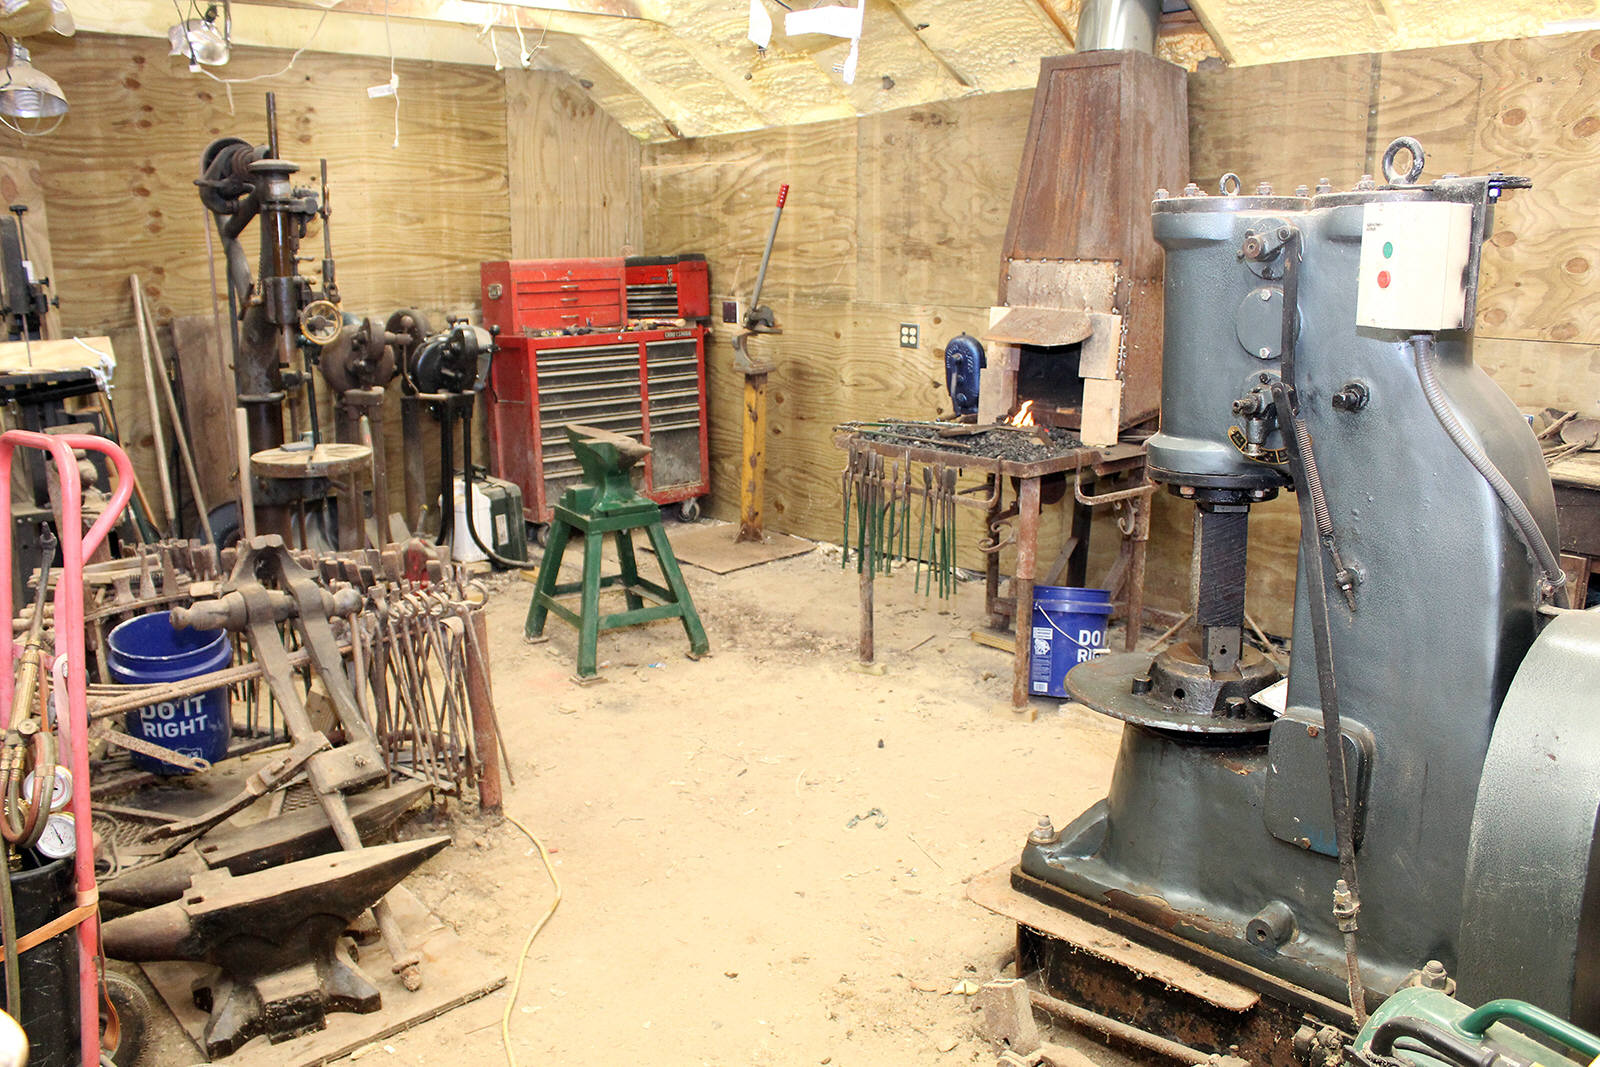 October 12th, 2022.
Shop renovation update. The forge fire has been lit. Way behind schedule, like around 4
months behind. Some of this work took far longer than expected. Old forge and
chimney are now back in their orignial locations.
The old forge will be used for making many of the parts for building a new
permanent shop forge, and that is why it was necessary to temporarily put it
back in its original location. The hole in the roof for the old chimney was
still there. This time I made a permanent little hoodie above the chimney smoke
entrance.
October 12th, 2022.
Shop renovation update. The forge fire has been lit. Way behind schedule, like around 4
months behind. Some of this work took far longer than expected. Old forge and
chimney are now back in their orignial locations.
The old forge will be used for making many of the parts for building a new
permanent shop forge, and that is why it was necessary to temporarily put it
back in its original location. The hole in the roof for the old chimney was
still there. This time I made a permanent little hoodie above the chimney smoke
entrance.
And tonight the forge fire has been lit for the first time since renovation work began. The chimney has now been tested and it draws very well - there is no smoke in the shop. The shop is once again back in operation. The floor around the anvil has been leveled, the old corn crib foundation broken up and removed to make the floor more comfortable to work around the anvil.
Now comes clean up. Tools and lumber that were left over from renovation work must now be removed and put away. Tools and machines need to be cleaned and lubricated and readied for use. Still have a bit more work to get the shop back in service such as making a new fireback for the wood stove and install one more welding outlet to allow the stick welder to be moved off the welding table. There is a big mess of stuff that needs cleaning. What is built for now is a temporary setup to allow the blacksmith shop to be used while waiting for the new shop forge to be built. The next few days up to the weekend will be devoted to cleaning up the shop and putting everything back in service to re-open the shop. And not a minute too soon, the fall season (they call it "climate change" now) is here and I have a huge backlog of things that need fixing or making.
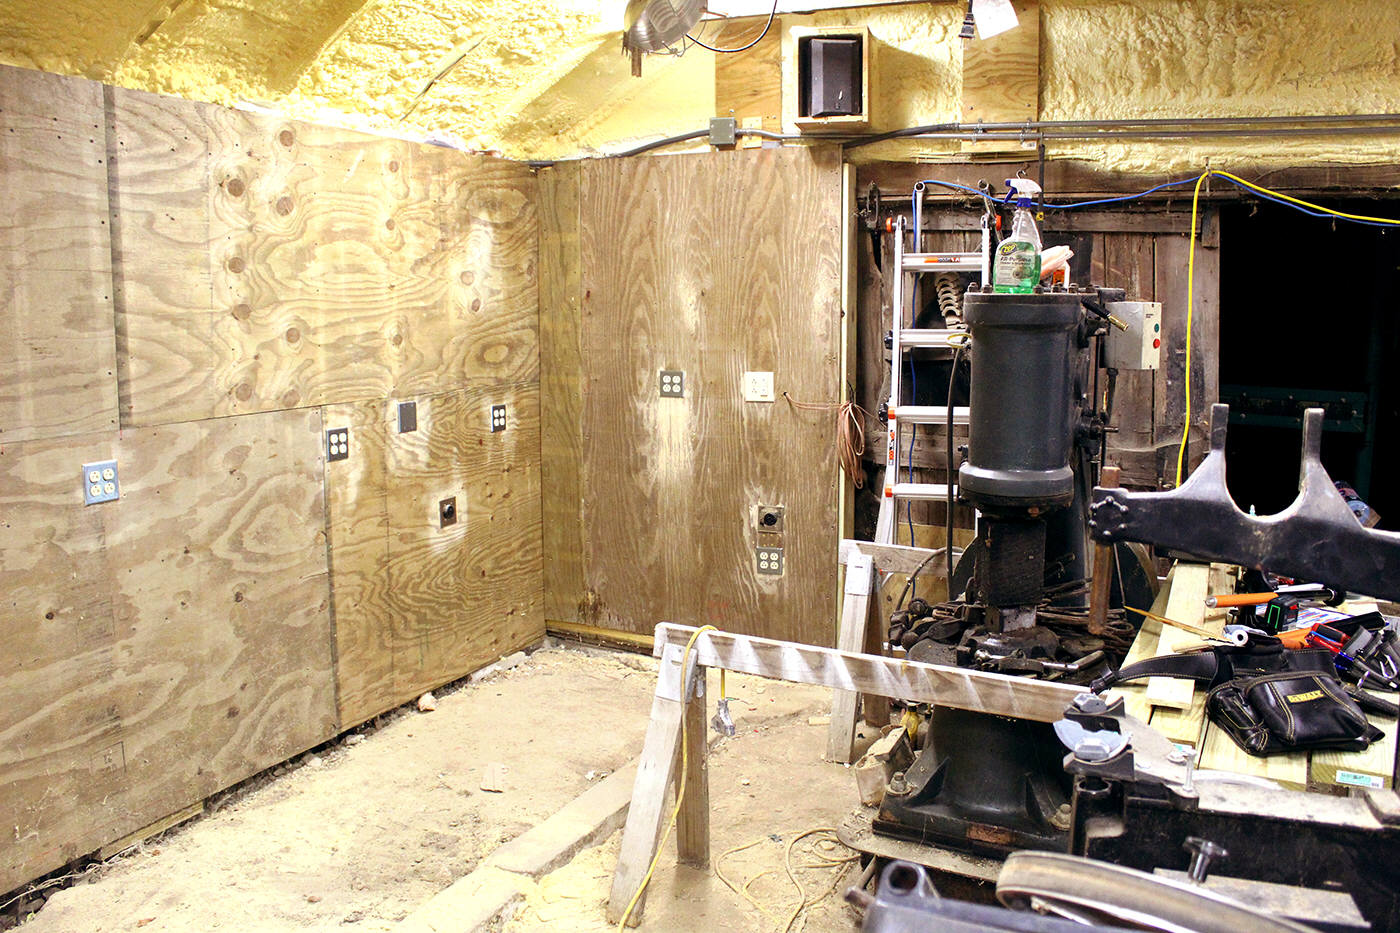
 October
1st, 2022. Upgraded website to HTTPS. Huge amount of new
material is being prepared. I will be adding roughly 500 new photos over the
next few months. This is time-consuming work. Photos take tremendous amounts of
time to prepare, edit, insert, and link. All new photos are larger and with
higher resolution than past photos. New updates coming very soon for the Post
drill page, Coal Forge series, and the Anvils pages - plus a whole new
category/series of pages.
October
1st, 2022. Upgraded website to HTTPS. Huge amount of new
material is being prepared. I will be adding roughly 500 new photos over the
next few months. This is time-consuming work. Photos take tremendous amounts of
time to prepare, edit, insert, and link. All new photos are larger and with
higher resolution than past photos. New updates coming very soon for the Post
drill page, Coal Forge series, and the Anvils pages - plus a whole new
category/series of pages.
Shop renovation is nearly finished for the year. Renovation took roughly 3 months longer than expected, but the finished result was much better than originally planned. First 2 photos at right show the final section of wall in front of the shop being framed and electrical work installed. And final photo of the finished wall. This was the last section of wall and the most expensive, difficult, and time-consuming to rebuild. New welding outlet was also mounted flush inside the wall. All walls now insulated and new electric, and none too soon, materials for this work are becoming crazy expensive.
Old temporary coal forge and chimney are now being readied to put back in their original location temporarily. The old forge will be used to make custom steel parts for the new forge and chimney - and that is why I must temporarily reinstall the old forge.
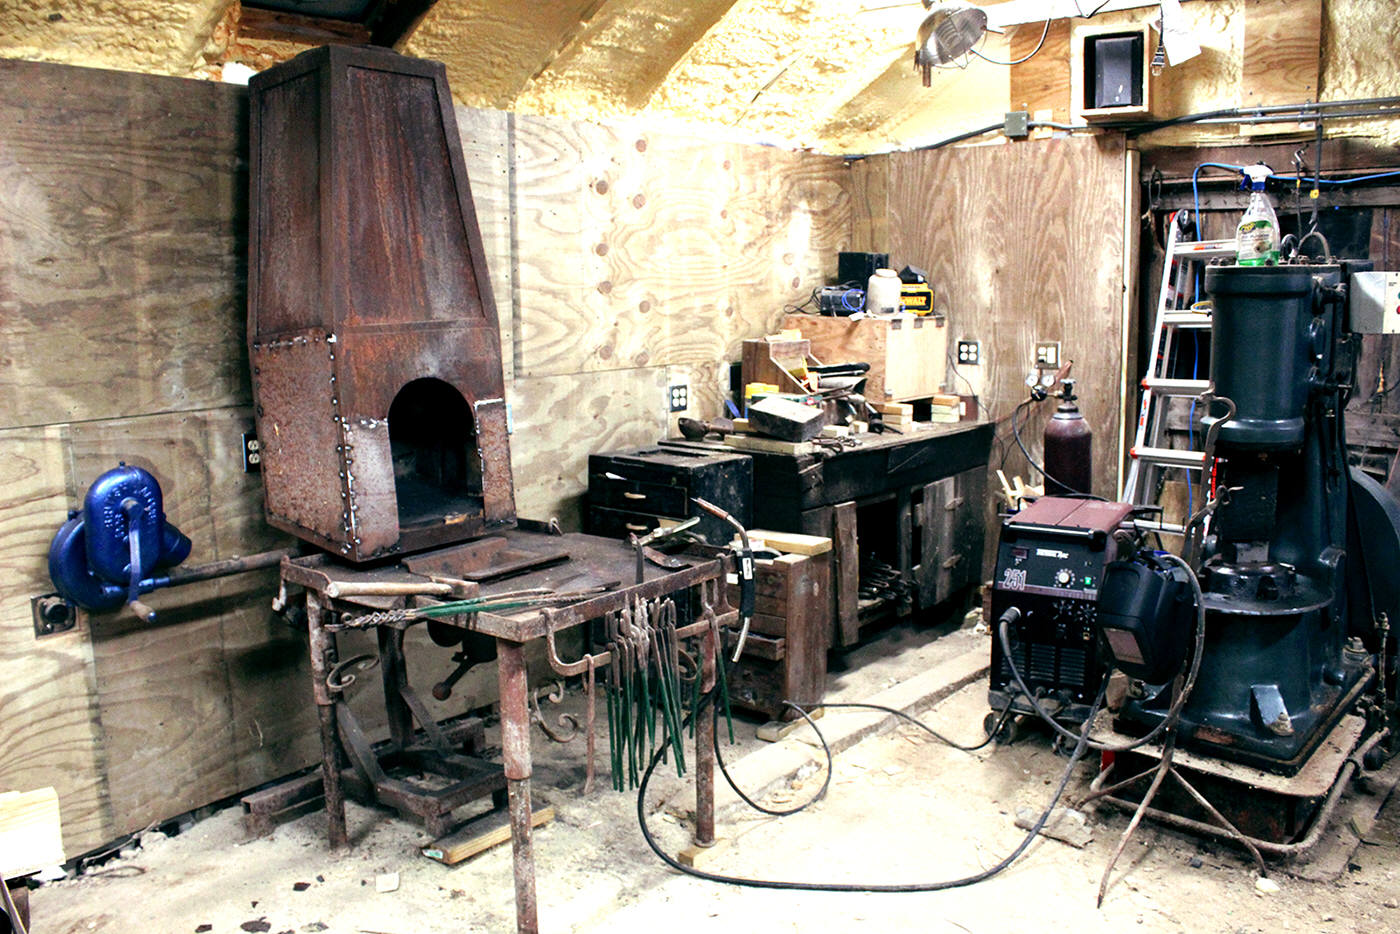
 The
old forge and chimney suffered serious rust damage after being left under a
leaky area of roof for several years. The worst of the damage was to the sheet
metal in the bottom of the chimney. In the second pair of photos at right, the
rust-damaged lower section of chimney smoke box is clearly visible. And the
second photo shows patches weld in place to repair the lower section of chimeny.
This is meant as a temporary fix and I do not plan to continue using this old
chimney and stand after the new forges are built.
The
old forge and chimney suffered serious rust damage after being left under a
leaky area of roof for several years. The worst of the damage was to the sheet
metal in the bottom of the chimney. In the second pair of photos at right, the
rust-damaged lower section of chimney smoke box is clearly visible. And the
second photo shows patches weld in place to repair the lower section of chimeny.
This is meant as a temporary fix and I do not plan to continue using this old
chimney and stand after the new forges are built.
With the chimney/smoke box patched and cleaned up, I am now preparing to install the chimney flue. This forge will be fired up soon.
September 16th, 2022. Steam Power Show schedule page has been updated with photos and links from most recent shows and 2023 show schedule posted. More photos from these shows will be posted later.
Shop update. Photos will be posted here soon. New walls and electrical outlets were finished three days ago. Some of the old benches and tools storage are being moved to temporary new locations in preparation for building the new shop forge. The old forge is being put back into its original position temporarily for making some of the parts that will be needed for the new forge.
Renovation is 3 months behind schedule but it is getting done. Part of the delay was due to another project in the house that had a higher priority. But another part of the delay was actually the result of adding additional improvements to the renovation work that were not originally planned such as fully enclosed wiring for the north wall, new welding outlets, additional machine outlets, and an additional wall section that was not originally planned, and vacation away from home for the first time in years. The final section of wall was the most difficult of all. Every part of the frame was out of plumb in two directions, and not straight. New framing needed to conform to the old wall structure on one side and present a good plumb straight mounting surface on the inside. Putting a 60amp circuit through a wall with limited space for a flush mount outlet was exceedingly difficult and time-consuming. This final section of wall (including the welding circuit) is the most expensive section of wall that I have ever put in. Total cost was around $600 for a five-foot section of wall, and was worth every penny to build. My biggest concern with this section of wall was that the original electrical boxes had been exposed and were a safety hazard. New internal and flush-mounted outlets dramatically improve electrical safety on this wall. Equipment can now be moved back into permanent or temporary locations for building the new shop forge.
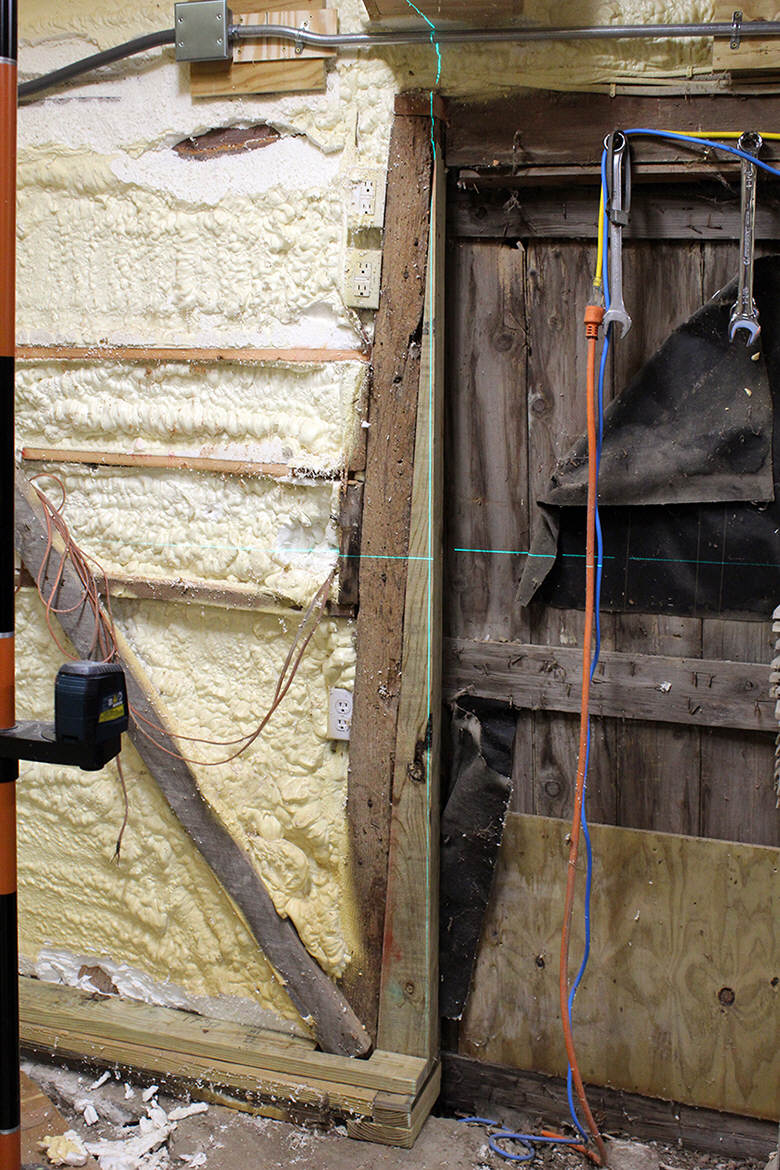
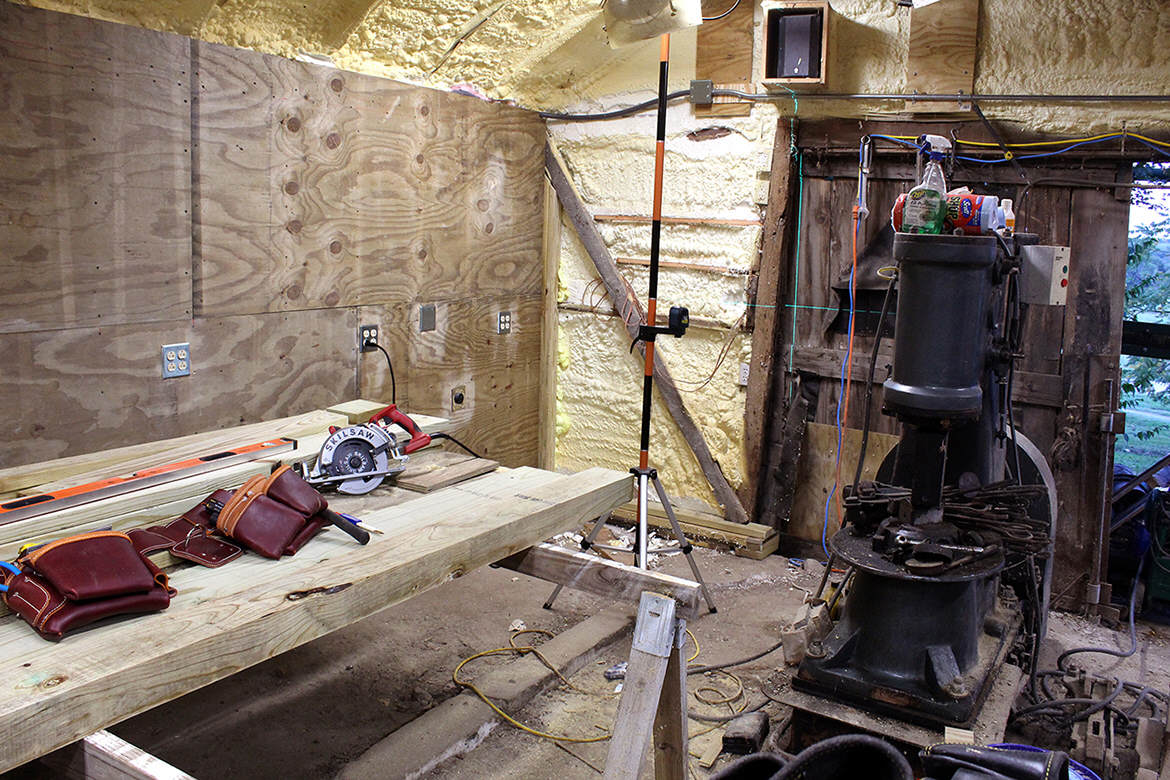
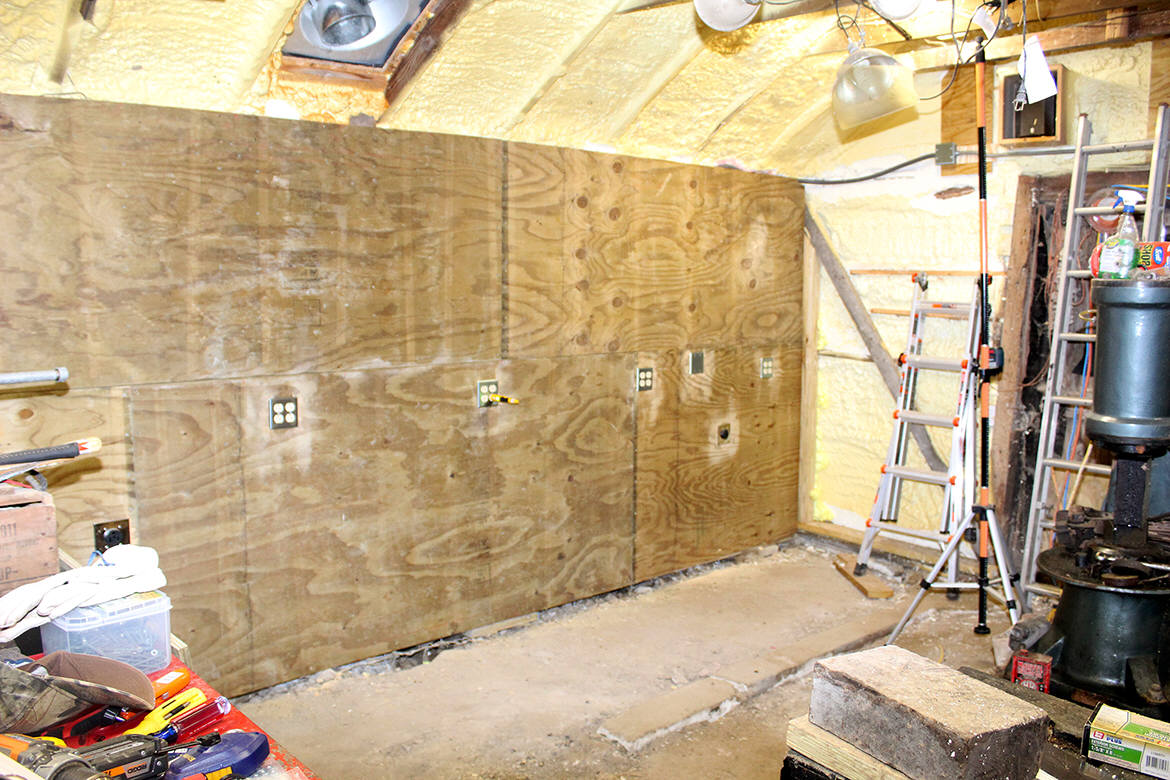 August 16, 2022.
Shop update. Work is over two months
behind schedule. Other work came up that pulled me away from shop construction. Walls work is
almost done. North wall was finished a few weeks ago in mid July. See nearest
photo at right. Electric was connected
and tested to make sure everything was correct.
Shop now has electrical service on 3 of the four walls. One last section of wall. This one is the
smallest, only 6 feet wide, and this wall is the worst of all. Out of plumb in two
directions. This building was never intended to be a workshop. New frame must be plumb before new wall can be put in.
In the last two photos at right, the laser line shows just how out-of-plumb that
the frame is.
August 16, 2022.
Shop update. Work is over two months
behind schedule. Other work came up that pulled me away from shop construction. Walls work is
almost done. North wall was finished a few weeks ago in mid July. See nearest
photo at right. Electric was connected
and tested to make sure everything was correct.
Shop now has electrical service on 3 of the four walls. One last section of wall. This one is the
smallest, only 6 feet wide, and this wall is the worst of all. Out of plumb in two
directions. This building was never intended to be a workshop. New frame must be plumb before new wall can be put in.
In the last two photos at right, the laser line shows just how out-of-plumb that
the frame is.
Steam power show page is updated. The Steam Power Show page keeps keeps track of dates of Steam Power shows nearest me. These shows are often a good source of old tools and equipment. And for beginner blacksmiths these shows offer live demonstrations of blacksmiths working.
Change number 867, new main forge will likely be brick or stone or some combination. This means hole must be dug in floor for foundation. Temporary old forge will be put back in its original location to make hardware and parts for new forge. This starts in 3 weeks.
July 11th, 2022. Improving size of photos on several pages including the Old Thresher's Reunion, Mt.Pleasant coal forge page. Many of the photos on this website were very low resolution to avoid using up large amounts of bandwidth more than a decade ago before most people had high speed internet. Computers have much higher resolution monitors and thus all of my original thumbnailed photos appear very tiny on a typical computer screen today. I am making another push at replacing some of the older photos and thumbnailed photos again. This is a huge ungoing project because there are literally thousands of photos on this website. I am also re-writing some of the pages on this site. Currently I am looking for the original photos for re-scanning at higher resolution. I will be posting some of the webpage links here and on the home page as improved photos and thumbnails are added.
I am using a Canon T6 Rebel.SLR. The Pella Historical Village Blacksmith page is the first that I have published using photos from this camera, and boy oh boy , what difference it makes. The new camera has made a gigantic improvement in quality of photos.The new Pella Historical Village Blacksmith Coal Forge page was created on May 13th, 2022 and the link is here: http://www.beautifuliron.com/cf_PellaHistoricalVillage.html This is the first new edition to the Coal Forge series in over a decade. It is the 5th entry on the Coal Forge 3 page. Lots more stuff coming for this website in the future.
The Pella Historical Village is located in Pella, Iowa, and the blacksmith shops depicts a rural blacksmith shop from the mid or late 1800s. These photos were from a visit during the Pella Tulip Time festival in Pella, Iowa on May 7, 2022. Find more information about this event here: www.pellahistorical.org
Shop renovation is one 6 weeks behind schedule. I had to temporarily stop working on the shop to take to work on some other things. But now I am back in the shop finishing up the last section of wall replacment.
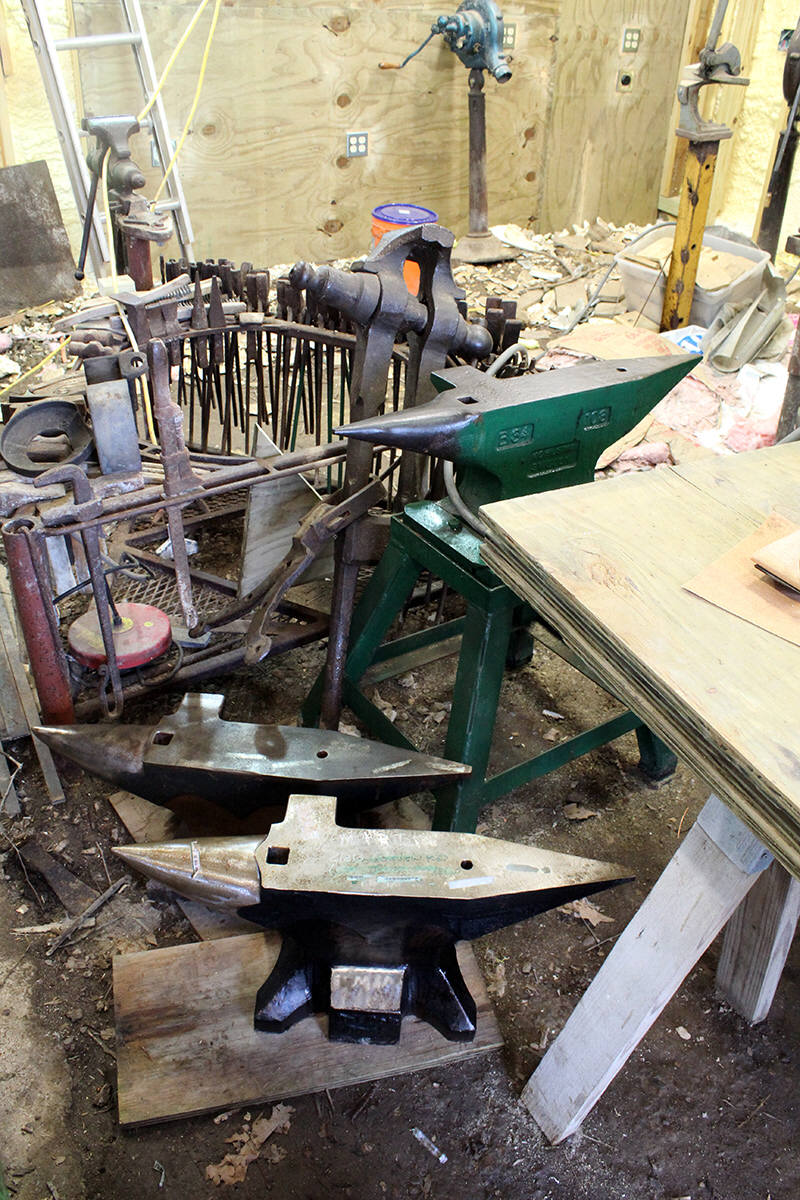
 April
30th, 2022. Latest new edition to the shop -
the second of
two new anvils has just arrived (on April 21st),
the shop now has a total of three good two-horn anvils. (See photo at second
right) After shop reconstruction is finished, all 3 forging stations will each
have a high quality anvil. All anvils are (or were) purchased new. No broken
down worn out junk antiques.
April
30th, 2022. Latest new edition to the shop -
the second of
two new anvils has just arrived (on April 21st),
the shop now has a total of three good two-horn anvils. (See photo at second
right) After shop reconstruction is finished, all 3 forging stations will each
have a high quality anvil. All anvils are (or were) purchased new. No broken
down worn out junk antiques.
Shop renovation update. Rear wall and part of opposit side wall are now finished. (See photo near right) This puts shop renovation at a convenient stopping point and now back to house renovation work. Despite intermittant renovation schedule, shop reconstrution is progressing towards completion this summer as planned. Next renovation task is cleanup work to remove construction debris and trash that now covers the floor, and then move everything from the right side of the shop to the rear to make room for finishing the second side wall.
Replacing the subframe is frustrating, tedious, and agonizingly slow work. I can still only work an average of 2 hours per day in the shop at this time. What a mess, some of the decades-old wall repairs project inward into the new sub-frame, and much of the sub-frame must be built around those projections while still maintaining an overall standard frame spacing. And thus framing and finishing the back wall and first half of the side wall has taken literally a month. While it would have been so much faster and easier to have simply torn down the building and built new, this project was completely unplanned and is being done with zero budget. A new building would have cost around $30,000. When this project is complete, I will have paid 1/3 of that. There will be little, or no increase in taxes or insurance costs, as these are repair and maintenance expenditures rather than new construction. Not bad for taking a dilapidated and near-worthless structure and making it fully usable again.
Plans have changed again. A contractor will be replacing the concrete floor for me early this summer.
Boy oh boy what a difference it makes to have an insulated shop. Work on the rear wall was done during some very cold days, and this work was made much more pleasant by having a nice warm shop - heated in minutes by a small fire in the stove. This means the shop will be warm and cozy for seminars and workshops held during winter. I don't know yet for sure what the temperature will be like during summer. But I can say for sure that the insulation dramatically reduces heat penetrating through the roof. Just a few days ago we had temperatures in the 40s, and then on the following day temperatures suddenly in the upper 70s - and the shop was actually a little too chilly to work in without a jacket.
March 18th, 2022. Shop renovation and preparation for re-opening this summer are continuing slowly. Most of this work has been delayed to allow some house renovation projects to be completed. But I got a little bored with the house upgrades and decided to sneak back into the shop for a week to do a little more shop renovation. So now it's back and forth between house renovation and shop renovation. More photos coming a couple weeks.
January 24th, 2022. Capel Garmon Firedog - Lillies War group project blacksmith training workshops CANCELLED - Postponed Indefinitely. Let it be known here and now - I do NOT make any demands, nor will I enforce anyone elses demands requiring dangerous or unwanted medical procedures, nor will I ever enforce satanic conversion practices such as forced mask wearing or ritual satanic isolation and indoctrination. Not for any reason. Ever. Period. As of today ALL SCA-related workshops are cancelled indefinitely. The SCA board of directors is a group of nazi freaks with no medical training and they are pushing a requirement that all participants take the death vax, destroy their health, participate in their nazi show-me-your-papers-bitte games, forcing participants to wear diseased face diapers, and participate in their disgusting satanic distancing garbage. After months of preparation to finally open the Capel Garmon Firedog - Lillies War project training workshops, this series of workshops must now be cancelled indefinitely. My policy precludes me from making demands on participants that deliberately harm their health or well being or cause permanent injury or death, nor will I enforce such demands on behalf of others. The new policy dictated by the leftist freaks in the SCA board of directors do all of thoses things. We are witnessing the death of an organization that had been a lot of fun for a lot of years. One solution to this problem is to start an alternative group or community effort. Forget about what "they" are doing. We are the solution to the problem. We need only step up and do something. It's time for us to step up.
Good News: There is some very good news that comes out of this mess. The Firedog training events would have absorbed huge amounts of time and resources. Now the same time and resources can be directed exclusively to a much better series of workshops and seminars. Shop renovations are on temporary hold for now due to the need to finish renovating more rooms in the house, but sometime this spring shop renovation gets priority again. This only gets better. An old and fun organization has died, but a new one has been born. New upcoming classes and workshops will focus on ironwork that is a lot more fun to make and blacksmith work of a more practical use. Get ready. What is coming will be a game-changer. More on this later.
Sequence of shop updates. One of the first things readers saw on this page during the autumn and winter of of 2021 (below) were the updates on shop renovation. My shop was in a terrible dilapidated condition which created an uncomfortable and unsafe working environment. Renovation of the shop was/is the first step in eliminating these problems and preparing the shop for upcoming classes, workshops, seminars, and specifically the Capel Garmon workshops that I was planning to host beginning in autumn of 2022. Roof replacement and blown insulation was completed during December of 2020, and by early September of 2021 I had begun structural and electrical renovation. Shop renovation updates began appearing on my home page in October of 2021, and here on this page in early November. I had given myself a deadline of mid-June of 2022 to have the shop finished and ready for classes and workshops. I am still working towards that completion deadline.
The plan as of right now, is to be ready for workshops and seminars to begin in mid-autumn (sometime around October) of 2022. If everything works out as well as I hope, there will be a total of 3 forges in the shop, each with a good two-horn anvil. There are some tools that will need to be made prior to these workshops opening, such as anvil tools and tongs. These take some time to make and thus the need to finish shop renovation in summer - leaving time to make these tools later in early autumn before hosting workshops.
How has renovation work changed the shop environment so far? Even though renovation is only partially complete at this time, these improvements are far better than originally planned. One of the biggest problems was the lack of insulation and inability to heat the shop during the coldest part of winter. Even with renovation only partially complete, it is far easier and more economical now to heat the shop. This means workshops and seminars can be offered during the winter. Winter is actually a great time to for workshops and seminars because it is easier to control temperature, quite unlike summer. During winter, if the shop is too warm, simply open the doors enough to cool the shop down. If too cold, close the doors and let the fires warm it up again. Inusulation in the roof has also greatly improved summer tempertures inside the shop for at least a few hours longer each day. Outdoor summer heat can't be stopped, but the heat radiated down through the roof as a result of summer sun is greatly reduced. I have not worked a forge inside the shop yet, so I don't truly know how heat from the forges will affect shop temperature during summer. This is why I am currently planning worshops and seminars for fall, winter, and spring. Any type of roof mounted ventilation to remove trapped hot air during summer events will have wait until next year.
Looking into the idea of hammer-ins. No plans as of yet. Only considering it.
 January
2nd. 2022.
Shop renovation
update. Most of the work planned for the second half of 2021 has been
completed. The only items not finished are the rear half of the floor
replacement and construction of new forge. These tasks will be completed in
spring 2022. Half of the shop floor space and most of the equipment is
now accessible. The most difficult tasks of 2021 are now complete. New roof, new
insulation, new windows and wall on one side of the shop. New electrical outlets
on south side of shop. Equipment moved back to south side of shop. Ready for
winter and ready for operation again.
January
2nd. 2022.
Shop renovation
update. Most of the work planned for the second half of 2021 has been
completed. The only items not finished are the rear half of the floor
replacement and construction of new forge. These tasks will be completed in
spring 2022. Half of the shop floor space and most of the equipment is
now accessible. The most difficult tasks of 2021 are now complete. New roof, new
insulation, new windows and wall on one side of the shop. New electrical outlets
on south side of shop. Equipment moved back to south side of shop. Ready for
winter and ready for operation again.
In the photos at right, the near right photo shows equipment has been cleared out of the middle of the shop and a clear path is now available for walking through to the back of the shop. This was necessary for moving back and forth and carrying lumber sheeting to work on the rear wall of the shop. Drill presses are set up in their permanent positions and need only cleaned and oiled to begin working again. Hand cranked drill is moved to the rear wall near a window. If power goes out, I now have access to this drill for repair work. Welding table is moved to its permanent position and welding equipment needs only cleaning and they are ready for use. Those dark rusty objects in front of the welding table are a pair of Edwards Shears awaiting replacement blades. Very heavy and difficult to move. I'll find a place for them later. Air hammer can now be operated again for maintenance. Triangular vise bench has been moved to allow the vise to be closer to the new windows - more light for repair work if power goes out. Anvils moved to temporary location for easy use when needed, and out of the way during construction in rear half of shop. Basically everything in the middle and the left half of the photo is ready for full use again. In middle photo, lumber has been brought inside. Ready for winter. And the final photo (at far right) was taken just 8 hours later on New Year's Day 2022 - Snow storm!
Shop renovation will now stop temporarily while I begin working on house again. Two rooms of house almost complete and need only drywall sanded and painted and new electric outlets installed, and then 2 more need only electrical outlets finished. Then start on 3 more - full tear down to the frame, and rebuild. Shop renovation is still on schedule to be completed sometime in the upcoming spring of 2022. BUT this might possibly be delayed until late spring or early smmer because I must speed up some of the renovations in the house.
It was necessary to finish enough of the renovation work to allow equipment to be cleared out of the middle of the building, so that all lumber and tools could be moved inside before the snow flies. We were lucky this year to have snow come so late. It allowed a large part of the renovation to be done while these things were stored outside. Weather suddenly became very cold during the last two weeks of December. Working longer and longer hours became necessary to finish enough of this project to get to a stopping point.
At 12 o'clock, midnight December 31st, 2021 - New Year's Eve, the shop was finally cleaned up enough to allow space for lumber and equipment to be brought inside. And not a moment too soon. By early morning on the following day - New Year's Day (January 1st, 2022) the snow came. We had roughly 9 inches of snow that day, and temperatures dropped to sub-zero that night. But the lumber is inside and there is enough space to work inside the shop and continue renovation during cold and inclement weather.
New walls, new spray-foam insulation all around, and new fiberglass insulation in the walls, have all contributed to making it much faste and easier to heat the shop with a smaller fire consuming less wood. On December 31st, the temperature was 5 degrees (F) and dropping fast. Before shop renovation this would have meant a cold shop that would have taken hours to warm up enough to work bare handed, and doors would have been sealed shut to try to conserve some of the heat. But now because of the new insulation and new walls, I needed only a tiny fire to keep enough heat to do much of the work. New walls also meant more light. Previously the old dilapidated walls absorbed so much light and caused the shop to be very dark and gloomy at night. The new walls reflect much of this light back into the shop now.
New electrical outlets were upgraded to heavier circuits for higher loads and these circuits are up to building code for improved safety. The number of outlets were increased so that there would be plenty of open outlets despite some outlets being blocked by equipment. This is why there appears to be an excessive number of outlets in the photos - because there really is an excessive number of outlets built into the walls. Cover any outlet up, and another is just a few feet away in either direction. Steel outlet cover plates protect the outlets, reducing the likelyhood of an outlet cover being broken when struck by something.
Winter is finally here. The vaccinated have a lot to fear this winter. Don't be one of the stupid sheeple. Don't take the fake "vaccine". It's called a bio-weapon for a reason. The vaccinated covidiots are called "mudbloods" for a reason. Look at blood samples of an injected sheeple under a microscope. Compare with blood samples from purebloods. The damage to the blood is shockingly horrific. Upon injection with the fake "vaccine," their blood curdles and turns literally into a sort of mud. The fake vaccine causes all sorts of other auto-immunity, and immune system damage, and cancer problems that I won't describe here. There is no cure for the damage caused by the "vaccine" bio-weapon. There is no antidote. Quit believing the lying quacks in the fake news. A die-off is coming - but it is the vaccinated who have a real reason to fear. The disease is a hoax created to frighten sheeple into taking the bio-weapon. All "C.o.V.ID" tests are a fraud. Notice the spelling? It's not a name of a thing! Look at the original spelling - C.o.V.ID. Certificate of Vaccination ID. It's NOT a virus!!! It's a vaccine passport program. I have worked closely with "infected" covidiots for 2 years now. If the disease was actually a real disease, and the disease was super-contagious as we have been told repeatedly, then I should have caught the disease and died 2 years ago. I am not immune to it. It is simply not real. You can't catch the fake virus. It's a lie designed to frighten sheeple into taking a bio-weapon that they think will protect them from their big bad boogieman. It's fake. All of the medical malpractice that hospitals around the country are using to hurt, and sicken, and kill people - is aimed at frightening the sheeple into believing that there really is some "virus" that is contagious and is out to get us - to frighten them into taking the vaccine bio-weapon. Governments around the world have granted immunity from prosecution for all hospitals that participate in the program. It's winter now. The die-off is coming soon. Globalist totalitarian scumbags like to call it "Dark Winter." The vaccinated fear it. There is no way to undo what the vaccinated have done to themselves. There is no stopping what is coming. Only purebloods will survive. Don't take the fake "vaccine."
DragonForger is coming - Only young Purebloods may enter the DragonForger. Arrival end of summer 2022.

 December 16th, 2021.
Renovation update. First
phase of blacksmith shop renovation project is complete. One wall is finished
and part of the rear wall is partially done. Walls fully insulated and new
electric installed. Now cleanup is needed
before moving equipment in the shop.
December 16th, 2021.
Renovation update. First
phase of blacksmith shop renovation project is complete. One wall is finished
and part of the rear wall is partially done. Walls fully insulated and new
electric installed. Now cleanup is needed
before moving equipment in the shop.
UPDATED WITH PHOTOS: A huge amount of equipment and tools had been piled through the center of the shop to make space for construction work around the walls and roof. Photo at near right show wall finished. Photo at far right shows the drills and welding table moved against the wall, and a path has been cleared to the center of the shop. All of this stuff had to be sorted, separated, roughly cleaned and moved. This turned into a 4 day project and required increasingly longer and longer work days to accomplish. Winter weather is coming very soon and this phase of the renovation work must be finished before the snow flies.
It's amazing how much sawdust and wood scraps accumulate in the woodworking areas during carpentry projects. Sawdust coats everything despite using dust collection. Thus I must pull out all tools and supplies from cabinets and work benches and storage areas to clean out those areas. Clean and orderly storage areas make it easier to gather and properly store tools and supplies from the work area. This is a two-day project it seems.
Severe storms delayed work for a day, but back at it again now.
Getting ready for the big move. After moving half of the equipment in the blacksmith shop back to their proper locations, it should be much easier to work on the phase of the renovation. Everything still on schedule despite additional tasks that were added during the project. See the December 5th update below. \
The biggest problem right now are the shortages of everything. To get around this problem, I begin purchasing and accumulating materials and supplies weeks in advance of the work. Lumber is back in stock in very small quantities and the quality is very low. Electrical components such as boxes, outlets, wire and cable, are all in very short supply. If there is something I know I will need for the new electric installation - I buy whatever quantity is available and take it home. Returning every week to see if more arrived. It's that bad. For example, to wire just half of my shop, I need at least 12-14 outlet boxes. But the stores might have anywhere from 0-8 of any item. I need 4 bulk packs of outlets to complete the shop and another small project, but the stores had only two packs of outlets, and I already bought and installed those. I went back two weeks later - still no new bulk packs of outlets. At this time I can build half of my remaining shop wall project, but I can't put in electric until more inventory arrives in the stores. In some cases I have been forced to order from wholesalers, but this means ordering more than double or triple what I need for the entire project. Electric cable is outrageously priced. For just 50ft of 10-3, the price is literally $200. Plywood quality is awful, warped, gouged, frayed and separated edges, some almost unusable. So the strategy is to visit various stores weekly and buy whatever they have, until enough parts and supplies are accumulated to complete a project. Bulk packs of construction screws and nailer nails are also in very short supply. The shelves are full of these items, but the sizes used most often for framing and construction are the ones in very short supply. And prices are sky high - if you can get them.
December, 5th, 2021. Renovation update. Building upgrades are nearly half way completed. Weather is turning colder. Winter is almost here. I still have one additional task to complete on outside of shop and two very small tasks to finish inside. And the building construction phase will have reached the half-way point and I can finally move half of the equipment back to the side of the shop and start construction of a new main forge. Everything is still on track to partially re-open shop around the end of this month...
And just in time too, weather is becoming colder and uncomfortable for carpentry work unsheltered outside. And in addition to colder temps, winter brings shortened daylight hours, thus requiring light sets for some carpentry work outside.
But the good news is, I fired up the stove for the first time since construction/renovation started - and the result was even better than I expected. It took only minutes to heat the shop enough to work in freezing weather. Before the renovation began, it would have taken a couple hours to heat the shop to the same temperature. New insulation and weatherproofing has tremendously improved heating/cooling the shop. And insulation and wall construction is only half complete! Conditions inside the shop will improve even more as renovation work nears completion. New electrical installation has eliminated past problems and added plenty of new outlets.
Just one half day of work to finish the last remaining carpentry tasks for the current phase of renovation, and it will finally be time to move half of the equipment back where it belongs. I expect opening the center of the shop will increase speed and efficiency of second half of shop renovation. You should have seen me in ridiculous contortions moving large sheets of plywood and lumber through the corners and tight areas along the walls during the first half of renovation. That's done.
Planning next phase;
begin second phase of renovation - rear wall,
begin tear out/replace part of floor,
build new main forge, (by end of December 2021)
complete renovation of second half of shop,
build two new forges (for a total of 3 forges if space allows - spring of 2022).
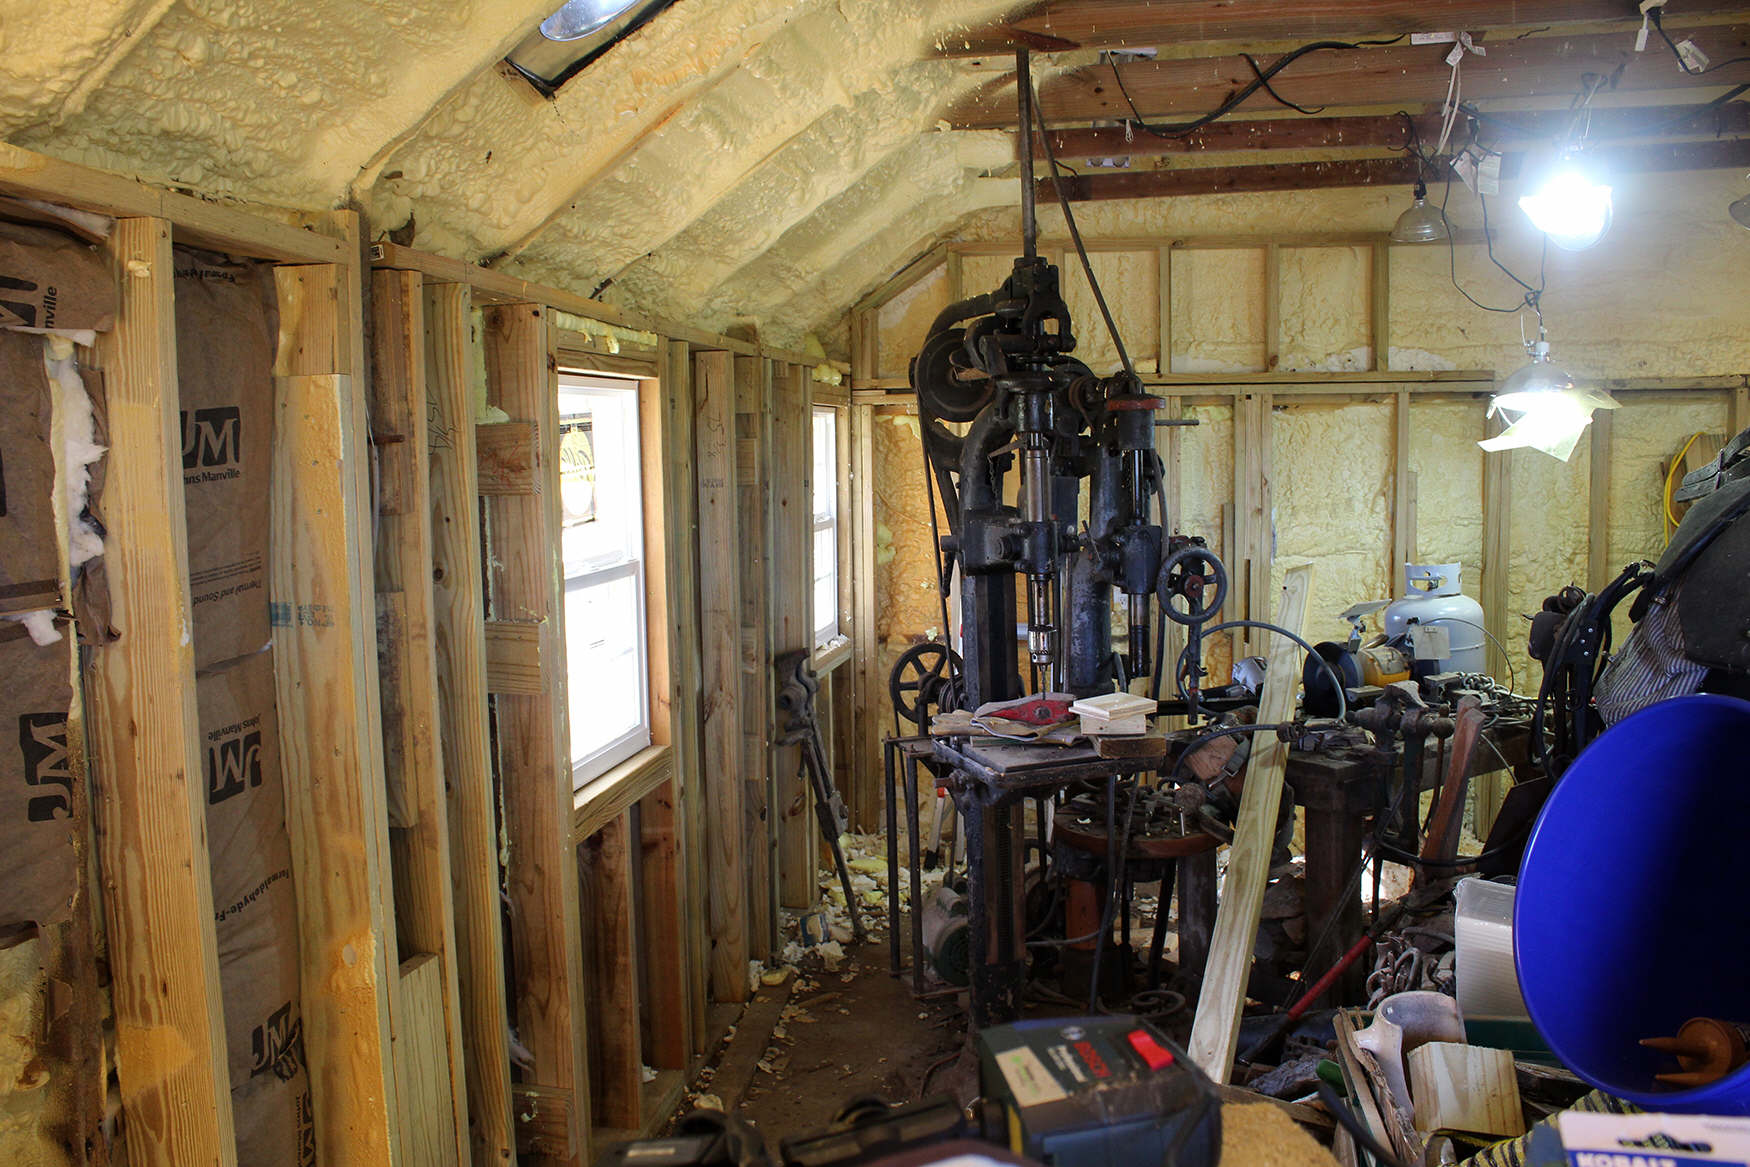 November
7th, 2021.
Shop renovation
is continuing slowly and steadily, a partial re-opening planned for early winter sometime
in December this year, and new additional forging stations will be completed and
ready for work around late winter or early spring of 2022. New windows for more light and ventilation. New walls
will be insulated to allow work during the coldest part of the winter. And
during the hottest part of the summer, insulation will help reduce the amount of
heat radiated through the roof into the shop by sunlight. New floor
to replace some of the roughest and dirtiest/wettest areas. Fitting a new frame
into an poorly built and old framed building is slow and tedious work, and this
is why renovation is taking so long. More photos coming as renovation work
begins speeding up.
November
7th, 2021.
Shop renovation
is continuing slowly and steadily, a partial re-opening planned for early winter sometime
in December this year, and new additional forging stations will be completed and
ready for work around late winter or early spring of 2022. New windows for more light and ventilation. New walls
will be insulated to allow work during the coldest part of the winter. And
during the hottest part of the summer, insulation will help reduce the amount of
heat radiated through the roof into the shop by sunlight. New floor
to replace some of the roughest and dirtiest/wettest areas. Fitting a new frame
into an poorly built and old framed building is slow and tedious work, and this
is why renovation is taking so long. More photos coming as renovation work
begins speeding up.
Shop layout will be changed to allow multiple forges again, a total of three forges this time if space will allow. Part of this upgrade will include new two-horn anvils for each of the new forging stations. The first of the new two-horn anvils has already arrived. Photos lower right. Both of the new forging stations will have one of these anvils.
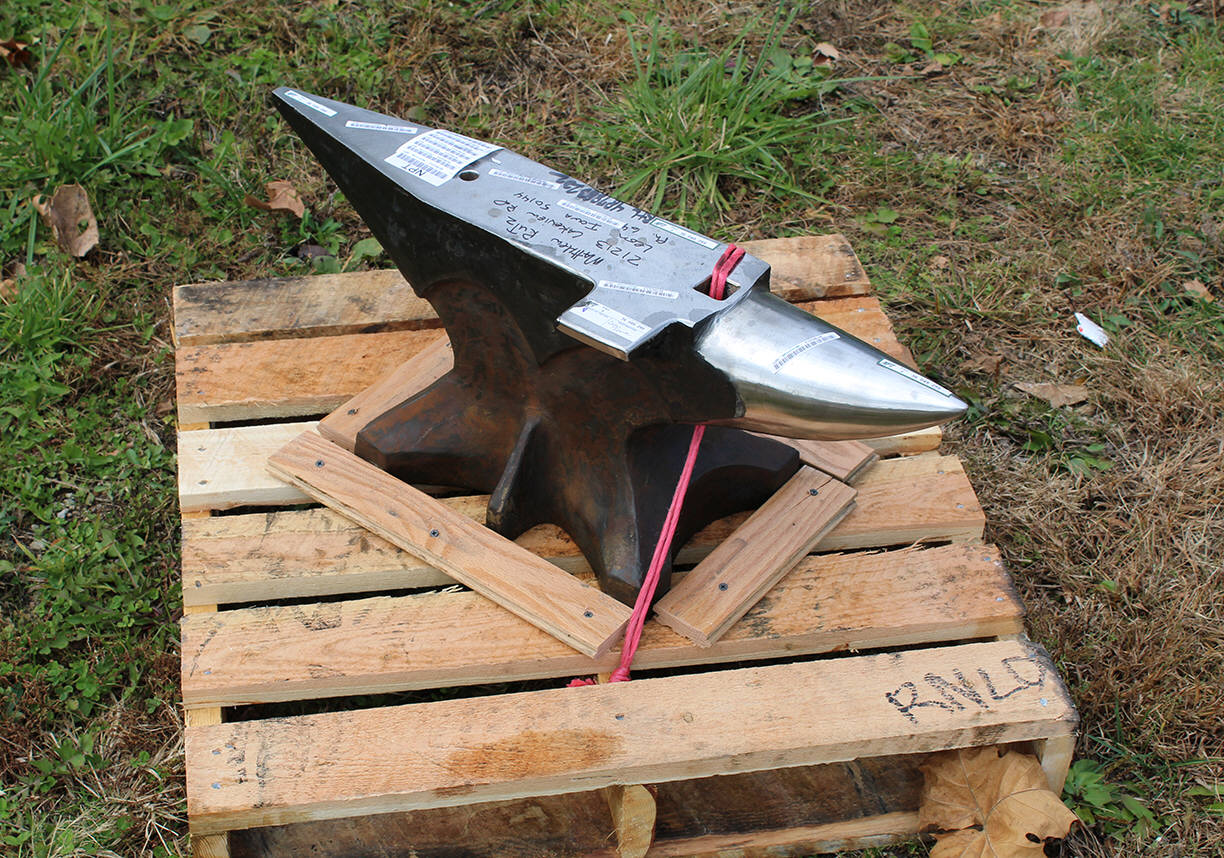
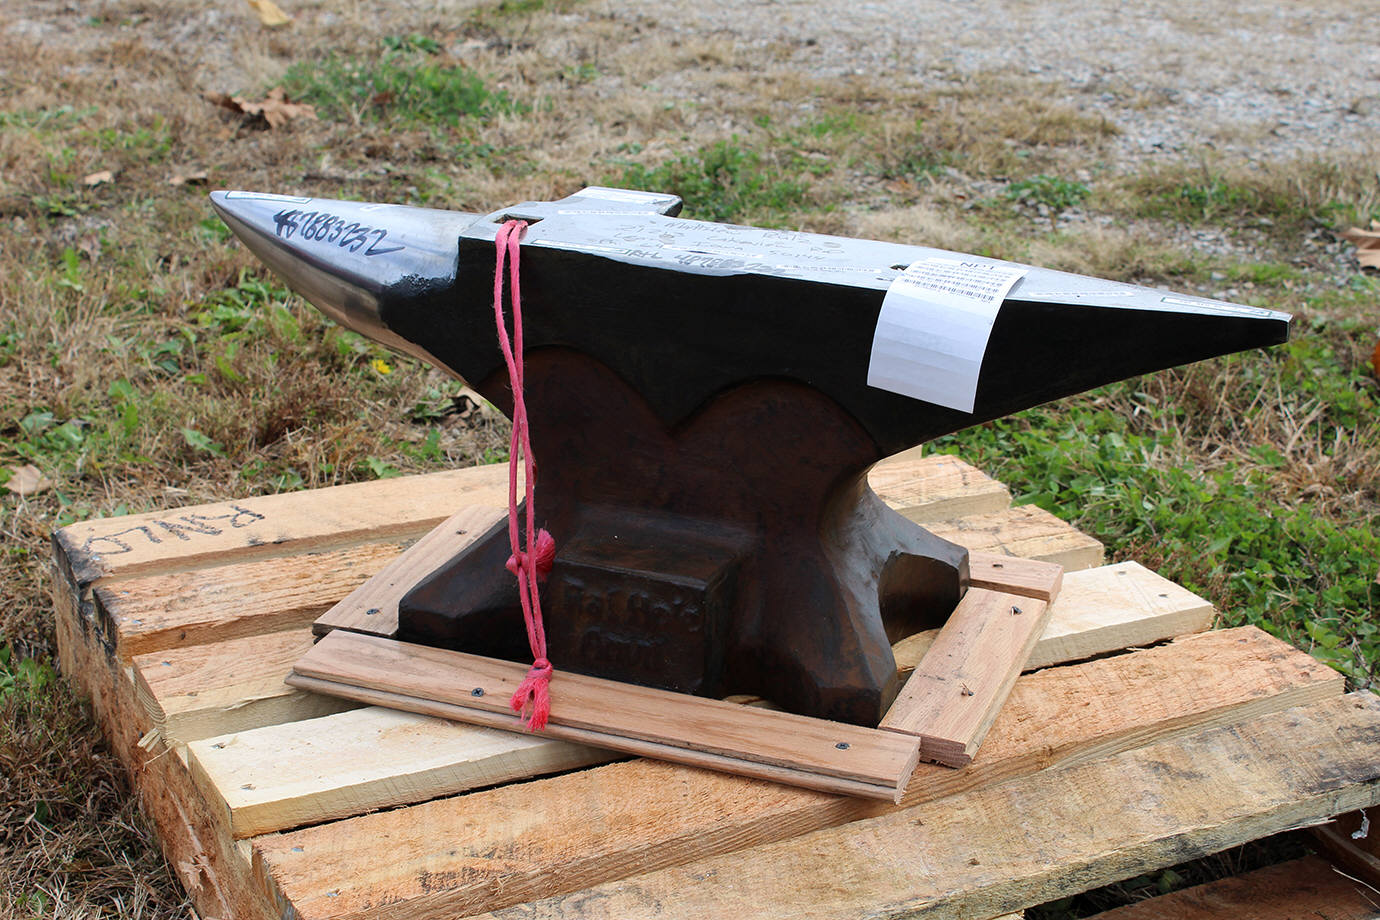 After
shop renovation is finished, I will again offer hands-on workshops and seminars
tentatively planned to begin in spring of 2022. Seminars will include tongs making (flats, bolts,
hollow bits, etc.), forging animals and flowers, and ornamental work. These
seminars and workshops will be starting at a time when we might very well be
seeing a large die-off of the sheeple that took the dangerous fake 'vaccines'.
Workshops and seminars will go on no matter what is happening to the sheeple and
their scamdemic. There will be NO face diapers, NO satanic distancing, NO
covidiots, and NO asinine 'vaccine' mandate garbage. Period. Do not take the
fake 'vaccines'. Purebloods will be given priority on all upcoming seminars and
workshops.
After
shop renovation is finished, I will again offer hands-on workshops and seminars
tentatively planned to begin in spring of 2022. Seminars will include tongs making (flats, bolts,
hollow bits, etc.), forging animals and flowers, and ornamental work. These
seminars and workshops will be starting at a time when we might very well be
seeing a large die-off of the sheeple that took the dangerous fake 'vaccines'.
Workshops and seminars will go on no matter what is happening to the sheeple and
their scamdemic. There will be NO face diapers, NO satanic distancing, NO
covidiots, and NO asinine 'vaccine' mandate garbage. Period. Do not take the
fake 'vaccines'. Purebloods will be given priority on all upcoming seminars and
workshops.
Dragon forger is coming. Be ready.

 April
23, 2020. NOTE: I DO NOT post any items for sale on the Pinterest website!!! If
one of my tools or machines is shown as "for sale" on the Pinterest website -BE
WARNED - I did not post that offer on Pinterest. All tools and machines I offer for sale are posted here on
my website (Beautiful Iron) and will be found at this page:
http://www.beautifuliron.com/gs_blacksmith_tools_for_sale.htm
April
23, 2020. NOTE: I DO NOT post any items for sale on the Pinterest website!!! If
one of my tools or machines is shown as "for sale" on the Pinterest website -BE
WARNED - I did not post that offer on Pinterest. All tools and machines I offer for sale are posted here on
my website (Beautiful Iron) and will be found at this page:
http://www.beautifuliron.com/gs_blacksmith_tools_for_sale.htm
Re-Update. September 27, 2021. I have reconsidered my previous post and have edited this page accordingly.
Recently a visitor wrote me to inquire about a blacksmith leg vise for sale. He found a photo of one of my blacksmith vises on the Pinterest website along with the comment "Blacksmith leg vise. I have one For Sale, for the price of $100.00". The problem is - I was not offering any vises for sale at that time. And I have never posted any offers to sell anything at Pinterest.
See photos (near right) showing my leg vise and text that reads; "Blacksmith leg vise. I have one For Sal...".
I clicked on the link and it took me to the Pinterest image (picture at far right). Full text reads "Blacksmith leg vise. I have one For Sale, for the price of $100." It did look like I was the one offering this vise for sale. The link on the Pinterest page takes visitors back to my website. But I never offered this vise for sale - this is one of the most-used tools in my shop.
Maybe the person that posted my photos was making legitimate sale offer of a vise they had, and maybe they had no photos of their vise, and simply found one of my photos and used my vise photos as an example of what they were offering for sale.

 About
Pinterest postings. Pinterest is best viewed on a real computer screen.
Cell phone users will get a more stripped down or abreviated version of Pinterest
content and this can cause confusion if the viewer is looking for more
information about a specific posting. Put the cell phone down and use a real
computer.
About
Pinterest postings. Pinterest is best viewed on a real computer screen.
Cell phone users will get a more stripped down or abreviated version of Pinterest
content and this can cause confusion if the viewer is looking for more
information about a specific posting. Put the cell phone down and use a real
computer.
I like Pinterest. They have some great photos of work created by some great artists. Pinterest credits the original photo sources by posting links back to the website where the photo was taken. This keeps the owners of the original photos happy. But at the same time, this can cause confusion or expectation that the owner of the photos is the same person posting them at Pinterest along with whatever offer appears at the Pinterest photo website. Again, I don't make sales offeres there. If anyone wants to see what tools or equipment I might have for sale, then see my Blacksmith Tools For Sales Page. the page is linked at the bottom of this article.